November 30, 2016

Hunni Bear

HONEY BEAR TUTORIAL

**Click to see original size**

Tutorial written by Marcia Salgado on November 30th, 2016
for those who have a working knowledge of PSP.
I'm using PSP9 to create my tuts.
Any resemblance to any other tutorial is coincidental.
Do not copy and paste this tutorial anywhere on the net.
If you want to translate please ask first. 

****************************************
Material:

PTU Kit "Hunni Bear" by Hungry Hill,
you can purchase it here 
Plugin: MuRa's Meister > Cloud
Font: Cherry Swash 

****************************************

--> Remember to save often and use my tag as reference if necessary. Use a drop shadow of your preference on layers.

1. Create a new image 851x315.

2. Add new layer and fill with #c0c0c0.

3. Add a new layer and use MuRa's Meister > Cloud with #3790c8 as foreground color and white as background colors with following settings:


4. Open bush. Resize 30%. Copy and paste as new layer.Move it down and midway to left. Duplicate and wove it to right.

5. Open flower-bush. Resize 30%. Copy and paste as new layer. Move it down and place on left side of the previous plant. Duplicate and do the same on right side.

6. Open curvy-branch. Resize 70%. Copy and paste as new layer.

7. Select inside the frames. Add a new layer. Expand > 5. Move this layer below frame layer. Open paper 2. Copy and paste into selection. Deselect.

8. Open flower-4. Resize 30%. Copy and paste as new layer. Move it way down.

9. Open bear-1. Resize 50%. Copy and paste as new layer. Place it inside the middle frame. Erase all unwanted parts. 

10. Open bear-2. Resize 45%. Copy and paste as new layer. Place it inside the right frame. Erase all unwanted parts. Duplicate. Mirror. Resize 85%. Place it inside the left frame.

11. Select all. Clip to canvas. Crop to selection.

12. Click on frame layer. Open vine-circle. Resize 50%. Copy and paste as new layer. Move it way to left. Show only half circle. Duplicate. Mirror.

13. Select left frame. Open paper 1. Select pattern on foreground. Size 50%. Fill only left side frame. Deselect. Duplicate. Mirror.

14. Open flower-1. Resize 30%. Copy and paste as new layer. Place inside the left big frame. Duplicate. Mirror.

14. Click on first layer. Open bumblybee-1. Resize 30%. Copy and paste as new layer. Move it a little to left.

15. Open bumblybee-2. Resize 30%. Copy and paste as new layer. Move it to right.

16. Open WordArt. Resize 85%. Copy and paste as new layer. Add border using color #3d2a22. Move it down and to right.

17. Open flutterby. Resize 15%. Free Rotate: Left-25. Copy and paste as new layer. Move it up and to right. Duplicate. Mirror. Place over the triple frame on left. Duplicate. Resize 85%. Free Rotate: Right-25. Move it up and to left.

18. Add new layer. Fill with black. Contract > 2. Delete. Deselect.


-> Add your copyright info (no URL by Facebook TOU) and license#. 
Add your name or initials. Save as PNG.

--> Sometimes I had to change my Timeline size to 846x313 because when I add it to Facebook the image has extra pixels and do not fit perfectly. So try this size if the same is happening to you.


****************************************

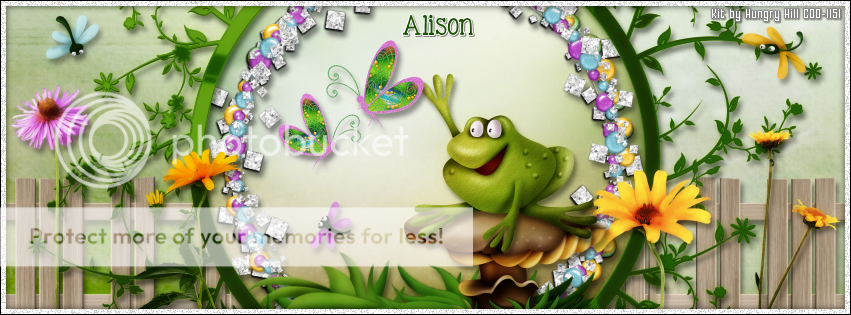
A Picture Profile example made by me:


November 27, 2016

Pirate Elli ~ by Joanne Salgado


Tutorial written by Joanne Salgado on November 27th, 2016
for those who have a working knowledge of PSP.
I'm using PSP9 to create my tuts.
Any resemblance to any other tutorial is coincidental.
Do not copy and paste this tutorial anywhere on the net.
If you want to translate please ask first. 

****************************************
Material:

Tube: "Pirate Elli" by LadyMishka - you can purchase it here
do not use without the proper #license.
PTU Kit "Pirate Elli" by Lizquis Scraps - you can purchase it here
Font: Thinking of Betty
****************************************

Don't forget to save often.
At any point if you have doubts check my tag.

1. Open a new image 650x550

2. Open element 'LS_PirateElli_frame1' copy and paste as new layer. Resize 70%.

3. Open element 'LS_PirateElli_flower1' copy and paste as new layer. Resize 50%. Move this layer below the frame layer. Arrange it to the top left. Duplicate. Arrange it to middle left. Duplicate both and mirror/flip both.

4. Open element 'LS_PirateElli_flower2' copy and paste as new layer. Resize 50%. Arrange it to the top left. Duplicate. Arrange it to the bottom left. Duplicate. Arrange it to the top right. Duplicate. Arrange it to the bottom right. (always between the black flowers).

5. Open paper 'LS_PirateElli_paper6' copy and paste as new layer. Resize 55%. Arrange it inside the frame and clean the outside parts.

6. Open element 'LS_PirateElli_sand' copy and paste as new layer. Arrange it to bottom. Clean parts outside the frame.

7. Open element 'LS_PirateElli_crystals' copy and paste as new layer. Resize 30%. Arrange it to bottom.

8. Open element 'LS_PirateElli_water' copy and paste as new layer. arrange it a little to top. Clean parts outside the frame.

9. Open element 'LS_PirateElli_watersplash' copy and paste as new layer. Resize 50%. Mirror. Arrange it to the left.

10. Open element 'LS_PirateElli_palm tree' copy and paste as new layer. Resize 50%. Mirror. Arrange it a little to the right.

11. Open element 'LS_PirateElli_chest' copy and paste as new layer. Resize 30%. Arrange it to the bottom right.

12. Open element 'LS_PirateElli_skull chest' copy and paste as new layer. Resize 30%. Arrange it to the bottom right.

13. Open element 'LS_PirateElli_flag' copy and paste as new layer. Resize 30%. Arrange it to the left.

14. Open element 'LS_PirateElli_cannon' copy and paste as new layer. Resize 40%. Mirror. Arrange it to the bottom left.

15. Open element 'LS_PirateElli_bomb' copy and paste as new layer. Resize 30%. Arrange it to the bottom left.

16. Open element 'LS_PirateElli_crab' copy and paste as new layer. Resize 30%. Arrange it to bottom.

17. Open element 'LS_PirateElli_hat' copy and paste as new layer. Resize 30%. Move this layer above the frame layer. Arrange it to the top right.

18. Open element 'LS_PirateElli_rope' copy and paste as new layer. Resize 70%. Arrange it to bottom.

19. Open element 'LS_PirateElli_parrot1' copy and paste as new layer. Resize 30%. Arrange it to the bottom right.

20. Open your tube. Copy and paste as new layer. Resize as needed and arrange it a little to the left.

21. Open element 'LS_PirateElli_sparkles2' copy and paste as new layer.

22. Open element 'LS_PirateElli_light1' copy and paste as new layer. Resize 80%.

23. Add shadow as you prefer.

24. Add copyright. Add name. Save as PNG.

Princess ~ by Joanne Salgado


Tutorial written by Joanne Salgado on November 27th, 2016
for those who have a working knowledge of PSP.
I'm using PSP9 to create my tuts.
Any resemblance to any other tutorial is coincidental.
Do not copy and paste this tutorial anywhere on the net.
If you want to translate please ask first. 

****************************************
Material:

Tube: "Autumn Princess" by Toriya - you can purchase it here
do not use without the proper #license.
PTU Kit "Timeless" by Tagcatz Design - you can purchase it here
Font: Esplanade Script

****************************************

Don't forget to save often.
At any point if you have doubts check my tag.

1. Open a new image 650x650

2. Open element 'time_tc_el56' copy and paste as new layer.

3. Open element 'time_tc_el54' copy and paste as new layer. Move this layer below the frame layer. Arrange it to top. Duplicate. Mirror/Flip.

4. Open element 'time_tc_el29' copy and paste as new layer. Arrange it to the top left. Duplicate. Mirror/Flip.

5. Open element 'time_tc_el40' copy and paste as new layer. Resize 50%. MuRa'S copies encircle with settings below.

6. Open paper 'time_tc_paper7' copy and paste as new layer. Resize 65%. Arrange it inside the frame and clean the outside parts.

7. Open element 'time_tc_el21' copy and paste as new layer. Mirror/Flip. Arrange it to the top right of the frame.

8. Open element 'time_tc_el79' copy and paste as new layer.

9. Open your tube. Copy and paste as new layer. Resize as needed and arrange it inside the frame to the left.

10. Open element 'time_tc_el38' copy and paste as new layer. Resize 30%. Rotate right 25. Arrange it to the bottom left.

11. Open element 'time_tc_el85' copy and paste as new layer. Resize 30%. Mirror. Arrange it to bottom.

12. Open element 'time_tc_el77' copy and paste as new layer. Resize 40%. Arrange it behind the tube to the bottom right.

13. Open element 'time_tc_el76' copy and paste as new layer. Resize 40%. Arrange it behind the butterfly to the left.

14. Open element 'time_tc_el57' copy and paste as new layer. Resize 15%. Arrange it above the cat's head.

15. Open element 'time_tc_el46' copy and paste as new layer. Resize 30%. Arrange it to the top right.

16. Add shadow as you prefer.

17. Add copyright. Add name. Save as PNG.

November 26, 2016

SHOW OFF - Pilgrim Girl


== NEW PTU TAG TINY TURTLE DESIGNS CT ==
AND THE ART OF ALEHANDRA VANHEK

Featuring "Pilgrim girl", tube by Alehandra Vanhek and
"Falling Leaves", Tiny Turtle Design kit at TinyTurtleDesign Store.

Alehandra Vanhek's tube can be found  at
-> TinyTurtleDesign Store, here

Tiny Turtle Design kit can be found  at
-> TinyTurtleDesign Store, here


SHOW OFF - Cats


== NEW PTU TAG TINY TURTLE DESIGNS CT ==
AND THE ART OF ALFADESIRE

Featuring "Cats", tube by Alfadesire and
"Christmas Carol", Tiny Turtle Design kit at TinyTurtleDesign Store.

Alfadesire's tube can be found  at
-> TinyTurtleDesign Store, here

Tiny Turtle Design kit can be found  at
-> TinyTurtleDesign Store, here


SHOW OFF - 3RD ANNIVERSARY COLLAB 2


== NEW PTU S&CO. CT ==
FOR LADYMISHKA AND KIZZED BY KELZ

Featuring "3rd Anniversary JOAN & BIBI DOLLS" tube by LadyMishka and
"Romantic Sweet" Kit by Kizzed by Kelz at Scraps N Company - S&Co.

Tube by LadyMishka - you can purchase here

3RD ANNIVERSARY COLLAB 2 - you can purchase here


Xmas Girly


== NEW PTU TAG S&CO. CT ==
LYSISANGE AND LIL MZ'S BRAINSTORMS

Featuring "Xmas Girly", a Lysisange tube and
 "Xmas Girly", Lil Mz's Brainstorm kit at Scraps N Company - S&Co.


Exclusively at Scraps N Company, Lil Mz's Brainstorm introduces Xmas Girly
This personal use scrapkit contains 103 elements and 15 coordinating papers. 
This kit is a match to the LysIsange tube, Xmas Girly but can be used for any of your designs. 
Very versatile and can be used with any other tubes and artists you have.

Tube can be found  at:
-> Scraps N Company - S&Co., here 

Kit can be found  at:
-> Scraps N Company - S&Co., here 


SHOW OFF - One UP


== NEW PTU S&CO. CT ==
FOR ISMAEL RAC AND RIENEKE DESIGNS

Featuring "One Up" tube by Ismael Rac and
"Dreamland" Kit by Rieneke Designs at Scraps N Company - S&Co.

Tube by Ismael Rac - you can purchase here

Kit by Rieneke Designs - you can purchase here


SHOW OFF - Minion Girl


== NEW PTU S&CO. CT ==
FOR ISMAEL RAC AND KIZZED BY KELZ

Featuring "Minion Girl" tube by Ismael Rac and
"Minion Girl" Kit by Kizzed By Kelz at Scraps N Company - S&Co.

Tube by Ismael Rac - you can purchase here

Kit by Kizzed By Kelz - you can purchase here


Santas Babe ~ by Joanne Salgado


Tutorial written by Joanne Salgado on November 27th, 2016
for those who have a working knowledge of PSP.
I'm using PSP9 to create my tuts.
Any resemblance to any other tutorial is coincidental.
Do not copy and paste this tutorial anywhere on the net.
If you want to translate please ask first. 

****************************************
Material:

Tube: "Santas Babe 7" by Oky Draft - you can purchase it here
do not use without the proper #license.
PTU Kit "Pink Xmas" by Bibi's Collection - you can purchase it here
Font: Bachelor Script

****************************************

Don't forget to save often.
At any point if you have doubts check my tag.

1. Open a new image 650x650

2. Open element 'BIBI-PINKY XMAS ELEM (31)' copy and paste as new layer. Resize 70%. Arrange it to the right.

3. Open element 'BIBI-PINKY XMAS ELEM (77)' copy and paste as new layer. Resize 50%.

4. Open element 'BIBI-PINKY XMAS ELEM (86)' copy and paste as new layer. Resize 70%. Arrange it to bottom left.

5. Open element 'BIBI-PINKY XMAS ELEM (17)' copy and paste as new layer. Resize 70%. Arrange it to bottom.

6. Open element 'BIBI-PINKY XMAS ELEM (46)' copy and paste as new layer. Resize 30%. Arrange it to the bottom left.

7. Open element 'BIBI-PINKY XMAS ELEM (20)' copy and paste as new layer. Resize 40%. Arrange it to the right.

8. Open element 'BIBI-PINKY XMAS ELEM (49)' copy and paste as new layer. Resize 40%. Arrange it above the one we just added.

9. Open element 'BIBI-PINKY XMAS ELEM (98)' copy and paste as new layer. Resize 70%. Arrange it to the bottom right.

10. Open element 'BIBI-PINKY XMAS ELEM (99)' copy and paste as new layer. Arrange it to the right. Duplicate. Mirror/Flip.

11. Open your tube. Copy and paste as new layer. Resize as needed and arrange it a little to the left.

12. Open element 'BIBI-PINKY XMAS ELEM (37)' copy and paste as new layer. Resize 20%. Arrange it above the piano.

13. Open element 'BIBI-PINKY XMAS ELEM (97)' copy and paste as new layer. Resize 20%. Arrange it in front of the tube.

14. Open element 'BIBI-PINKY XMAS ELEM (94)' copy and paste as new layer. Resize 30%. Arrange it to the bottom right.

15. Add shadow as you prefer.

16. Add copyright. Add name. Save as PNG.

Wonder Woman


== NEW PTU TUTORIAL S&CO. CT ==
ISMAEL RAC AND TAGCATZ DESIGN

Featuring "Cosplay Wonder Woman", an Ismael Rac tube and
 "Wonder Woman", Tagcatz Design kit at Scraps N Company - S&Co.


My heroine! Wonder Woman - nostalgic, fun, great role model and perfect for tags. 
Wonder Woman is a match for Ismael Rac's great Wonder Woman tube
It has 80 elements and 6 papers. PU only. 
Not all shown. Drop shadows on preview only. 
Very versatile and can be used with any other tubes and artists you have.

Tube can be found  at:
-> Scraps N Company - S&Co., here 

Kit can be found  at:
-> Scraps N Company - S&Co., here 


Winter Glamour


== NEW PTU TAG S&CO. CT ==
LYSISANGE AND LIL MZ'S BRAINSTORM

Featuring "Winter Glamour", a Lysisange tube and
 "Winter Glamour", Lil Mz's Brainstorm kit at Scraps N Company - S&Co.

Exclusively at Scraps N Company, Lil Mz's Brainstorm introduces Winter Glamour
This personal use scrapkit contains 115 elements and 15 coordinating papers. 
This kit is a match to the LysIsange tube, Winter Glamour but can be used for any of your designs. Very versatile and can be used with any other tubes and artists you have.

Tube can be found  at:
-> Scraps N Company - S&Co., here 

Kit can be found  at:
-> Scraps N Company - S&Co., here 


November 23, 2016

Sexy Call tube with Always Yours kit

SAY YOU LOVE ME TUTORIAL


Tutorial written by Marcia Salgado on November 20th, 2016
for those who have a working knowledge of PSP.
I'm using PSP9 to create my tuts.
Any resemblance to any other tutorial is coincidental.
Do not copy and paste this tutorial anywhere on the net.
If you want to translate please ask first. 

****************************************
Material:

Tube: "Sexy Call" by Ismael Rac, you can purchase it here 
do not use without the proper #license.
PTU Kit "Always Yours" by Rieneke Designs, you can purchase it here 
Font: Aventure Scriptine

****************************************

--> Remember to save often and use my tag as reference if necessary. Use a Drop Shadow of your preference on layers. 


1. Open 'element' 70. Resize 65%. Copy and paste as new layer. Move it up and to left. Duplicate. Mirror. Flip. 

2. Open 'element' 2. Resize 85%. Copy and paste as new layer. 

3. Open 'element' 55. Copy and paste as new layer. 

4. Open 'element' 77. Copy and paste as new layer. Move it a little down. Duplicate. Mirror and move it a little up. Duplicate. Mirror. Move it a little up. 

5. Open 'element' 60. Resize 40%. Copy and paste as new layer. Move it to left. Duplicate. Mirror. Flip. Move it a little up. 

6. Open 'element' 8. Resize 55%. Copy and paste as new layer. Move it down and to left.

7. Open 'element' 49. Resize 55%. Copy and paste as new layer. Move it up and to right.

8. Open 'element' 33. Resize 40%. Mirror. Free Rotate: Left-25. Copy and paste as new layer. Move it down and to left. Duplicate. Move it up and to right.

9. Open 'element' 27. Resize 65%. Copy and paste as new layer. 

10. Select inside the frame; Expand > 5. Add a new layer and move it below the frame layer. Open 'paper' 7. Copy and paste into selection. Deselect.

11. Click on frame layer. Open 'element' 75. Resize 55%. Copy and paste as new layer. Move it down and to right.

12. Open your tube. Resize. Copy and paste as new layer. Move it to right and erase unwanted parts. You may want to rearrange some elements to better fit with your tube.

13. Open 'element' 41. Resize 50%. Copy and paste as new layer. Move it down and to right.

14. Open 'element' 46. Resize 40%. Copy and paste as new layer. Place over the last leaves.

15. Open 'element' 35. Resize 35%. Copy and paste as new layer. Move it down.

16. Apply your chosen shadow on layers. Use Crop > Merged Opaque and get rid of all extra spaces.


--> Add your copyright info and license#. Add your name and save as PNG.


November 22, 2016

Retro Wonder tube with Super Girl kit


== NEW PTU SHOWOFF S&CO. CT ==
ISMAEL RAC AND BIBI'S COLLECTION

Featuring "Retro Wonder", an Ismael Rac tube and
 "Super Girl", Bibi's Collection kit at Scraps N Company - S&Co.


The kit has 20 papers and 160 elements so you can play with it. 
Very versatile and can be used with any other tubes and artists you have.

Tube can be found  at:
-> Scraps N Company - S&Co., here 

Kit can be found  at:
-> Scraps N Company - S&Co., here 


November 21, 2016

Turkey Time


== NEW PTU SHOWOFF S&CO. CT ==
= STORE COLLAB TURKEY TIME =
USING LYSISANGE AND STARRY NIGHT DESIGNS

Featuring Store Collab - using "Turkey Time", a Lysisange tube and
 "Turkey Time", Starry Night Designs kit at Scraps N Company - S&Co.


Gorgeous Collab with Fall-Turkey theme
Beautiful tubes, poser, cu and kits for your thanksgiving, projects and tags. 
We hope you like it. The kit used has 6 papers and 82 elements so you can play with it. 
Very versatile and can be used with any other tubes and artists you have.

Tube can be found  at:
-> Scraps N Company - S&Co., here 

Collab Kit - Add this product to your cart and get it as a free gift:
-> Scraps N Company - S&Co., here


November 20, 2016

SHOW OFF - Store Collab Winter Love


== NEW PTU S&CO. CT ==
FOR KELLY LYNN AND TAGCATZ DESIGNS

Featuring "Winter" tube by Kelly Lynn and
"Winter Love" Kit by Tagcatz Designs at Scraps N Company - S&Co.

WINTER LOVE STORE COLLAB - you can purchase here


SHOW OFF - Store Collab Turkey Time


== NEW PTU S&CO. CT ==
FOR DANNY LEE AND DESIGN BY JOAN

Featuring "Vintage Fall" tube by Danny Lee and
"Turkey Time" Kit by Design by Joan at Scraps N Company - S&Co.

Tube by Danny Lee - you can purchase here

Kit by Design by Joan - you can purchase here


SHOW OFF - My Sweet Mermaid


== NEW PTU S&CO. CT ==
FOR TORIYA AND BIBI'S COLLECTION

Featuring "My Sweet Mermaid" tube by Toriya and
"My Sweet Mermaid" Kit by Bibi's Collection at Scraps N Company - S&Co.

Tube by Toriya - you can purchase here

Kit by Bibi's Collection - you can purchase here


SHOW OFF - Xmas Deer 2


== NEW PTU S&CO. CT ==
FOR OKY DRAFT AND BIBI'S COLLECTION

Featuring "Xmas Deer 2" tube by Oky Draft and
"My Reindeer" Kit by Bibi's Collection at Scraps N Company - S&Co.

Tube by Oky Draft - you can purchase here

Kit by Bibi's Collection - you can purchase here


SHOW OFF - Full Hot


== NEW PTU S&CO. CT ==
FOR DANNY LEE AND BLISSFUL DESIGNS

Featuring "Full Hot" tube by Danny Lee and
"Full Hot" Kit by Blissful Designs at Scraps N Company - S&Co.

Tube by Danny Lee - you can purchase here

Kit by Blissful Designs - you can purchase here


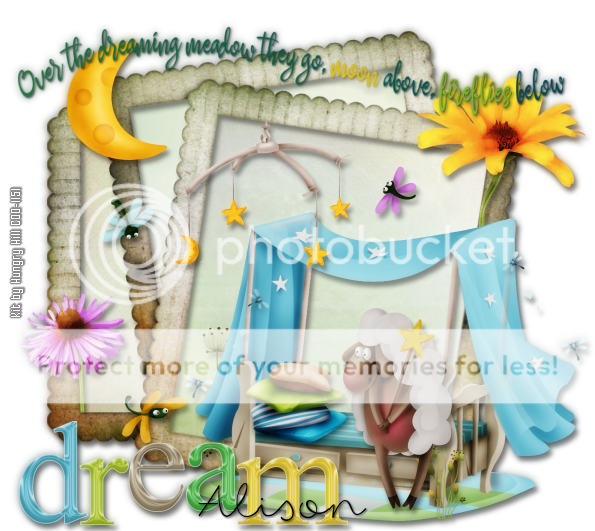
The Dreaming Meadow


**Click to see original size**

== NEW CT HUNGRY HILL PTU SHOWOFF ==

Featuring "The Dreaming Meadow" Kit by HUNGRY HILL at Creative Design Outlet - CDO


It has 6 papers, 32 elements, 3 frames and 2 wordart so you can play with it.

Kit can be found exclusively at:

-> Creative Design Outlet - CDO, here

Don't forget to visit her blog:


SHOW OFF - Amok Amok Amok


== NEW CT CREATIVE SCRAPS BY CRYS PTU ==

Featuring "Amok Amok Amok" Kit by Creative Scraps by Crys.


Run children, beware...don't let the virgin blow out the black flame candle.  Don't listen to beautiful singing on Halloween night.  Stay away from the Witches who will give fright.  Amok Amok Amok has 54 Elements and 10 Papers.

Kit can be found at:
-> Mystical Scraps here

Don't forget to visit her blog


Wishes ~ by Joanne Salgado


Tutorial written by Joanne Salgado on November 20th, 2016
for those who have a working knowledge of PSP.
I'm using PSP9 to create my tuts.
Any resemblance to any other tutorial is coincidental.
Do not copy and paste this tutorial anywhere on the net.
If you want to translate please ask first. 

****************************************
Material:

Tube: "My Sweet Mermaid" by Toriya - you can purchase it here
do not use without the proper #license.
PTU Kit "If Wishes Were Fishes" by Hungry Hill - you can purchase it here
Font: 2Peas Mister Giggles

****************************************

Don't forget to save often.
At any point if you have doubts check my tag.

1. Open a new image 650x550

2. Open element 'frame-1' copy and paste as new layer. Resize 60%.

3. Open element 'flower-2' copy and paste as new layer. Resize 50%. Move this layer below the frame layer. Arrange it to the left. Duplicate. Mirror. Arrange it to the right.

4. Open paper 'paper-4' copy and paste as new layer. Resize 40%. Clean the outside parts.

5. Open element 'greenery-4' copy and paste as new layer. Resize 30%. Arrange it to the right inside the frame.

6. Open element 'pebbles' copy and paste as new layer. Resize 15%. Arrange it to the bottom right inside the frame. Duplicate. Mirror.

7. Open element 'sandcastle' copy and paste as new layer. Resize 30%. Arrange it to the right inside the frame.

8. Open element 'fishie-3' copy and paste as new layer. Resize 10%. Arrange it near the castle.

9. Open element 'fishie-1' copy and paste as new layer. Resize 10%. Arrange it to the top.

10. open element 'fishie-2' copy and paste as new layer. Resize 10%. Arrange it to the bottom right.

11. Open element 'shell-6' copy and paste as new layer. Resize 7%. Arrange it to bottom.

12. Open element 'light-effect' copy and paste as new layer. Resize 10%. Move this layer above the frame layer. Arrange it around the frame duplicating. Ive used 3 from this size. Then resize 70%. Arrange it around again. I used 2 from this size. Then resize again 70%. This last one I used 2 from this size.

13. Open element 'sparkles-2' copy and paste as new layer. Resize 50%.

14. Open element 'waterdrops' copy and paste as new layer. Resize 50%. Arrange around the frame.

15. Open element 'starfish-1' copy and paste as new layer. Resize 15%. Arrange it to the top right.

16. Open element 'starfish-2' copy and paste as new layer. Resize 15%. Arrange it to the top right.

17. Open your tube. Copy and paste as new layer. Resize as needed and arrange it to the left.

18. Add shadow as you prefer.

19. Add copyright. Add name. Save as PNG.