Showing posts with label Kelly Lynn. Show all posts

May 28, 2017

Drina ~ by Joanne Salgado


Tutorial written by Joanne Salgado on May 28th, 2017
for those who have a working knowledge of PSP.
I'm using PSP9 to create my tuts.
Any resemblance to any other tutorial is coincidental.
Do not copy and paste this tutorial anywhere on the net.
If you want to translate please ask first. 

****************************************
Material:

Tube: "Drina" by Kelly Lynn
do not use without the proper #license.
PTU Kit "Dark Side" by Jenn's Designs
DARK SIDE COLLAB 1 & 2 you can purchase it here and here
Font: Wallows

****************************************

--> Remember to save often and use my tag as reference if necessary.

1. Open a new image 650x550

2. Select Preset Shape Tool, create your frame. I used rounded rectangle with anti-alias, vector and width 4 black. Align center.

3. Open element '11' copy and paste as new layer. Resize 70%. Arrange it to the top left. Duplicate. Arrange it to the top right. Duplicate. Flip/Mirror. Arrange it to the bottom left.

4. Open element '9' copy and paste as new layer. Arrange it to bottom right.

5. Open element '14' copy and paste as new layer. Resize 20%. Arrange it to the top right.

6. Open element '3' copy and paste as new layer. Resize 40%. Arrange it to top.

7. Open element '4' copy and paste as new layer. Resize 50%. Arrange it to the top left.

8. Open element '10' copy and paste as new layer. Resize 50%. Arrange it to bottom a little to left.

9. Open element '1' copy and paste as new layer. Resize 70%. Arrange it to the bottom right.

10. Open element '13' copy and paste as new layer. Resize 50%. Arrange it to the top right.

11. Open element '15' copy and paste as new layer. Resize 70%. Arrange it to the bottom left.

12. Open element '12' copy and paste as new layer. Resize 30%. Arrange it to the top right.

13. Open element '2' copy and paste as new layer. Arrange it to the bottom left.

14. Open element '5' copy and paste as new layer. Resize 55%. Arrange it inside the frame and clean outside.

15. Open element '16' copy and paste as new layer. Resize 50%. Move this layer above the frame layer. Arrange it to the right.

16. Open element '7' copy and paste as new layer. Resize 50%. Arrange it to the right.

17. Open element '8' copy and paste as new layer. Resize 60%. Arrange it to the left.

18. Open your tube. Copy and paste as new layer. Resize as needed and arrange it to the right.

19. Open element '6' copy and paste as new layer. Resize 30%. Arrange it to the bottom left.

20. Add shadow as you prefer.

21. Add copyright. Add name. Save as PNG.

March 17, 2017

Lucky ~ by Joanne Salgado


Tutorial written by Joanne Salgado on March 15th, 2017
for those who have a working knowledge of PSP.
I'm using PSP9 to create my tuts.
Any resemblance to any other tutorial is coincidental.
Do not copy and paste this tutorial anywhere on the net.
If you want to translate please ask first. 

****************************************
Material:

Tube: "Trish" by Kelly Lynn
PTU Kit "Lucky Irish" by FwTags Creations
LUCKY THE IRISH COLLAB, you can purchase it here
do not use without the proper #license.
Font: Afatar

****************************************

--> Remember to save often and use my tag as reference if necessary.

1. Open a new image 650x550

2. Open frame 'FwTagsLuckyIrishFRAME (1)' copy and paste as new layer. Resize 85%.

3. Open element 'FwTagsLuckyIrishELEMENT (38)' copy and paste as new layer. Resize 50%. Move this layer below the frame layer. Arrange it to the top left.

4. Open element 'FwTagsLuckyIrishELEMENT (25)' copy and paste as new layer. Resize 50%. Arrange it to the left.

5. Open element 'FwTagsLuckyIrishELEMENT (6)' copy and paste as new layer. Resize 50%. Arrange it to top.

6. Open element 'FwTagsLuckyIrishELEMENT (30)' copy and paste as new layer. Resize 80%. Arrange it to bottom.

7. Open paper 'FwTagsLuckyIrishPAPER (6)' copy and paste as new layer. Resize 50%. Clean the parts outside the frame.

8. Open element 'FwTagsLuckyIrishELEMENT (23)' copy and paste as new layer. Mirror. Move this layer above the frame layer.

9. Open element 'FwTagsLuckyIrishELEMENT (24)' copy and paste as new layer. Resize 25%. Arrange it to the bottom left.

10. Open element 'FwTagsLuckyIrishELEMENT (17)' copy and paste as new layer. Resize 25%. Arrange it to the bottom left.

11. Open element 'FwTagsLuckyIrishELEMENT (14)' copy and paste as new layer. Resize 25%. Arrange it to the bottom right.

12. Open element 'FwTagsLuckyIrishELEMENT (9)' copy and paste as new layer. Resize 15%. Arrange it to the bottom  right.

13. Open element 'FwTagsLuckyIrishELEMENT (10)' copy and paste as new layer. Resize 15%. Mirror. Arrange it to the bottom left.

14. Open element 'FwTagsLuckyIrishELEMENT (45)' copy and paste as new layer. Resize 15%. Arrange it to the bottom right.

15. Open element 'FwTagsLuckyIrishELEMENT (2)' copy and paste as new layer. Resize 20%. Rotate 12. Arrange it to the left. Duplicate. Resize 70%. Mirror. Arrange it a little to the bottom to the right of the first one.

16. Open element 'FwTagsLuckyIrishELEMENT (28)' copy and paste as new layer. Resize 70%. Arrange it to the top.

17. Open your tube. Copy and paste as new layer. Resize as needed and arrange it to the right.

18. Add shadow as you prefer.

19. Add copyright. Add name. Save as PNG.

November 20, 2016

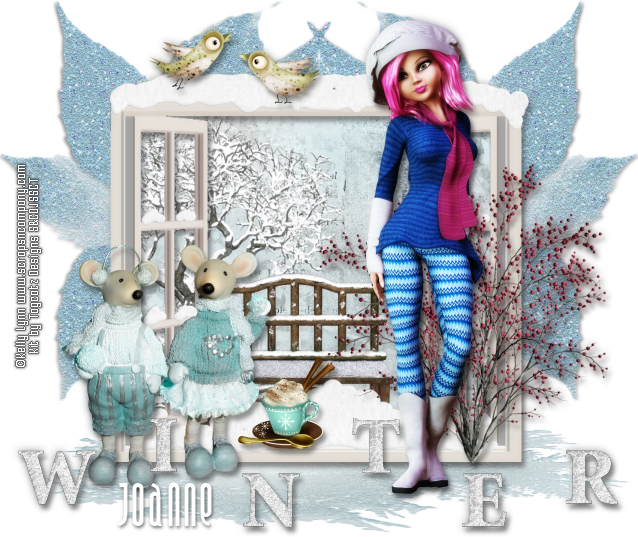
SHOW OFF - Store Collab Winter Love


== NEW PTU S&CO. CT ==
FOR KELLY LYNN AND TAGCATZ DESIGNS

Featuring "Winter" tube by Kelly Lynn and
"Winter Love" Kit by Tagcatz Designs at Scraps N Company - S&Co.

WINTER LOVE STORE COLLAB - you can purchase here


March 13, 2016

Sadie ~ by Joanne Salgado


Tutorial written by Joanne Salgado on March 13th, 2016
for those who have a working knowledge of PSP.
Any resemblance to any other tutorial is coincidental.
Do not copy and paste this tutorial anywhere on the net.
If you want to translate please ask first. 

Tube: Sadie by Kelly Lynn
Kit Day at the Beach by A Lil Mz Brainstorm
Pretty Colors Collab - you can purchase here
Font: A.D.MONO

Don't forget to save often.
At any point if you have doubts check my tag.

1. Open a new image 650x550

2. Open element 'LMB_SNCFREECOLLAB_Element (3)' copy and paste as new layer.

3. Open element 'LMB_SNCFREECOLLAB_Element' copy and paste as new layer. Resize 80%. Mirror. Move this layer below the frame layer. Arrange it to the top left.

4. Open element 'LMB_SNCFREECOLLAB_Element (33)' copy and paste as new layer. Resize 50%. Mirror. Arrange it to the top left.

5. Open paper 'LMB_SNC_FreeCollab_Paper' copy and paste as new layer. Resize 50%. Arrange inside the frame and clean the parts outside.

6. Open element 'LMB_SNCFREECOLLAB_Element (22)' copy and paste as new layer. Arrange inside the frame and clen the outside parts.

7. Open element 'LMB_SNCFREECOLLAB_Element (24)' copy and paste as new layer. Arrange it to the bottom of the frame and clean the outside parts.

8. Open element 'LMB_SNCFREECOLLAB_Element (10)' copy and paste as new layer. Resize 40%. Arrange it to the bottom right inside the frame and clean the outside parts.

9. Open element 'LMB_SNCFREECOLLAB_Element (25)' copy and paste as new layer. Resize 40%. Arrange it to the bottom right inside the frame and clean the outside parts.

10. Open element 'LMB_SNCFREECOLLAB_Element (19)' copy and paste as new layer. Resize 30%. Arrange it to the bottom left inside the frame and clean the outside parts.

11. Open element 'LMB_SNCFREECOLLAB_Element (14)' copy and paste as new layer. Arrange it to the left and clean the outside parts.

12. Open element 'LMB_SNCFREECOLLAB_Element (26)' copy and paste as new layer. Arrange it to the left inside the frame and clean the outside parts.

13. Open element 'LMB_SNCFREECOLLAB_Element (37)' copy and paste as new layer. Resize 30%. Move this layer above the frame layer. Arrange it to the bottom right.

14. Open element 'LMB_SNCFREECOLLAB_Element (36)' copy and paste as new layer. Resize 30%. Mirror. Arrange it to the bottom right.

15. Open element 'LMB_SNCFREECOLLAB_Element (20)' copy and paste as new layer. Resize 50%. Rotate right 15. Arrange it to the top right of the frame.

16. Open element 'LMB_SNCFREECOLLAB_Element (30)' copy and paste as new layer. Resize 25%. Arrange it to the bottom right.

17. Open element 'LMB_SNCFREECOLLAB_Element (29)' copy and paste as new layer. Resize 25%. Arrange it to the bottom left of the frame.

18. Open your tube. Copy and paste as new layer. Resize as needed and arrange it a little to the left.

19. Add shadow as you prefer.

20. Add copyright. Add name. Save as PNG.

April 28, 2015

Lolli ~ by Joanne Salgado


Tutorial written by Joanne Salgado on April 28th, 2015
for those who have a working knowledge of PSP.
Any resemblance to any other tutorial is coincidental.
Do not copy and paste this tutorial anywhere on the net.
If you want to translate please ask first. 

Tube + Kit: Girly Glam Collab - you can purchase here 
Font: BPscript

Don't forget to save often.
At any point if you have doubts check my tag.

1. Open a new image 500x500

2. Open element 'gg12' copy and paste as new layer. Resize 70%.

3. Open element 'gg19' copy and paste as new layer. Resize 50%. Move this layer below the frame layer. Make sure the white part of the flower is always outside. Duplicate and Mirror when necessary. Arrange it around the frame (you should end with 6 flowers).

4. Open element 'gg28' copy and paste as new layer. Resize 50%. Duplicate and arrange it around the frame between the flowers we just added. (you should end with 6 flowers).

5. Open paper 'ggp4' copy and paste as new layer. Clean all the parts of the paper that appears outside the frame.

6. Open your close up tube. Copy and paste as new layer. Arrange it inside the frame. Change blend mode to soft light. Clean all the parts from the tube that appears outside the frame.

7. Open element 'gg35' copy and paste as new layer. Arrange it to the upper part of the frame, clean the parts that appears above the face of your tube, but leave the rest.

8. Open element 'gg9' copy and paste as new layer. Resize 55%. Move this layer above the frame layer. Arrange it to the bottom of the frame.

9. Open your tube. Copy and paste as new layer. Resize as you prefer and arrange it to the right.

10. Open element 'gg40' copy and paste as new layer. Resize 50%. Arrange it to the bottom of the frame.

11. Open element 'gg35' again, copy and paste as new layer. Arrange it to the bottom.

12. Open element 'gg46' copy and paste as new layer. Resize 40%. Arrange it to the bottom left. Duplicate. Mirror. Resize 70%. Arrange it to the right.

13. Add shadow. I used: 1-1-65-2 #808080.

14. Add copyright.

15. Add name. I used: BPscript / size: 48

Save as PNG

March 29, 2015

Springtime ~ by Joanne Salgado


Tutorial written by Joanne Salgado on February 18th, 2015
for those who have a working knowledge of PSP.
Any resemblance to any other tutorial is coincidental.
Do not copy and paste this tutorial anywhere on the net.
If you want to translate please ask first. 

Tube + Kit Spring Fairytale Collab - you can purchase here 

or you can purchase the tube alone
Tube: Rosie Doll by Kelly Lynn - you can purchase here 
Font: Canter Bold

Don't forget to save often.
At any point if you have doubts check my tag.

1. Create a new image of 600x600. Open SPRINGFAIRYTALE_DBJ89. Copy and paste as new image. Select inside the frame. Expand > 4. Add a new layer. Open SF_DBJ-paper04. Copy and paste into selection. Move this layer below the frame. Deselect.

2. Open SPRINGFAIRYTALE_DBJ40. Resize 32%. Mirror. Copy and paste as new layer. Move it to right side, inside the frame. Open SPRINGFAIRYTALE_DBJ41. Resize 21%. Copy and paste as new layer. Move it to left side, inside the frame.

3. Open SPRINGFAIRYTALE_DBJ36. Resize 64%. Copy and paste as new layer. Move it upper far left. Arrange > Send to bottom. 

4. Click on first layer. Open SPRINGFAIRYTALE_DBJ71. Resize 51%. Copy and paste as new layer. Move it to right bottom, in front of frame. Duplicate mirror. Move it, if necessary to keep ot inside the tag space.

5. Open SPRINGFAIRYTALE_DBJ60. Resize 51%. Copy and paste as new layer. Move it bottom right, in front of the frame. Open SPRINGFAIRYTALE_DBJ-4. Resize 33%, Copy and paste as new layer. Move it bottom right. In front of purple flower.

6. Open SPRINGFAIRYTALE_DBJ73. Resize 51%. Copy and paste as new layer. Move it to upper right, over the frame opening. 

7. Open SPRINGFAIRYTALE_DBJ80. Resize 41%. Copy and paste as new layer. Move it to left side of the frame. Open SPRINGFAIRYTALE_DBJ82. Resize 33%. Copy and paste as new layer. Move it far left of the frame.

8. Open tweety's wordart WAPSP5Compatible. And pick the layer Spring Fairytale Repeat. Resize 85%. Copy and paste as mew layer. Move it over the frame top. Get another wirdart. Pick now the layer Fairytale. Copy and paste as new layer. Place it above the frame. 

9. Open SPRINGFAIRYTALE_DBJ67. Resize 64%. Copy and paste as new layer. Move it bottom left. Open SPRINGFAIRYTALE_DBJ75. Resize 41%. Copy and paste as new layer. Move it bottom left. 

10. OPen your tube. Resize if needed. Copy and paste as new layer. Move it to far left. 

11. Add shadow as you prefer. I used 1-1-65-2 with color #808080.

12. Add copyright.

13. Add name. I used: Canter Bold / size: 72

Save as PNG


March 4, 2015

Amy ~ by Joanne Salgado


Tutorial written by Joanne Salgado on February 18th, 2015
Any resemblance to any other tutorial is coincidental.
Do not copy and paste this tutorial anywhere on the net.
If you want to translate please ask first. 

Tube: Amy by Kelly Lynn - you can purchase here 
Kit Sad Love by Design by Joan - you can purchase here 
Mask 362 by Vix here 
Font: KG Two is Better Than One

Don't forget to save often.

1. Open a new image 600x600

2. Open element 'DBJ_ELEM30' copy and paste as new layer. Rename as FRAME.

3. Open element 'DBJ_ELEM75' copy and paste as new layer. Resize 40%. Arrange to the top right of the heart frame. Move this layer below the FRAME layer. The parts that appears outside from the frame use the eraser tool to clean it. Rename white flowers.

4. Open element 'DBJ_ELEM118' copy and paste as new layer. Resize 80%. Arrange to the same spot as the white flowers. Move this below the flowers. Rename sparkle.

5. Open paper 'PP_DBJ-3' copy and paste as new layer. Move this layer below the sparkle layer. Adjust/Hue and Saturation/Colorize (hue: 0 / saturation: 0). Select the FRAME layer. White magic wand select inside it. Selections/Modify/Expand 1. Selections/Invert. Select the paper layer and hit delete on your keyboard. Selections/Select None. Rename paper.

6. Open element 'DBJ_ELEM119' copy and paste as new layer. Resize 90%. Arrange to the top. Move this layer below 'paper' layer.

7. Open element 'DBJ_ELEM112' copy and paste as new layer. Resize 80%. Arrange below the white hearts we just added.

8. Open element 'DBJ_ELEM17' copy and paste as new layer. Resize 50%. Image/Mirror. Arrange to the bottom.

9. Open element 'DBJ_ELEM43' copy and paste as new layer. Resize 70%. Move this layer above the FRAME layer. Arrange at the bottom of the frame. (at any point if you have doubts check my tag).

10. Open element 'DBJ_ELEM76' copy and paste as new layer. Resize 50%. Arrange above the bouquet.

11. Open element 'DBJ_ELEM31' copy and paste as new layer. Resize 40%. Image/Rotate/Free Rotate (right/30). Arrange it to the bottom of the bouquet.

12. Open element 'DBJ_ELEM97' copy and paste as new layer. Image/Mirror. Arrange the line of butterflies to the right. The butterflies from the left wont be used, if some appears, just use the eraser tool to clean it.

13. Open element 'DBJ_ELEM29' copy and paste as new layer. Resize 30%. Arrange above the purple rose.

14. Open element 'DBJ_ELEM92' copy and paste as new layer. Resize 30%. Arrange it to the upper left from the frame.

15. Open your tube. I'm using 'Amy' from Kelly Lynn. Copy and paste as new layer. Arrange to the bottom.

16. Open element 'PP_DBJ-3' copy and paste as new layer. Layers/Arrange/Send to bottom. Open your mask. I used 'Vix_Mask362'. Layers/New mask layer/from image (look for your mask name/source luminance/invert mask data unchecked).

Add shadow as you like. I used 1-1-65-2 black.
Add the copyright.
Add the name - I used KG Two is Better Than One - size: 72

Save