April 30, 2016

Alice's House


**Click to see original size**


== NEW PTU TAG TINY TURTLE DESIGNS CT ==

Featuring "Alice's House", Tiny Turtle Design kit at TinyTurtleDesign Store.

Tiny Turtle Design kit has 35 papers and 140 elements so you can play with it. 

Tiny Turtle Design kit can be found  at:
-> TinyTurtleDesign Store, here 


SHOW OFF - Midnight Music


== NEW PTU TAG TINY TURTLE DESIGNS CT ==
AND THE ART OF ALEHANDRA VANHEK

Featuring "Princess", tube by Alehandra Vanhek and
"Midnight Music", Tiny Turtle Design kit at TinyTurtleDesign Store.


Alehandra Vanhek's tube can be found  at:
-> TinyTurtleDesign Store, here

Tiny Turtle Design kit can be found  at:
-> TinyTurtleDesign Store, here


SHOW OFF - Tea Garden


== NEW PTU HUNGRY HILL CT TAG ==

Featuring 'Tube 149-3' by Jasmine Becket-Griffith and
"Tea Garden" Kit by Hungry Hill at Creative Design Outlet - CDO.


Hungry Hill's beautiful kit with 60 elements, 12 papers, 4 frames and 2 wordart for you to play with.

Hungry Hill kit can be found HERE

Jasmine Becket-Griffith tube can be found HERE


April 29, 2016

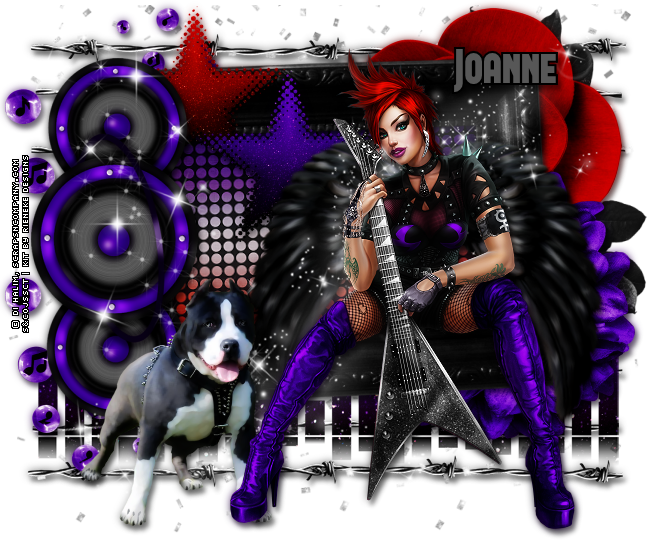
Punk Song ~ by Joanne Salgado


Tutorial written by Joanne Salgado on April 29th, 2016
for those who have a working knowledge of PSP.
Any resemblance to any other tutorial is coincidental.
Do not copy and paste this tutorial anywhere on the net.
If you want to translate please ask first. 

Tube: Punk Song by Di Halim - you can purchase here
Kit Punk Song by Rieneke Designs - you can purchase here
Font: FORQUE

Don't forget to save often.
At any point if you have doubts check my tag.

1. Open a new image 650x550

2. Open element 'RD-PunkSong-element (51)' copy and paste as new layer. Resize 80%. Arrange it a little to the top.

3. Open element 'RD-PunkSong-element (29)' copy and paste as new layer. Move this layer below the frame layer. Arrange it to the bottom. Duplicate. Arrange it to the top.

4. Open element 'RD-PunkSong-element (20)' copy and paste as new layer. Resize 90%. Arrange it to the left. Duplicate. Arrange it to the right.

5. Open element 'RD-PunkSong-element (37)' copy and paste as new layer. Arrange it to bottom.

6. Open element 'RD-PunkSong-element (53)' copy and paste as new layer. Resize 70%. Mirror. Arrange it to the top right.

7. Open element 'RD-PunkSong-element (55)' copy and paste as new layer. Resize 50%. Arrange it to the top right.

8. Open element 'RD-PunkSong-element (54)' copy and paste as new layer. Resize 50%. Arrange it to the bottom right.

9. Open element 'RD-PunkSong-element (30)' copy and paste as new layer. Resize 50%. Arrange it to the top left. Duplicate. Arrange it to the bottom left.

10. Open paper 'RD-PunkSong-paper (1)' copy and paste as new layer. Resize 40%. Rotate left 2. Arrange it inside the frame and clean the outside parts.

11. Open element 'RD-PunkSong-element (27)' copy and paste as new layer. Resize 30%. Move this layer above the frame layer. Arrange it to the top left.

12. Open element 'RD-PunkSong-element (28)' copy and paste as new layer. Resize 30%. Arrange it to the bottom right of the red star.

13. Open element 'RD-PunkSong-element (40)' copy and paste as new layer. Resize 60%. Rotate left 90. Arrange it to the left above the frame.

14. Open element 'RD-PunkSong-element (36)' copy and paste as new layer. Resize 60%. Arrange it to the right. We'll add the tube there, so you may need to arrange this wings again so it looks at your tube's back.

15. Open element 'RD-PunkSong-element (42)' copy and paste as new layer.

16. Open element 'RD-PunkSong-element (58)' copy and paste as new layer. Resize 80%. Arrange it to the left.

17. Open element 'RD-PunkSong-element (57)' copy and paste as new layer. Resize 45%. Arrange it to the bottom left.

18. Open your tube. Copy and paste as new layer. Resize as needed and arrange it to the right sitting on the frame.

19. Add shadow as you prefer.

20. Add copyright. Add name. Save as PNG.

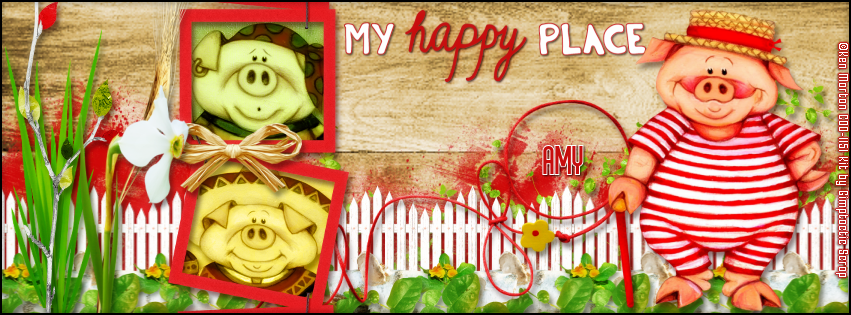
My Happy Place

MR. PIG TUTORIAL

**Click to see original size**

Tutorial written by Marcia Salgado on April 29th, 2016
for those who have a working knowledge of PSP.
I'm using PSP9 to create my tuts.
Any resemblance to any other tutorial is coincidental.
Do not copy and paste this tutorial anywhere on the net.
If you want to translate please ask first. 

****************************************
Material:

Tubes: "Package 54" by Ken Morton, you can purchase them here,
do not use without the proper #license.
PTU Kit "My Happy Place" by Gimptastic Scraps,
you can purchase it here 
Plugin: MuRa's Meister.
Font: Bronco Regular 

****************************************

--> Remember to save often and use my tag as reference if necessary. Use a drop shadow of your preference on layers. I used here 3 tubes from a Package but you can use only one.

1. Create a new image 851x315.

2. Open GS-My_Happy_Place_paper4. Copy and paste as new layer. Move it a little until you like it.

3. Open GS-My_Happy_Place_ele39. Resize 65%. Copy and paste as new layer. Move it down and duplicate it moving it a little up or a little down until you cover the back.

4. Open GS-My_Happy_Place_ele53. Resize 35%. Copy and paste as new layer. Move it down and duplicate it, move it up, use mirror, rotate it a little and cover  the red element a little.

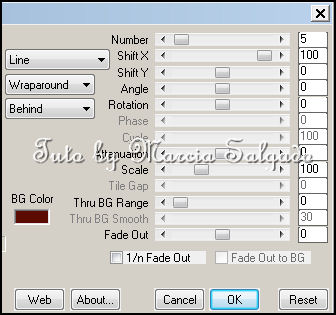
5. Open GS-My_Happy_Place_ele41. Resize 50%. Copy and paste as new layer. Use MuRa's Meister > Copies > Line with settings below and move it down. Now you may want to re-arrange the previous elements to look better behind the fence.


6. Open GS-My_Happy_Place_ele37. Resize 45%. Copy and paste as new layer. Use MuRa's Meister > Copies > Line with settings below and move it down.


7. Open GS-My_Happy_Place_ele34. Resize 45%. Copy and paste as new layer. Use MuRa's Meister > Copies > Line with settings below and move it down.


8. Open GS-My_Happy_Place_ele50. Resize 65%. Copy and paste as new layer. Move it down and a little to right. 

9. Open GS-My_Happy_Place_ele28. Resize 70%. Copy and paste as new layer. Move it way to left. Duplicate and move it a little bit to right. Merge down.

10. Open GS-My_Happy_Place_ele7. Copy and paste as new layer. Move it way left. Place it in front of the grass.

11. Open GS-My_Happy_Place_wordart1. Resize 50%. Copy and paste as new layer. Move it up and a little to right.

12. Open GS-My_Happy_Place_frame2. Copy and paste as new layer. Adjust it to show only 2 frames. 

13. Select inside the upper frame. Expand > 5. Add a new layer and move it below the frame layer. Open GS-My_Happy_Place_paper10. Copy and paste into selection. Invert selection. Open one of your selected tubes. Resize it. Copy and paste as new layer. Place it inside the frame. Delete. Deselect. Select all. Clip to canvas. Crop to selection. Apply a Blend Mode of your preference.

14. Select inside the lower frame. Expand > 5. Add a new layer and move it below the frame layer. Open GS-My_Happy_Place_paper6. Copy and paste into selection. Invert selection. Open one of your selected tubes. Resize it. Copy and paste as new layer. Place it inside the frame. Delete. Deselect. Select all. Clip to canvas. Crop to selection. Apply a Blend Mode of your preference.

15. Open GS-My_Happy_Place_ele43. Resize 55%. Copy and paste as new layer. Place it over the frame at middle.

16. Open GS-My_Happy_Place_ele60. Copy and paste as new layer. Move it to left. Place it on left side of the frame.

17. Open GS-My_Happy_Place_ele54. Resize 70%. Copy and paste as new layer. Move it to left. Place it over the previous element.

18. Open your tube and resize it. Copy and paste as new layer. Move it to right.

19. Add a new layer. Select all. Fill it with Black. Contract > 2. Delete.


--> Add your copyright info and license#. Add your name or initials. Save as PNG.

--> Sometimes I had to change my Timeline size to 846x313 because when I add it to Facebook the image has extra pixels and do not fit perfectly. So try this size if the same is happening to you.


---------------------------------------

Idea for the Profile Picture


Punk Rock ~ by Joanne Salgado


Tutorial written by Joanne Salgado on April 29th, 2016
for those who have a working knowledge of PSP.
Any resemblance to any other tutorial is coincidental.
Do not copy and paste this tutorial anywhere on the net.
If you want to translate please ask first. 

Tube: Punk Rock by Di Halim - you can purchase here
Kit Punk Babe by Bibi's Collection - you can purchase here
Font: AnnaEF

Don't forget to save often.
At any point if you have doubts check my tag.

1. Open a new image 650x600.

2. Open element 'BIBI-PUNK ROCK ELEMS (8)' copy and paste as new layer. Resize 23%.

3. Open element 'BIBI-PUNK ROCK ELEMS (2)' copy and paste as new layer. Resize 40%. Move this layer below the frame layer. Arrange it to the bottom right. Duplicate. Mirror. Duplicate. Arrange it to the top right. Duplicate. Mirror.

4. Open element 'BIBI-PUNK ROCK ELEMS (21)' copy and paste as new layer. Resize 65%.

5. Open element 'BIBI-PUNK ROCK ELEMS (86)' copy and paste as new layer. Resize 50%. Arrange it to the bottom left.

6. Open paper 'BIBI-PUNK ROCK PAPERS (1)' copy and paste as new layer. Resize 30%. Clean the parts outside the frame.

7. Open element 'BIBI-PUNK ROCK ELEMS (79)' copy and paste as new layer. Resize 65%.

8. Open element 'BIBI-PUNK ROCK ELEMS (47)' copy and paste as new layer. Resize 65%.

9. Open element 'BIBI-PUNK ROCK ELEMS (36)' copy and paste as new layer. Resize 70%. Arrange it a little to bottom. Not to much, we will add the tube and its must look like its on your tube's back. If needed arrange it again later.

10. Open your tube. Copy and paste as new layer. Resize as needed and arrange it inside the frame. Clean the parts needed so it looks like your tube is coming out of the frame.

11. Open element 'BIBI-PUNK ROCK ELEMS (81)' copy and paste as new layer. Resize 60%. Arrange it to bottom.

12. Open element 'BIBI-PUNK ROCK ELEMS (102)' copy and paste as new layer. Resize 40%. Arrange it to the bottom right.

13. Open element 'BIBI-PUNK ROCK ELEMS (22)' copy and paste as new layer. Resize 40%. Arrange it to the bottom right above the frame.

14. Open element 'BIBI-PUNK ROCK ELEMS (1)' copy and paste as new layer. Resize 20%. Arrange it to the bottom right.

15. Add shadow as you prefer.

16. Add copyright. Add name. Save as PNG.

Punk Babe ~ by Joanne Salgado


Tutorial written by Joanne Salgado on April 29th, 2016
for those who have a working knowledge of PSP.
Any resemblance to any other tutorial is coincidental.
Do not copy and paste this tutorial anywhere on the net.
If you want to translate please ask first. 

Tube: Punk Babe by Di Halim - you can purchase here
Kit Punk Babe by Chili Designz - you can purchase here
Font: White Pine

Don't forget to save often.
At any point if you have doubts check my tag.

1. Open a new image 650x550

2. Open frame 'CHILI_DESIGNZ_PunkBabe_frame5' copy and paste as new layer. Resize 70%.

3. Open element 'CHILI_DESIGNZ_PunkBabe_sparkles4' copy and paste as new layer. Move this layer below the frame layer. Arrange it to bottom left. Duplicate. Mirror. Duplicate. Flip. Duplicate. Mirror.

4. Open element 'CHILI_DESIGNZ_PunkBabe_bokeh' copy and paste as new layer. Arrange it to the top left. Duplicate. Mirror/Flip.

5. Open element 'CHILI_DESIGNZ_PunkBabe_bubbles' copy and paste as new layer. Arrange it to the top right. Duplicate. Mirror/Flip.

6. Open element 'CHILI_DESIGNZ_PunkBabe_deco5' copy and paste as new layer.

7. Open element 'CHILI_DESIGNZ_PunkBabe_nodes2' copy and paste as new layer.

8. Open element 'CHILI_DESIGNZ_PunkBabe_sparkles2' copy and paste as new layer.

9. Open paper 'CHILI_DESIGNZ_PunkBabe_paperr13' copy and paste as new layer. Resize 45%. Arrange it inside the frame and clean the outside parts.

10. Open element 'CHILI_DESIGNZ_PunkBabe_tulle' copy and paste as new layer. Resize 70%.

11. Open element 'CHILI_DESIGNZ_PunkBabe_skyline' copy and paste as new layer. Resize 55%. Arrange it to the bottom inside the frame and clean the outside parts.

12. Open element 'CHILI_DESIGNZ_PunkBabe_speaker3' copy and paste as new layer. Resize 70%. Move this layer above the frame layer. Arrange it to the bottom right. Duplicate. Mirror.

13. Open element 'CHILI_DESIGNZ_PunkBabe_speaker2' copy and paste as new layer. Resize 50%. Arrange it to the right above the blue speaker. Duplicate. Mirror.

14. Open element 'CHILI_DESIGNZ_PunkBabe_string' copy and paste as new layer. Resize 50%. Arrange it to the top left of the frame.

15. Open element 'CHILI_DESIGNZ_PunkBabe_speaker' copy and paste as new layer. Resize 55%. Arrange it to bottom.

16. Open element 'CHILI_DESIGNZ_PunkBabe_badge' copy and paste as new layer. Arrange it to the top right above the frame.

17. Open element 'CHILI_DESIGNZ_PunkBabe_sparkles3' copy and paste as new layer. Resize 90%.

18. Open your tube. Copy and paste as new layer. Resize as needed and arrange it sitting on the speaker box.

19. Add shadow as you prefer.

20. Add copyright. Add name. Save as PNG.

Love Lingers

MEMORIES TUTORIAL

WITH WORDART
**Click to see original size**

WITHOUT WORDART
**Click to see original size**

Tutorial written by Marcia Salgado on April 29th, 2016
for those who have a working knowledge of PSP.
I'm using PSP9 to create my tuts.
Any resemblance to any other tutorial is coincidental.
Do not copy and paste this tutorial anywhere on the net.
If you want to translate please ask first. 

****************************************
Material:

Tube: "Individual Tube 2-3" by Andreea Cernestean, you can purchase it here,
do not use without the proper #license.
PTU Kit "Love Lingers" by Hungry Hill,
you can purchase it here 
Plugin: Eye Candy 6 (OPTIONAL)
Font: Wytherness 

****************************************

--> Remember to save often and use my tag as reference if necessary. Use a drop shadow of your preference on layers.

1. Create a new image 851x315.

2. Open paper-3. Copy and paste as new layer. Move it around the background to place it as you like.

3. Add a new layer. Select all. Contract > 10. Fill it with white. Contract > 25. Delete. Deselect. Blend Mode: Overlay. Apply Blinds as shown below:


4. Select all. Float. Defloat. Add a new layer. Fill it with Black. Contract > 1. Deselect.

5. Open green-branch. Resize 30%. Mirror. Copy and paste as new layer. Move it a little down and to left.

6. Open envelopes. Resize 30%. Copy and paste as new layer. Move it down.

7. Open doodle-2. Resize 65%. Mirror. Copy and paste as new layer. Move it a little to left. Stop before the green brach.

8. Open fabric-leaf-1. Resize 45%. Copy and paste as new layer. Move it down and to left.  Duplicate. Free Rotate: Left-25. Move it a litle up and a little to right.
 Move this layer below the first golden leaf layer. 


9. Click on first layer. Open oak-leaves. Resize 45%. Flip. Copy and paste as new layer. Move it down and a little to left.

10. Open scarf. Resize 65%. Copy and paste as new layer. Move it way to left.

11. Open heart. Resize 70%. Copy and paste as new layer. Move it way to right.

12. Open time. Resize 40%. Copy and paste as new layer.Move it way to right.

13. Open leaf-scatter. Resize 50%. Mirror. Copy and paste as new layer. Move it to left.

14. Open your tube closeup. I mirrored mine. Copy and paste as new layer. Move it way to right.

15. OPTIONAL - Open WordArt. Resize 80%. Copy and paste as new layer. Move it down and to right. Add a border using Eye Candy 6 > Gradient Glow (color #5c0b00) with the settings below:


16. Add a new layer. Select all. Fill it with Black. Contract > 2. Deselect.


--> Add your copyright info and license#. Add your name or initials. Save as PNG.

--> Sometimes I had to change my Timeline size to 846x313 because when I add it to Facebook the image has extra pixels and do not fit perfectly. So try this size if the same is happening to you.

-----------------------------------------------------------

Idea for Profile Picture:


April 27, 2016

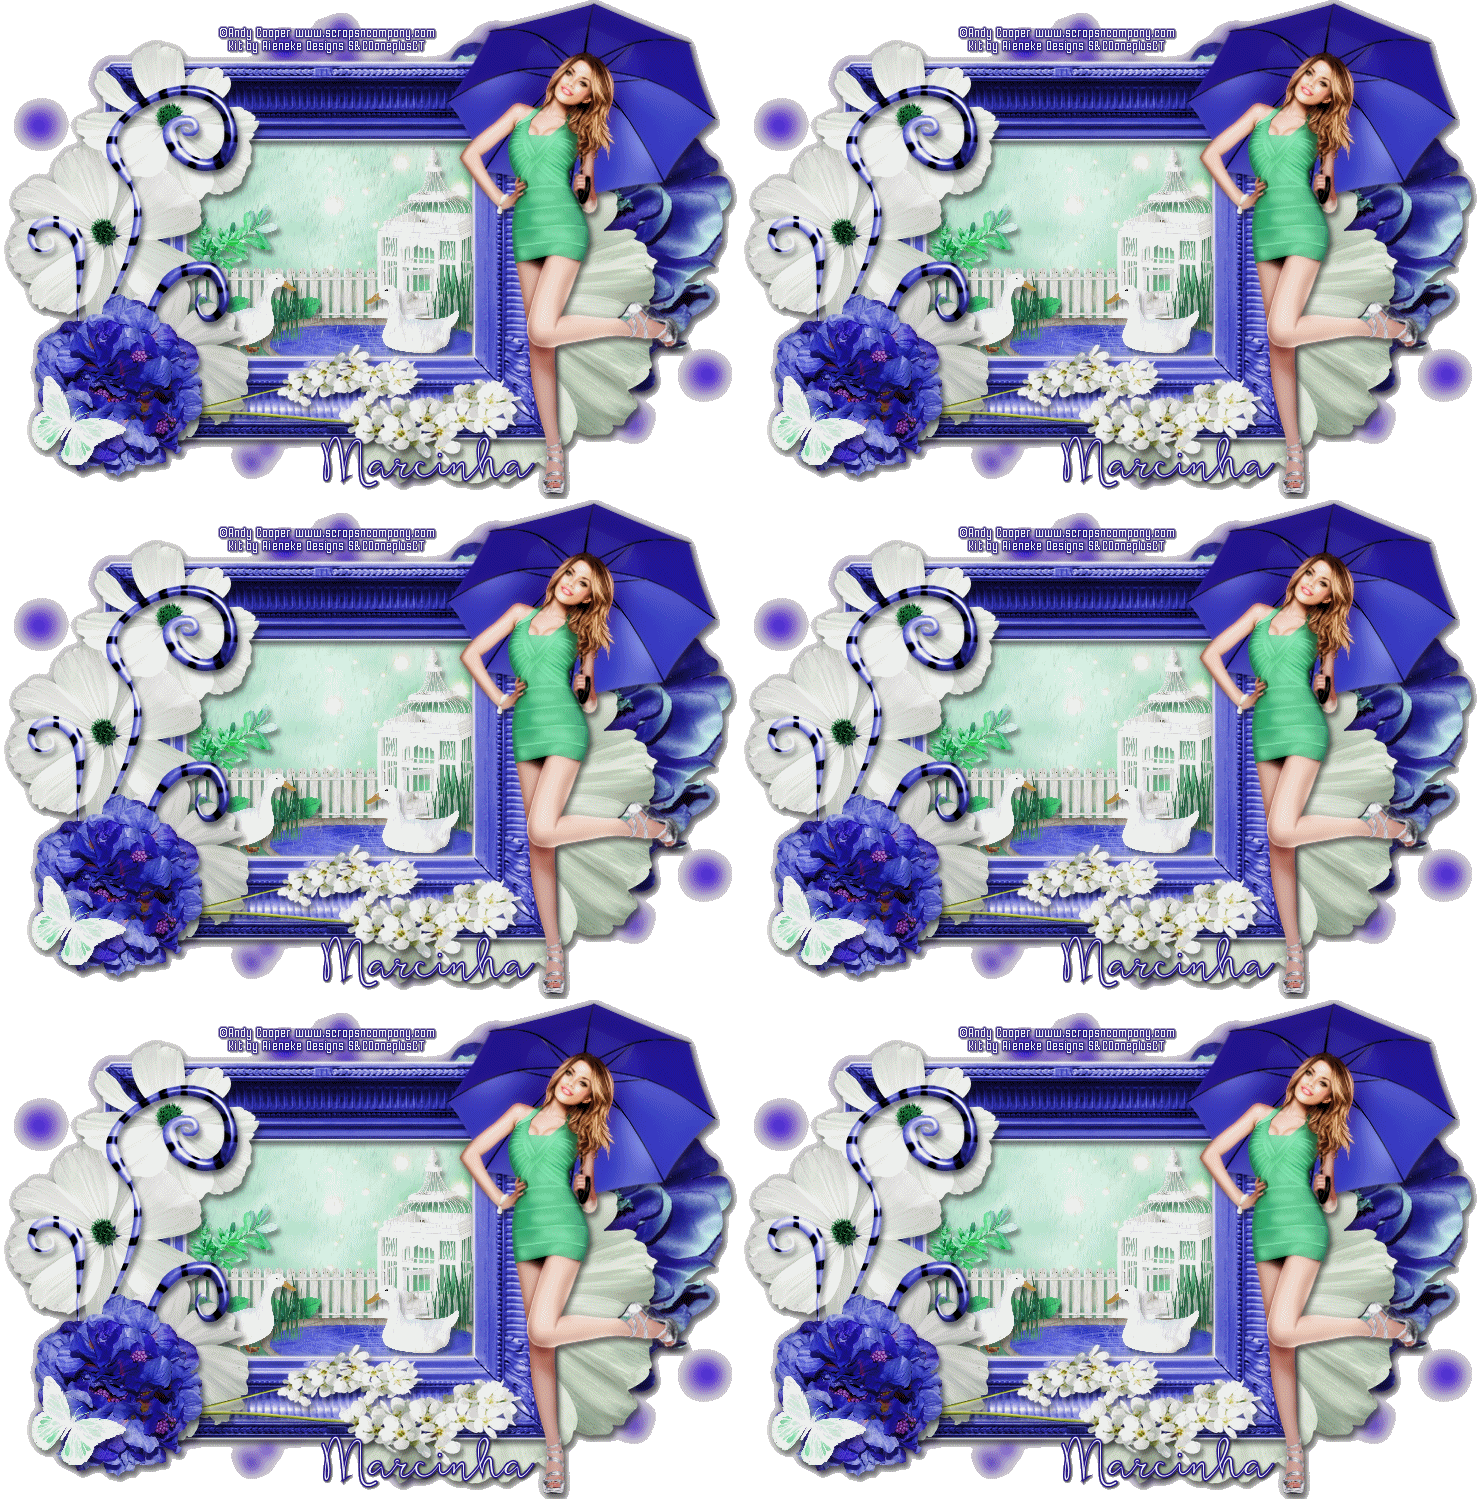
Purple Umbrella

PURPLE RAIN TUTORIAL

**Click to see original size**

Tutorial written by Marcia Salgado on April 27th, 2016
for those who have a working knowledge of PSP.
I'm using PSP9 to create my tuts.
Any resemblance to any other tutorial is coincidental.
Do not copy and paste this tutorial anywhere on the net.
If you want to translate please ask first. 

****************************************
Material:

Tube: "Purple Umbrella" by Andy Cooper, you can purchase it here 
do not use without the proper #license.
PTU Kit "PurpleUmbrella" by Rieneke Designs, you can purchase it here 
Material: Rain made by me, mar2016_300x250-rain, here 
Plugin: Eye Candy 6 (Optional)
Font: featherly

****************************************

--> Remember to save often and use my tag as reference if necessary. Use a Drop Shadow of your preference on layers before use MERGE. 

1. Create a new image 750x500.

2. Open RD-PurpleUmbrella-element (14). Resize 75%. Copy and paste as new layer. Add a thin white border or use Eye Candy 6 > Gradient Glow with the following settings:


3. Select inside the frame. Expand > 10. Add a new layer and move it below the frame layer. Open RD-PurpleUmbrella-paper (7). Copy and paste into selection. Duplicate. Click on original layer and low the layer opacity to 50, rename the original layer BACK and hide it for now. Click on copy layer. Selection invert.

4. Now we'll start to create the scenary inside the frame. Feel free to check my tag for placements or do it as you prefer. Open RD-PurpleUmbrella-element (31). Resize 25%. Copy and paste as new layer. Move it down and to the left. Delete. Keep selected.

5. Open RD-PurpleUmbrella-element (28). Resize 50%. Copy and paste as new layer. Move it down and to right. Delete. Keep selected.

6. Open RD-PurpleUmbrella-element (39). Resize 40%. Copy and paste as new layer. Move it down and to left.  Delete. Keep selected.

7. Open RD-PurpleUmbrella-element (50). Resize 40%. Mirror. Copy and paste as new layer. Move it down and to right.  Delete. Keep selected.

8. Open RD-PurpleUmbrella-element (43). Resize 15%. Copy and paste as new layer. Move it down and to left, place it in front of the fence. Duplicate and move it a little to right. Merge down. Delete. Keep selected.

9. Open RD-PurpleUmbrella-element (32). Resize 40%. Copy and paste as new layer. Move it down and to right. Delete. Keep selected.

10. Open RD-PurpleUmbrella-element (29). Resize 20%. Mirror. Copy and paste as new layer. Place it in the middle of the pond.  Delete. Keep selected.

11. Open RD-PurpleUmbrella-element (26). Resize 20%. Mirror. Copy and paste as new layer. Place it at the pond's left border. Delete. Deselect.

12. Hide the bottom empty layer (Raster 1) and the frame layer and merge all visible layers. Rename this layer to SCENE.

13. Turn the frame and empty bottom layer (Raster 1) visible again. Click on Raster 1 layer. Open RD-PurpleUmbrella-element (10). Copy and paste as new layer. Move it up and to left. Duplicate. Mirror. Flip. Merge down. 

14. Open RD-PurpleUmbrella-element (11). Resize 75%. Mirror. Copy and paste as new layer. Move it to right.

15. Open RD-PurpleUmbrella-element (13). Resize 75%. Copy and paste as new layer. Place it in front of the previous flower but leave it a little bit more to left. Turn the frame, SCENE and Raster 1 layers invisible. Turn BACK visible. Merge visible layers. Rename it BACK again. Turn all layer visible.

16. Click on frame layer (should be the first layer). Open RD-PurpleUmbrella-element (15). Resize 70%. Mirror. Copy and paste as new layer. Move it way to left. Place it over the frame border.

17. Open RD-PurpleUmbrella-element (37). Resize 80%. Copy and paste as new layer. Place it over the previous flowers.

18. Open RD-PurpleUmbrella-element (33). Resize 80%. Free Rotate: Right-90. Copy and paste as new layer. Move it down.

19. Open RD-PurpleUmbrella-element (17). Resize 35%. Copy and paste as new layer. Move it down and to left. 

20. Open. RD-PurpleUmbrella-element (27). Resize 20%. Copy and paste as new layer. Place it over the purple flower.

21. Open your tube and resize it. Copy and paste as new layer. I mirrored mine and moved it to the right.

22. Hide layers BACK, SCENE and Raster 1. Merge visible layers and rename it TOP. Turn all layers visible again. Use Crop > Merged Opaque to get rid of any extra space. Now it's the time to resize it if wanted (all layers). Add your copyright info and license#. Add your name. If you do not want to add the animation you can save it as PNG right now.


ADDING ANIMATION

1. PSP -> Click on SCENE layer. Copy. 

2. AS -> Paste as new animation. Duplicate it to have 8 frames in total. Select all. Activate Propagate Paste. Open mar2016_300x250-rain MNG. Select all. Copy. Back to SCENE frames. Paste to selected frames. Position it and click to fix the rain.

3. PSP -> Turn off TOP and SCENE layers. Copy merged. 

4. AS -> Paste as new animation. Duplicate it to have 8 frames in total. Select all. Activate the scene animation. Select all. Copy. Activate the tag BACK and Paste into selected frames using the empty background rectangle to place the animation on your tag. 

5. PSP -> Turn on the TOP layer and off BACK layer. Copy merged. 

6. AS -> Paste as new animation. Copy. Activate your tag. Paste into selected frames. Position the frame over the scenery background. Save as GIF.


April 26, 2016

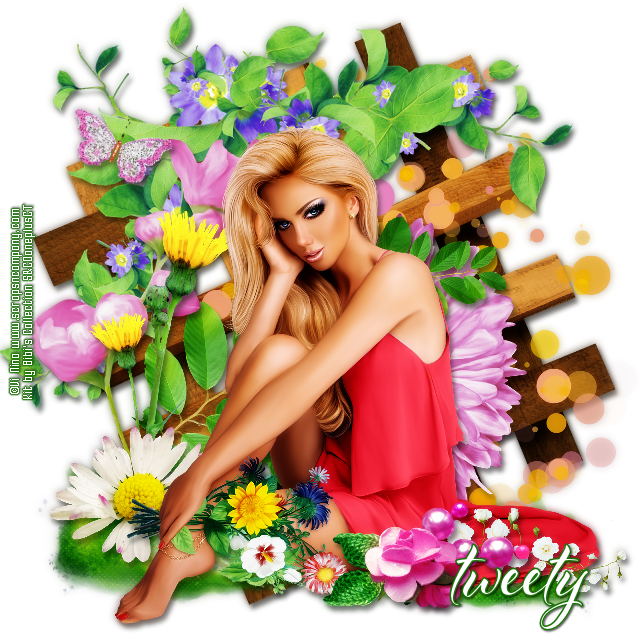
Kate with Flowers

GARDENING TUTORIAL


Tutorial written by Marcia Salgado on April 26th, 2016
for those who have a working knowledge of PSP.
I'm using PSP9 to create my tuts.
Any resemblance to any other tutorial is coincidental.
Do not copy and paste this tutorial anywhere on the net.
If you want to translate please ask first. 

****************************************
Material:

Tube: "Kate" by Vi Nina, you can purchase it here 
do not use without the proper #license.
PTU Kit "Flowers" by Bibi's Collection, you can purchase it here 
Font: AlFresco

****************************************

--> Remember to save often and use my tag as reference if necessary. Use a Drop Shadow of your preference on layers. 

1. Create a new image 650x650.

2. Open BIBI-KATE FLOWERS ELEM (74). Resize 55%. Copy and paste as new layer.

3. Open BIBI-KATE FLOWERS ELEM (53). Resize 50%. Copy and paste as new layer. Move it a little to right.

4. Open BIBI-KATE FLOWERS ELEM (105). Resize 50%. Copy and paste as new layer. Move it down.

5. Open BIBI-KATE FLOWERS ELEM (93). Resize 
45%. Free Rotate: Right-90. Copy and paste as new layer. Move it to right.

6. Open BIBI-KATE FLOWERS ELEM (30). Resize 40%. Copy and paste as new layer. Move it a little down.

7. Open BIBI-KATE FLOWERS ELEM (109). Resize 70%. Copy and paste as new layer. Move it up and to left.

8. open BIBI-KATE FLOWERS ELEM (99). Resize 65%. Copy and paste as new layer. Move it to left.

9. Open BIBI-KATE FLOWERS ELEM (110). Resize 30%. Copy and paste as new layer. Move it a little down and to left.

10. Open BIBI-KATE FLOWERS ELEM (82). Resize 30%. Copy and paste as new layer. Move it down and to left,

11. Open your tube. Resize it. Copy and paste as new layer. Place it over the grass, Rearrange the previous elemnts to better fit your tube.

12. Open BIBI-KATE FLOWERS ELEM (29). Resize 25%. Copy and paste as new layer. Move it down and to right. I placed mine over the tube's dress.

13. Open BIBI-KATE FLOWERS ELEM (61). Resize 45%. Copy and paste as new layer. Move it down and to right. 

14. Open BIBI-KATE FLOWERS ELEM (13). Resize 15%. Free Rotate: Right-25. Copy and paste as new layer. Move it up and to left.

15. Use Crop > Merged Opaque to get rid of all extra space.


--> Add your copyright info and license#. Add your name and save as PNG.


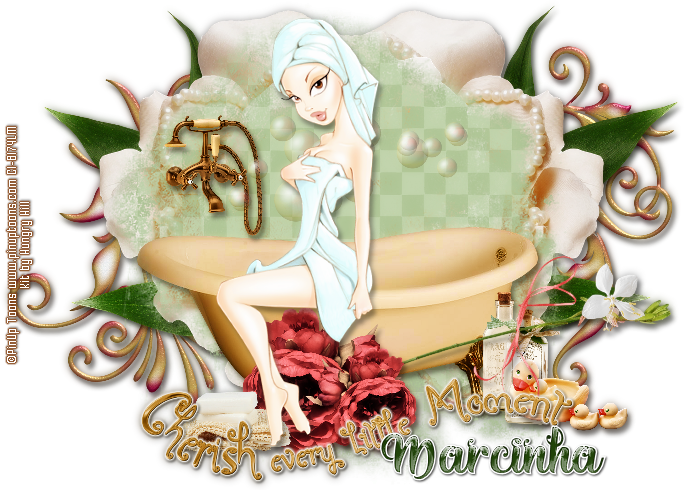
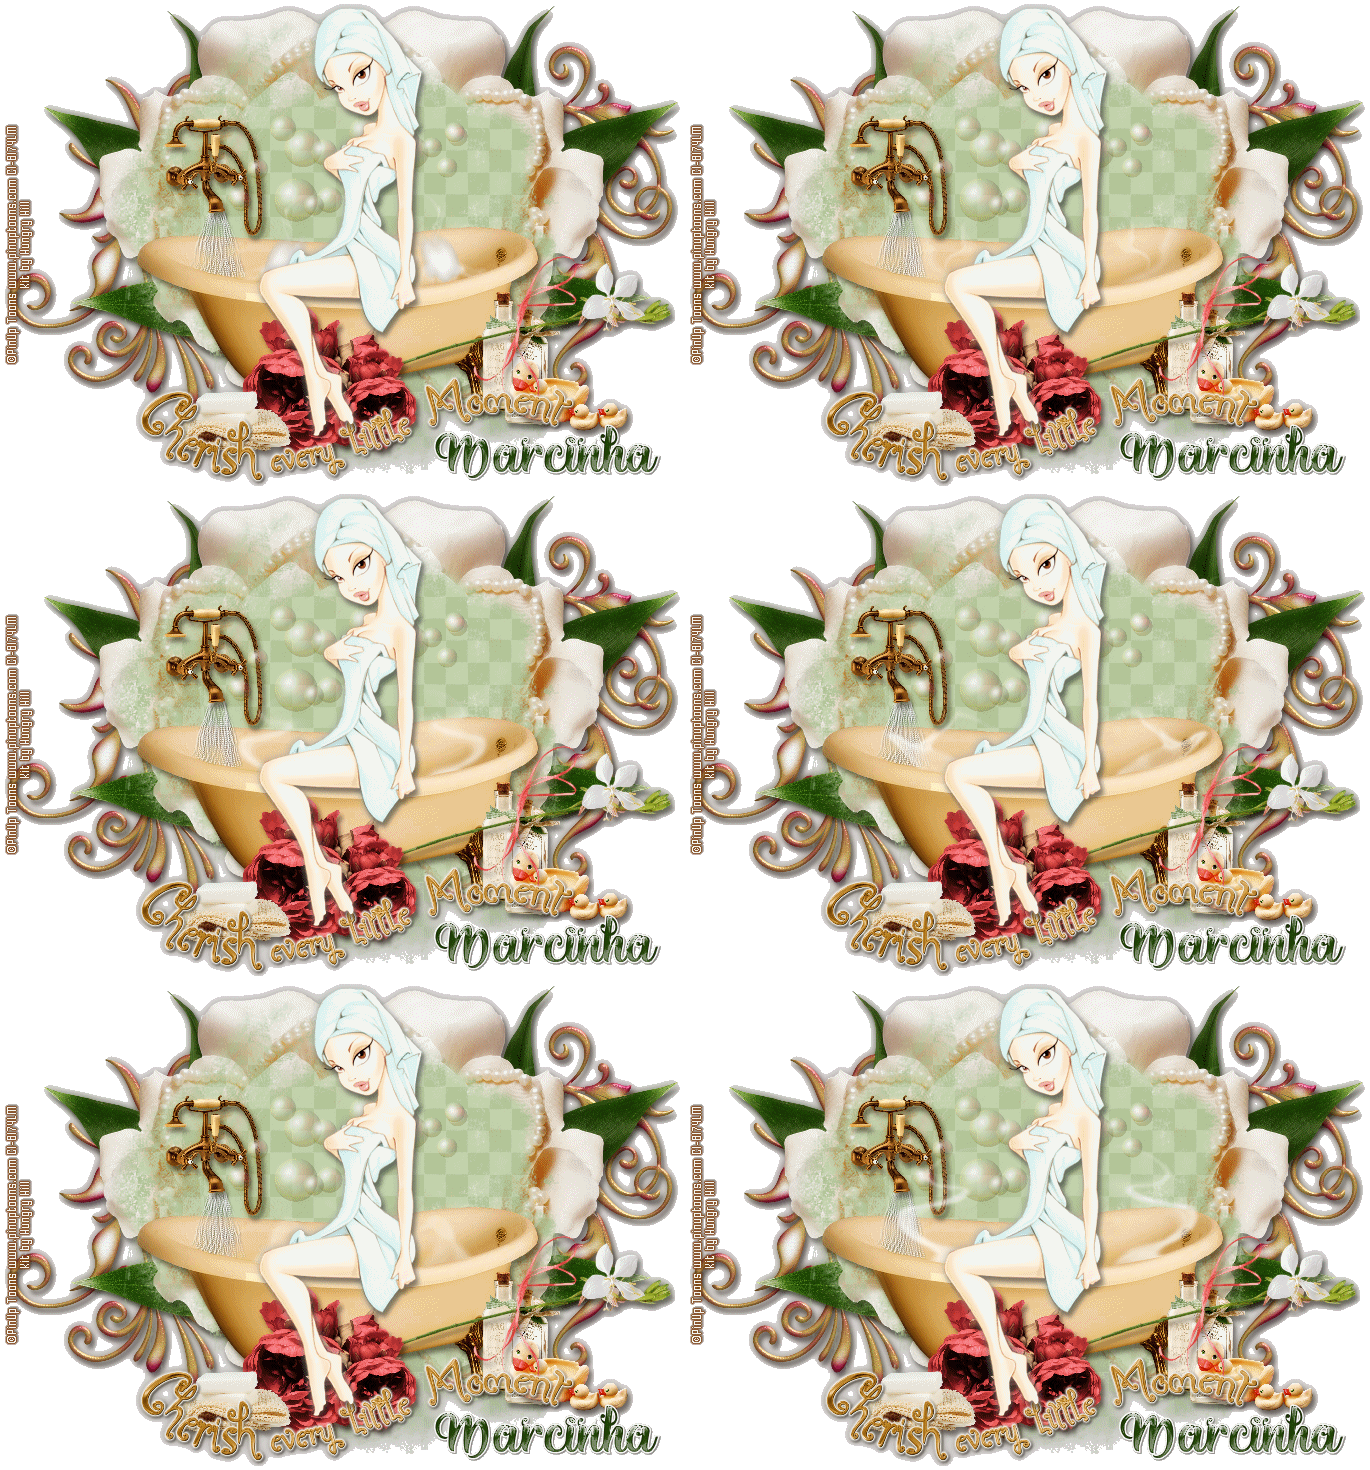
Little Moments

BATH TIME TUTORIAL


Tutorial written by Marcia Salgado on April 26th, 2016
for those who have a working knowledge of PSP.
I'm using PSP9 to create my tuts.
Any resemblance to any other tutorial is coincidental.
Do not copy and paste this tutorial anywhere on the net.
If you want to translate please ask first. 

****************************************
Material:

Tube: "Individual Tube 44-2" by PinUp Toons, now you can purchase it here - CDO,
do not use without the proper #license.
PTU Kit "Little Moments" by Hungry Hill,
you can purchase it here 
Font: Brigent Script  

****************************************

--> Remember to save often and use my tag as reference if necessary. Use a drop shadow of your preference on layers.

1. Create a new image 750x500. Later you will remove unused spaces.

2. Open tile-bkg. Resize 55%. Copy and paste as new layer.

3. Open deco-2. Resize 45%. Copy and paste as new layer. Move it to left. Arrange this layer below tile-bkg layer.

4. Open deco-1. Resize 45%. Copy and paste as new layer. Move it to right.

5. Open greenery-2. Resize 45%. Copy and paste as new layer. Move it to left. Duplicate. Mirror. Maybe it will need a little place adjustment. Merge down.

6. Open flower-2. Resize 50%. Copy and paste as new layer. Move it to right. Duplicate. Mirror. Maybe it will need a little place adjustment. Merge down.

7. Click on first layer (tile background layer). Open bathtub. Resize 50%. Copy and paste as new layer. Move it a little down.

8. Open bottle-1. Resize 15%. Copy and paste as new layer. Move it down and to right. Place it near the bathtube.

9. Open bottle-2. Resize 15%. Copy and paste as new layer. Move it down and to right. Place it on right side of the previous bottle.

10. Open duckies. Resize 15%. Copy and paste as new layer. Move it down and to right. Place it near the bottles.

11. Open stem. Resize 50%. Copy and paste as new layer. Move it down and a little to right. 

12. Open flower-1. Resize 20%. Copy and paste as new layer. Move it down and a little to left. Duplicate, mirror and resize 70%. Place it on right side of bigger flower.

13. Open soap. Resize 15%. Copy and paste as new layer. Move it down and to left. Place it near the bathtube.

14. Open faucets. Resize 15%. Copy and paste as new layer. Move it a little up and to left. 

15. Open bubbles-2. Resize 30%. Copy and paste as new layer. Move it a very little up.

16. Open WordArt. Resize 55%. Copy and paste as new layer. Move it down and a little to right.

17. Use Crop > Merged Opaque to get rid of all extra spaces.


--> Resize it if wanted. Add your copyright info and license#. Add your name and save as PNG.


----------------------------------------------------------------

Showing Off of Animated Tag - animations made by me


April 25, 2016

Delicious Old Style 3 ~ by Joanne Salgado


Tutorial written by Joanne Salgado on April 25th, 2016
for those who have a working knowledge of PSP.
Any resemblance to any other tutorial is coincidental.
Do not copy and paste this tutorial anywhere on the net.
If you want to translate please ask first. 

Tube: Delicious Old Style 3 by Di Halim - you can purchase here
Kit Delicious Old Style by Kizzed by Kelz - you can purchase here
Font: Susanna

Don't forget to save often.
At any point if you have doubts check my tag.

1. Open a new image 650x550

2. Open paper 'KBK_DeliciousOldStyle (13)' copy and paste as new layer. Resize 30%.

3. Open element 'KBK_DeliciousOldStyle (138)' copy and paste as new layer. Use Raster Deform Tool to stretch it a little to both sides. Then holding shift take the uper part and push it to the center. It will end like mine, looking like its on the floor. If needed stretch it a little to the top so it has a better range of the canvas. The paper should still appear thought.

4. Open element 'KBK_DeliciousOldStyle (7)' copy and paste as new layer. Arrange it to the top of the canvas. Leave some space so the flowers we will add still apears.

5. Open element 'KBK_DeliciousOldStyle (106)' copy and paste as new layer Resize 50%. Move this layer below the wall we just added. Arrange it to the top right.

6. Open element 'KBK_DeliciousOldStyle (81)' copy and paste as new layer. Resize 50%. Arrange it to the top right a little to the left of the flower we added. Duplicate. Mirror. Arrange it to the bottom left of the wall.

7. Open element 'KBK_DeliciousOldStyle (105)' copy and paste as new layer. Resize 50%. Arrange it to the top right a little to the lelft of the leaf we added.

8. Open element 'KBK_DeliciousOldStyle (98)' copy and paste as new layer. Resize 50%. Arrange it to the top to the left of the flower we added.

9. Open element 'KBK_DeliciousOldStyle (82)' copy and paste as new layer. Resize 50%. Arrange it to the top to the left of the flower we added.

10. Open element 'KBK_DeliciousOldStyle (101)' copy and paste as new layer. Resize 50%. Arrange it to the top left of the wall.

11. Open element 'KBK_DeliciousOldStyle (80)' copy and paste as new layer. Resize 50%. Arrange it to the right of the wall.

12. Open element 'KBK_DeliciousOldStyle (88)' copy and paste as new layer. Resize 50%. Arrange it to the bottom right of the wall.

13. Open element 'KBK_DeliciousOldStyle (68)' copy and paste as new layer. Resize 30%. Arrange it to the bottom right.

14. Open element 'KBK_DeliciousOldStyle (17)' copy and paste as new layer. Resize 25%. Mirror. Arrange it above the boxes we just added.

15. Open element 'KBK_DeliciousOldStyle (114)' copy and paste as new layer. Resize 40%. Arrange it to the top right of the wall.

16. Open element 'KBK_DeliciousOldStyle (115)' copy and paste as new layer. Resize 50%. Mirror. Arrange it to the bottom left.

17. Open element 'KBK_DeliciousOldStyle (12)' copy and paste as new layer. Resize 20%. Arrange it above the rack.

18. Open element 'KBK_DeliciousOldStyle (103)' copy and paste as new layer. Resize 17%. Mirror. Arrange it above the rack.

19. Open element 'KBK_DeliciousOldStyle (4)' copy and paste as new layer. Resize 15%. Arrange it above the rack.

20. Open element 'KBK_DeliciousOldStyle (9)' copy and paste as new layer. Resize 15%. Arrange it above the rack.

21. Open element 'KBK_DeliciousOldStyle (11)' copy and paste as new layer. Resize 18%. Arrange it above the rack.

22. Open element 'KBK_DeliciousOldStyle (6)' copy and paste as new layer. Resize 22%. Arrange it above the rack.

23. Open element 'KBK_DeliciousOldStyle (126)' copy and paste as new layer. Resize 30%. Arrange it to the bottom left in front of the rack.

24. Open element 'KBK_DeliciousOldStyle (16)' copy and paste as new layer. Resize 70%. Mirror. Arrange it to the bottom right.

25. Open your tube. Copy and paste as new layer. Resize as needed and arrange it sitting at the chair.

26. Open element 'KBK_DeliciousOldStyle (141)' copy and paste as new layer. Resize 20%. Arrange it to the bottom left.

27. Open element 'KBK_DeliciousOldStyle (50)' copy and paste as new layer. Resize 20%. Arrange it to the bottom right.

28. Open element 'KBK_DeliciousOldStyle (43)' copy and paste as new layer. Resize 25%. Arrange it to the bottom right.

29. Open element 'KBK_DeliciousOldStyle (129)' copy and paste as new layer. Resize 20%. Arrange it to the bottom left.

30. Open element 'KBK_DeliciousOldStyle (84)' copy and paste as new layer. Resize 30%. Arrange it to the bottom right.

31. Open element 'KBK_DeliciousOldStyle (21)' copy and paste as new layer. Resize 30%. Arrange it to the bottom right.

32. Open element 'KBK_DeliciousOldStyle (3)' copy and paste as new layer. Resize 15%. Arrange it above the rack.

33. Open element 'KBK_DeliciousOldStyle (23)' copy and paste as new layer. Arrange it to the left. Duplicate. Mirror/Flip.

34. Add shadow as you prefer.

35. Add copyright. Add name. Save as PNG.

Delicious Old Style 2 ~ by Joanne Salgado


Tutorial written by Joanne Salgado on April 25th, 2016
for those who have a working knowledge of PSP.
Any resemblance to any other tutorial is coincidental.
Do not copy and paste this tutorial anywhere on the net.
If you want to translate please ask first. 

Tube: Delicious Old Style 2 by Di Halim - you can purchase here
Kit Delicious Glamour by Chili Designz - you can purchase here
Font: Capella

Don't forget to save often.
At any point if you have doubts check my tag.

1. Open a new image 650x550.

2. Open frame 'CHILI_DESIGNZ_DeliciousGlamour_frame3' copy and paste as new layer. Resize 70%. Arrange it to the left. Leave a little space for the flowers we will add.

3. Open element 'CHILI_DESIGNZ_DeliciousGlamour_tulle' copy and paste as new layer. Resize 60%. Move this layer below the frame layer and arrange it to the right.

4. Open element 'CHILI_DESIGNZ_DeliciousGlamour_peacock' copy and paste as new layer. Arrange it to the right.

5. Open element 'CHILI_DESIGNZ_DeliciousGlamour_flower' copy and paste as new layer. Resize 70%. Arrange it to the top left.

6. Open element 'CHILI_DESIGNZ_DeliciousGlamour_flower9' copy and paste as new layer. Resize 70%. Arrange it to the left a little below the one we just add.

7. Open element 'CHILI_DESIGNZ_DeliciousGlamour_flower10' copy and paste as new layer. Resize 70%. Arrange it to the bottom left.

8. Open element 'CHILI_DESIGNZ_DeliciousGlamour_flower6' copy and paste as new layer. Resize 70%. Arrange it to the bottom left a little above the one we just add.

9. Open element 'CHILI_DESIGNZ_DeliciousGlamour_button4' copy and paste as new layer. Arrange it to the left.

10. Open element 'CHILI_DESIGNZ_DeliciousGlamour_flower2' copy and paste as new layer. Resize 70%. Arrange it to the top right.

11. Open element 'CHILI_DESIGNZ_DeliciousGlamour_flower8' copy and paste as new layer. Resize 70%. Arrange it to the right a little below the one we just add.

12. Open paper 'CHILI_DESIGNZ_DeliciousGlamour_paper2' copy and paste as new layer. Resize 50%. Arrange it inside the frame and clean the outside parts.

13. Open element 'CHILI_DESIGNZ_DeliciousGlamour_wa' copy and paste as new layer. Resize 70%. Rotate left 20. Move this layer above the frame layer. Arrange it to the top left above the frame.

14. Open element 'CHILI_DESIGNZ_DeliciousGlamour_butterfly' copy and paste as new layer. Resize 50%. Arrange it to the left above the frame.

15. Open element 'CHILI_DESIGNZ_DeliciousGlamour_broche2' copy and paste as new layer. Resize 50%. Arrange it to the left a little below to the right of the vintage wordart.

16. Open element 'CHILI_DESIGNZ_DeliciousGlamour_car' copy and paste as new layer. Resize 70%. Arrange it to bottom right.

17. Open element 'CHILI_DESIGNZ_DeliciousGlamour_box' copy and paste as new layer. Resize 30%. Arrange it to bottom right.

18. Open element 'CHILI_DESIGNZ_DeliciousGlamour_trunk' copy and paste as new layer. Resize 30%. Arrange it to bottom right above the box we just add.

19. Open your tube. Copy and paste as new layer. Resize as needed and arrange it sitting on the car.

20. Open element 'CHILI_DESIGNZ_DeliciousGlamour_cat' copy and paste as new layer. Resize 40%. Arrange it to bottom left of the car.

21. Open element 'CHILI_DESIGNZ_DeliciousGlamour_heart' copy and paste as new layer. Resize 25%. Arrange it next to your tube above the car.

22. Open element 'CHILI_DESIGNZ_DeliciousGlamour_sparkles4' copy and paste as new layer. Resize 90%.

23. Add shadow as you prefer.

24. Add copyright. Add name. Save as PNG.
Jacques ~ by Joanne Salgado


Tutorial written by Joanne Salgado on April 24th, 2016
for those who have a working knowledge of PSP.
Any resemblance to any other tutorial is coincidental.
Do not copy and paste this tutorial anywhere on the net.
If you want to translate please ask first. 

Tube: Jacques by Di Halim - you can purchase here
Kit Jacques by Bibi's Collection - you can purchase here
Font: Andover

Don't forget to save often.
At any point if you have doubts check my tag.

1. Open a new image 650x550

2. Open element 'BIBI-JACQUES ELEMS (35)' copy and paste as new layer. Resize 48%. Arrange it to bottom.

3. Open element 'BIBI-JACQUES ELEMS (120)' copy and paste as new layer. Resize 45%. Move this layer below the floor layer. Arrange it to top right.

4. Open element 'BIBI-JACQUES ELEMS (46)' copy and paste as new layer. Resize 30%. Arrange it to top left.

5. Open element 'BIBI-JACQUES ELEMS (44)' copy and paste as new layer. Resize 70%. Arrange it to bottom.

6. Open element 'BIBI-JACQUES ELEMS (43)' copy and paste as new layer. Resize 65%. Move this layer above the floor layer. Arrange it to right a little to the top.

7. Open element 'BIBI-JACQUES ELEMS (10)' copy and paste as new layer. Resize 40%. Arrange it to bottom left.

8. Open element 'BIBI-JACQUES ELEMS (14)' copy and paste as new layer. Resize 20%. Arrange it to bottom left.

9. Open element 'BIBI-JACQUES ELEMS (13)' copy and paste as new layer. Resize 20%. Arrange it to bottom left.

10. Open element 'BIBI-JACQUES ELEMS (138)' copy and paste as new layer. Resize 12%. Arrange it to bottom right.

11. Open element 'BIBI-JACQUES ELEMS (37)' copy and paste as new layer. Resize 15%. Arrange it to bottom right.

12. Open element 'BIBI-JACQUES ELEMS (134)' copy and paste as new layer. Resize 10%. Arrange it to bottom right beside the chest.

13. Open element 'BIBI-JACQUES ELEMS (132)' copy and paste as new layer. Resize 10%. Arrange it near the one we just added.

14. Open element 'BIBI-JACQUES ELEMS (133)' copy and paste as new layer. Resize 10%. Arrange it near the one we just added.

15. Open element 'BIBI-JACQUES ELEMS (24)' copy and paste as new layer. Resize 30%. Arrange it to the left of the firt bottle we added.

16. Open element 'BIBI-JACQUES ELEMS (22)' copy and paste as new layer. Resize 30%. Arrange it to the right above the barrel.

17. Open element 'BIBI-JACQUES ELEMS (1)' copy and paste as new layer. Resize 20%. Mirror. Arrange it to bottom right near the chest.

18. Add shadow as you prefer.

19. Add copyright. Add name. Save as PNG.