March 30, 2016

SHOW OFF - Spring Thing


== NEW PTU TAG TINY TURTLE DESIGNS CT ==
AND THE ART OF ALFADESIRE

Featuring "Easter Girl", tube by Alfadesire and 
"Spring Thing", Tiny Turtle Design kit at TinyTurtleDesign Store.


Alfadesire's tube can be found  at:
-> TinyTurtleDesign Store, here

Tiny Turtle Design kit can be found  at:
-> TinyTurtleDesign Store, here


Aurika ~ by Joanne Salgado


Tutorial written by Joanne Salgado on March 30th, 2016
for those who have a working knowledge of PSP.
Any resemblance to any other tutorial is coincidental.
Do not copy and paste this tutorial anywhere on the net.
If you want to translate please ask first. 

Tube: Aurika Pretty by Toriya - you can purchase here
Kit Aurika Pretty by Mysterfeerie Creation - you can purchase here
Font: Andover

Don't forget to save often.
At any point if you have doubts check my tag.

1. Open a new image 650x550

2. Open element '24' copy and paste as new layer. Arrange it to the top left. Duplicate. Mirror. Duplicate. Flip. Duplicate. Mirror.

3. Open element '28' copy and paste as new layer. Resize 50%. Plugins/Mura'S Meister/Copies with settings below: 


4. Open element '55' copy and paste as new layer. Resize 50%. Copies again with the settings below:


5. Open element '31' copy and paste as new layer. Resize 70%. Copies with the settings below:


6. Open element '18' copy and paste as new layer. Resize 30%. Copies with the settings below: 


7. Open element '37' copy and paste as new layer. Resize 30%. Flip. Copies with the settings below:


8. Open paper '08' copy and paste as new layer. Resize 40%. When we add frame, clean the parts that appears outside.

9. Open frame '03' copy and paste as new layer. Resize 70%. If you select paper to clean, don't forget to select the frame layer again to continue.

10. Open your tube. Copy and paste as new layer. Resize as needed and arrange it inside the frame. Clean the parts needed.

11. Open element '05' copy and paste as new layer. Resize 50%. Arrange it to top left.

12. Open element '07' copy and paste as new layer. Resize 50%. Arrange it to bottom right.

13. Open element '12' copy and paste as new layer. Resize 40%. Arrange it to bottom right.

14. Add shadow as you prefer.

15. Add copyright. Add name. Save as PNG.

Punk Girl 3 ~ by Joanne Salgado


Tutorial written by Joanne Salgado on March 30th, 2016
for those who have a working knowledge of PSP.
Any resemblance to any other tutorial is coincidental.
Do not copy and paste this tutorial anywhere on the net.
If you want to translate please ask first. 

Tube: Punk Girl 3 by LadyMishka - you can purchase here
Kit Punk Girl 3 by Rieneke Designs - you can purchase here
Font: A.D.MONO

Don't forget to save often.
At any point if you have doubts check my tag.

1. Open a new image 650x550

2. Open element 'RD-PunkGirl3-element (40)' copy and paste as new layer. Arrange it to bottom.

3. Open element 'RD-PunkGirl3-element (41)' copy and paste as new layer. Resize 50%. Plugins/Mura'S Meister/Copies with settings below:


4. Open element 'RD-PunkGirl3-element (28)' copy and paste as new layer. Resize 50%. Copies again with settings below:


5. Open element 'RD-PunkGirl3-element (42)' copy and paste as new layer. Resize 20%. Copies with settings below: 


6. Open element 'RD-PunkGirl3-element (43)' copy and paste as new layer. Resize 20%. Copies with settings below: 


7. Open paper 'RD-PunkGirl3-paper (1)' copy and paste as new layer. Resize 35%. After we add frame, clean the parts that appears outside the frame.

8. Open element 'RD-PunkGirl3-element (22)' copy and paste as new layer. Resize 60%.

9. Open element 'RD-PunkGirl3-element (26)' copy and paste as new layer.

10. Open element 'RD-PunkGirl3-element (25)' copy and paste as new layer.

11. Open element 'RD-PunkGirl3-element (33)' copy and paste as new layer. Arrange it to top.

12. Open element 'RD-PunkGirl3-element (49)' copy and paste as new layer. Resize 50%. Mirror. Arrange it to bottom right.

13. Open your tube. Copy and paste as new layer. Resize as needed and arrange it to bottom.

14. Open element 'RD-PunkGirl3-element (24)' copy and paste as new layer. Resize 25%. Arrange it to bottom left.

15. Open element 'RD-PunkGirl3-element (35)' copy and paste as new layer. Resize 30%. Arrange it to the top left.

16. Add shadow as you prefer.

17. Add copyright. Add name. Save as PNG.

Babette 3 ~ by Joanne Salgado


Tutorial written by Joanne Salgado on March 30th, 2016
for those who have a working knowledge of PSP.
Any resemblance to any other tutorial is coincidental.
Do not copy and paste this tutorial anywhere on the net.
If you want to translate please ask first. 

Tube: Babette 3 by Vi Nina - you can purchase here
Kit Just Remember The Memories by Rieneke Designs - you can purchase here
Font: BachelorScript

Don't forget to save often.
At any point if you have doubts check my tag.

1. Open a new image 650x550

2. Open element 'RD-JRTM-element (57)' copy and paste as new layer. Resize 70%.

3. Open element 'RD-JRTM-element (73)' copy and paste as new layer. Move this layer below the frame layer. Arrange it to bottom left. Duplicate. Mirror/Flip.

4. Open element 'RD-JRTM-element (74)' copy and paste as new layer. Arrange it to top left. Duplicate. Mirror/Flip.

5. Open element 'RD-JRTM-element (38)' copy and paste as new layer. Arrange it to bottom left. Duplicate. Flip. Duplicate. Mirror. Duplicate. Flip.

6. Open element 'RD-JRTM-element (17)' copy and paste as new layer. Resize 60%. Arrange it to top left.

7. Open element 'RD-JRTM-element (19)' copy and paste as new layer. Resize 60%. Arrange it to left.

8. Open element 'RD-JRTM-element (3)' copy and paste as new layer. Resize 60%. Arrange it to bottom left.

9. Open element 'RD-JRTM-element (4)' copy and paste as new layer. Resize 60%. Arrange it to bottom right.

10. Open element 'RD-JRTM-element (2)' copy and paste as new layer. Resize 60%. Arrange it to right.

11. Open element 'RD-JRTM-element (50)' copy and paste as new layer. Resize 60%. Arrange it to top left.

12. Open element 'RD-JRTM-element (31)' copy and paste as new layer. Resize 60%. Arrange it to top.

13. Open paper 'RD-JRTM-paper (9)' copy and paste as new layer. Resize 40%. Clean the parts outside the frame.

14. Open your tube. Copy and paste as new layer. Resize as needed. Adjust/Hue and Saturation/Colorize both 0. Change opacity to 80. Arrange it inside the frame and clean the parts outside the frame.

15. Open element 'RD-JRTM-element (75)' copy and paste as new layer. Resize 50%. Mirror. Move this layer above the frame layer. Arrange it to bottom left.

16. Open element 'RD-JRTM-element (18)' copy and paste as new layer. Resize 40%. Arrange it to bottom left.

17. Open element 'RD-JRTM-element (27)' copy and paste as new layer. Resize 30%. Arrange it to top right a little to middle.

18. Open element 'RD-JRTM-element (33)' copy and paste as new layer. Resize 40%. Arrange it to top right.

19. Add shadow as you prefer.

20. Add copyright. Add name. Save as PNG.

Bunny 3 ~ by Joanne Salgado


Tutorial written by Joanne Salgado on March 30th, 2016
for those who have a working knowledge of PSP.
Any resemblance to any other tutorial is coincidental.
Do not copy and paste this tutorial anywhere on the net.
If you want to translate please ask first. 

Tube: Bunny 3 by LadyMishka - you can purchase here
Kit Bunny 3 by A Lil Mz Brainstorm - you can purchase here
Font: Claudia

Don't forget to save often.
At any point if you have doubts check my tag.

1. Open a new image 650x550

2. Open element 'LMB_Bunny3 (31)' copy and paste as new layer. Resize 80%.

3. Open element 'LMB_Bunny3 (4)' copy and paste as new layer. Move this layer below the frame layer. Arrange it to the top left.

4. Open element 'LMB_Bunny3 (65)' copy and paste as new layer. Arrange it to the top. Duplicate. Mirror/Flip.

5. Open element 'LMB_Bunny3 (91)' copy and paste as new layer. Resize 50%. Arrange it to the bottom left. Duplicate. Mirror/Flip.

6. Open element 'LMB_Bunny3 (28)' copy and paste as new layer. Resize 50%. Arrange it to the top left. Duplicate. Mirror/Flip.

7. Open element 'LMB_Bunny3 (66)' copy and paste as new layer.

8. Open paper 'LMB_Bunny3_Paper (12)' copy and paste as new layer. Resize 37%. Arrange it inside the frame and clean the outside parts.

9. Open element 'LMB_Bunny3 (81)' copy and paste as new layer. Resize 50%. Arrange it to the top left inside the frame.

10. Open element 'LMB_Bunny3 (101)' copy and paste as new layer. Arrange it to bottom inside the frame and clean the outside parts.

11. Open element 'LMB_Bunny3 (76)' copy and paste as new layer. Arrange it to bottom inside the frame and clean the outside parts.

12. Open element 'LMB_Bunny3 (23)' copy and paste as new layer. Arrange it to bottom.

13. Open element 'LMB_Bunny3 (100)' copy and paste as new layer. Clean outside the frame.

14. Open element 'LMB_Bunny3 (25)' copy and paste as new layer. Move this layer above the frame layer. Arrange it to top.

15. Open element 'LMB_Bunny3 (106)' copy and paste as new layer. Resize 30%. Arrange it to the top left.

16. Open your tube. Copy and paste as new layer. Resize as needed. Arrange it to the right.

17. Open element 'LMB_Bunny3 (75)' copy and paste as new layer. Resize 25%. Arrange it to right.

18. Open element 'LMB_Bunny3 (73)' copy and paste as new layer. Resize 30%. Arrange it to bottom left of the frame.

19. Open element 'LMB_Bunny3 (38)' copy and paste as new layer. Resize 95%.

20. Add shadow as you prefer.

21. Add copyright. Add name. Save as PNG.

Punk Girl 2 ~ by Joanne Salgado


Tutorial written by Joanne Salgado on March 30th, 2016
for those who have a working knowledge of PSP.
Any resemblance to any other tutorial is coincidental.
Do not copy and paste this tutorial anywhere on the net.
If you want to translate please ask first. 

Tube: Punk Girl 2 by LadyMishka - you can purchase here
Kit Punked Girl 2 by Scrappin with lil ole me - you can purchase here
Font: Tenebrae

Don't forget to save often.
At any point if you have doubts check my tag.

1. Open a new image 650x550

2. Open element 'cm_el69' copy and paste as new layer. Resize 90%. Sharpen.

3. Open element 'cm_el72' copy and paste as new layer. Resize 70%. Move this layer below the frame layer. Arrange it to bottom.

4. Open element 'cm_el22' copy and paste as new layer. Resize 70%. Arrange it to the bottom right.

5. Open element 'cm_el96' copy and paste as new layer. Resize 70%. Arrange it to top. Duplicate. Flip.

6. Open element 'cm_el17' copy and paste as new layer. Resize 70%. Arrange it to the top right.

7. Open element 'cm_el88' copy and paste as new layer. Resize 70%. Rotate left 90. Arrange it to top.

8. Open element 'cm_el19' copy and paste as new layer. Arrange it to the bottom left.

9. Open element 'cm_el111' copy and paste as new layer. Arrange it to top. Duplicate. Flip.

10. Open element 'cm_el59' copy and paste as new layer. Rotate left 15. Arrange it to top.

11. Open element 'cm_el92' copy and paste as new layer. Resize 70%. Arrange it to bottom a little to the left.

12. Open element 'cm_el75' copy and paste as new layer. Resize 70%. Arrange it to bottom above the red flower we just added.

13. Open element 'cm_el86' copy and paste as new layer. Resize 70%. Arrange it to the top left.

14. Open paper 'cm_p24' copy and paste as new layer. Resize 50%. Arrange it inside the frame. Clean the outside parts.

15. Open element 'cm_el2' copy and paste as new layer. Arrange it inside the frame. Clean the outside parts.

16. Open element 'cm_el94' copy and paste as new layer. Resize 30%. Mirror. Move this layer above the frame layer. Arrange it to the top left.

17. Open element 'cm_el110' copy and paste as new layer. Resize 40%. Arrange it to the bottom left.

18. Open element 'cm_el119' copy and paste as new layer. Resize 30%. Mirror. Arrange it to the top left.

19. Open your tube. Copy and paste as new layer. Resize as needed and arrange it to bottom right.

20. Open element 'cm_el102' copy and paste as new layer. Resize 30%. Arrange it to the top left.

21. Open element 'cm_el32' copy and paste as new layer. Resize 30%. Rotate right 15. Arrange it to the top left.

22. Open element 'cm_el12' copy and paste as new layer. Resize 30%. Arrange it to bottom.

23. Add shadow as you prefer.

24. Add copyright. Add name. Save as PNG.

Bunny Pinup ~ by Joanne Salgado


Tutorial written by Joanne Salgado on March 30th, 2016
for those who have a working knowledge of PSP.
Any resemblance to any other tutorial is coincidental.
Do not copy and paste this tutorial anywhere on the net.
If you want to translate please ask first. 

Tube: Bunny Pinup by Andy Cooper - you can purchase here
Kit Bunny Pinup by Bibi's Collection - you can purchase here
Font: Theodista Decally

Don't forget to save often.
At any point if you have doubts check my tag.

1. Open a new image 650x550

2. Open element 'BIBI-BUNNY PINUP ELEM (34)' copy and paste as new layer. Resize 60%.

3. Open element 'BIBI-BUNNY PINUP ELEM (28)' copy and paste as new layer. Resize 50%. Move this layer below the frame layer. Arrange it to the top left.

4. Open element 'BIBI-BUNNY PINUP ELEM (80)' copy and paste as new layer. Resize 80%. Arrange it to the top.

5. Open element 'BIBI-BUNNY PINUP ELEM (78)' copy and paste as new layer. Resize 60%. Arrange it to the top right.

6. Open element 'BIBI-BUNNY PINUP ELEM (94)' copy and paste as new layer. Arrange it to the top left.

7. Open element 'BIBI-BUNNY PINUP ELEM (68)' copy and paste as new layer. Resize 60%. Arrange it to bottom.

8. Open element 'BIBI-BUNNY PINUP ELEM (27)' copy and paste as new layer. Arrange it to top.

9. Open element 'BIBI-BUNNY PINUP ELEM (52)' copy and paste as new layer. Resize 50%. Arrange it to top left.

10. Open element 'BIBI-BUNNY PINUP ELEM (91)' copy and paste as new layer. Arrange it to to right a little to top.

11. Open element 'BIBI-BUNNY PINUP ELEM (18)' copy and paste as new layer. Resize 60%. Move this layer above the frame layer. Arrange it to the top left of the frame.

12. Open element 'BIBI-BUNNY PINUP ELEM (53)' copy and paste as new layer. Resize 90%. Arrange it to bottom.

13. Open element 'BIBI-BUNNY PINUP ELEM (77)' copy and paste as new layer. Resize 70%. Arrange it to bottom.

14. Open element 'BIBI-BUNNY PINUP ELEM (88)' copy and paste as new layer. Resize 55%. Arrange it to bottom.

15. Open element 'BIBI-BUNNY PINUP ELEM (50)' copy and paste as new layer. Resize 30%. Mirror. Arrange it to bottom left.

16. Open element 'BIBI-BUNNY PINUP ELEM (10)' copy and paste as new layer. Resize 30%. Arrange it to bottom left.

17. Open element 'BIBI-BUNNY PINUP ELEM (48)' copy and paste as new layer. Resize 30%. Arrange it to bottom left.

18. Open your tube. Copy and paste as new layer. Resize as needed and arrange it to bottom.

19. Open element 'BIBI-BUNNY PINUP ELEM (47)' copy and paste as new layer. Resize 30%. Arrange it to bottom.

20. Open element 'BIBI-BUNNY PINUP ELEM (26)' copy and paste as new layer. Resize 20%. Arrange it to bottom in front of the egg.

21. Open element 'BIBI-BUNNY PINUP ELEM (57)' copy and paste as new layer. Resize 30%. Arrange it to the top to the right of the dotted flower.

22. Add shadow as you prefer.

23. Add copyright. Add name. Save as PNG.

Sexy Easter ~ by Joanne Salgado


Tutorial written by Joanne Salgado on March 28th, 2016
for those who have a working knowledge of PSP.
Any resemblance to any other tutorial is coincidental.
Do not copy and paste this tutorial anywhere on the net.
If you want to translate please ask first. 

Tube: Your Sexy Easter by Danny Lee
Kit Easter Morning by Chachaz Creationz
Wordart by tweety
EASTER MORNING COLLAB - you can purchase here
Font: Segoe Print

Don't forget to save often.
At any point if you have doubts check my tag.

1. Open a new image 600x200

2. Open paper 'Paper5' copy and paste as new layer.

3. Open element 'Element20'copy and paste as new layer. Arrange it to bottom right. Duplicate. Arrange it to middle. Duplicate. Arrange it to bottom right.

4. Open element 'Element17' copy and paste as new layer. Arrange it to left above the grass. Duplicate. Mirror.

5. Open element 'ELement9' copy and paste as new layer. Resize 40%. Arrange it to right.

6. Open element 'Element32' copy and paste as new layer. Resize 40%. Arrange it to the left of the flower we just added.

7. Open element 'Element28' copy and paste as new layer. Resize 40%. Arrange it to the right of the first flower we added.

8. Open element' Element16' copy and paste as new layer. Resize 40%. Arrange it to the middle, a little to the left.

9. Open element 'Element30' copy and paste as new layer. Resize 40%. Arrange it to the right of the one we just added. A little above it.

10. Open element 'Element25' copy and paste as new layer. Resize 40%. Arrange it to the right of the last flower.

11. Open element 'Element33' copy and paste as new layer. Arrange it to the left above the grass.

12. Open element 'Element26' copy and paste as new layer. Arrange it to the middle a little to the right.

13. Open element 'ELement5' copy and paste as new layer. Resize 55%. Arrange it to the middle a little to the right.

14. Open element 'Element13' copy and paste as new layer. Arrange it bottom left. Duplicate. Arrrange it so it completes the fence on the right side.

15. Open element 'ELement10' copy and paste as new layer. Resize 20%. Rotate right 15. Arrange it to bottom left.

16. Open element 'ELement11' copy and paste as new layer. Resize 20%. Arrange it to bottom left.

17. Open element 'Element34' copy and paste as new layer. Resize 30%. Arrange it to bottom left.

18. Now you'll duplicate this eggs we just added to it fills all the lower part of the canvas. Look mine for exemple.

19. Open your tube. Copy and paste as new layer. Resize as needed and arrange it around the center.

20. Open the wordart. Copy the layer 'morning' and paste as new layer. Resize 70%. Arrange it to the bottom right.

21. Still with the wordart. Copy the first 'easter' layer and paste as new layer. Resize 60%. Arrange it to above the morning wordart.

22. Add shadow as you prefer.

23. Add copyright. Add name. Save as PNG.


March 28, 2016

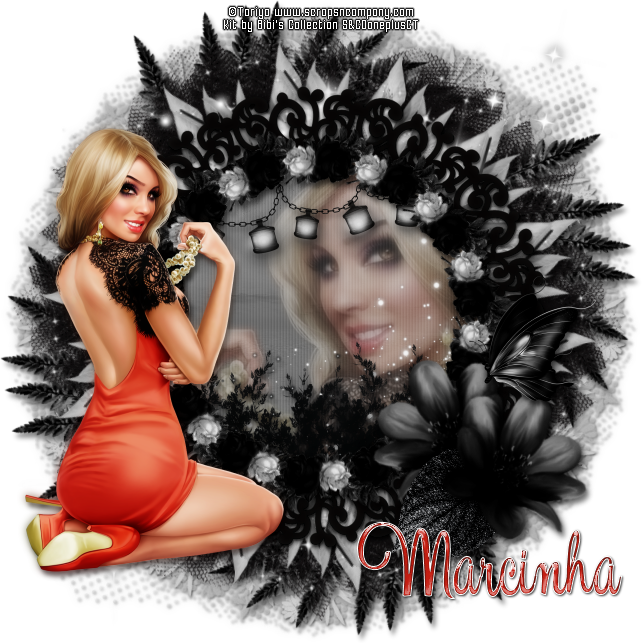
Aurika Lovely

INTO THE NIGHT TUTORIAL


Tutorial written by Marcia Salgado on March 27th, 2016
for those who have a working knowledge of PSP.
I'm using PSP9 to create my tuts.
Any resemblance to any other tutorial is coincidental.
Do not copy and paste this tutorial anywhere on the net.
If you want to translate please ask first. 

****************************************
Material:

Tube: "Aurika Lovely", by Toriya, you can purchase it here 
do not use without the proper #license.
PTU Kit "Aurika" by Bibis Collection, you can purchase it here 
Mask: Dee's mask, DD_NFM_2015_3, here 
Plugin: MuRa's Meister
Font: Esplanade Script PERSONAL USE

****************************************

--> Remember to save often and use my tag as reference if necessary. Use a Drop Shadow of your preference on layers. 


1. Create a new image 650x650.

2. Add a new layer. Fill with #c5c5c5. Apply Dee's mask. Merge group.

3. Open BIBI-AURIKA ELEMS (8). Resize 80%. Copy and paste as new layer.

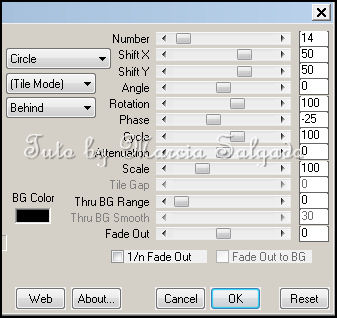
4. Open BIBI-AURIKA ELEMS (63). Copy and paste as new layer. Apply MuRa's Meister > Copies > Encircle as shown below.


5. Open BIBI-AURIKA ELEMS (35). Resize 75%. Copy and paste as new layer. Apply MuRa's Meister > Copies > Encircle with the following settings:


6. Open BIBI-AURIKA ELEMS (13). Copy and paste as new layer. 

7. Open BIBI-AURIKA ELEMS (9). Copy and paste as new layer.

8. Select inside the frame and expand > 16. Add a new layer and move it below the frame layer. open BIBI-AURIKA PAPERS (6). Copy and paste into selection. Keep selected.

9. Add a new layer and fill it with White. Low the layer opacity to 40. Apply Blinds with the follow options marked and invert the selection:


10. Open your tube and resize a little (or use a closeup). Copy and paste as new layer. Place it inside the frame and delete. Blend Mode: Luminance (L). Low the layer opacity to 26. Duplicate. Gaussian Blur: 4. Blend Mode: Soft Light. Increase the layer opacity to 100. Keep selected.

11. Open BIBI-AURIKA ELEMS (66). Resize 50%. Copy and paste as new layer. Place it inside the frame on its bottom right portion. When satisfied with placing hit delete. Keep selected.

12. Open BIBI-AURIKA ELEMS (43). Resize 25%. Copy and paste as new layer. Move it up and keep it inside the frame. Delete. Keep selected.

13. OPen BIBI-AURIKA ELEMS (82). Resize 40%. Copy and paste as new layer. Move it down and keep it inside the frame. Delete. Deselect.

14. Click on first layer (should be the black frame. Open BIBI-AURIKA ELEMS (61). Resize 15%. Copy and paste as new layer. Apply MuRa's Meister > Copies > Encircle with follow settings:


15. Open BIBI-AURIKA ELEMS (36). Resize 70%. Free Rotate: Left-45. Copy and paste as new layer. Move it down and to left. Place it over the frame bottom right border. Duplicate. Mirror. Place it on the bottom right side of the original flower.

16. Open BIBI-AURIKA ELEMS (23). Resize 50%. Move it down and a little to right. Place this leaf layer between the previous flowers layer. (Move it down one layer, then click on first layer to continue).

17. Open BIBI-AURIKA ELEMS (86). Resize 15%. Place it over the flowers.

18. Open your tube and resize it. Copy and paste as new layer. I mirrorred mine and move it to the left.

19. Select all. Clip to canvas. Crop to selection, to clean lost pixels from the closeup layer.


--> Add your copyright info and license#. Add your name and save as PNG.


March 26, 2016

Bunny 5

CUTE EASTER TUTORIAL


Tutorial written by Marcia Salgado on March 26th, 2016
for those who have a working knowledge of PSP.
I'm using PSP9 to create my tuts.
Any resemblance to any other tutorial is coincidental.
Do not copy and paste this tutorial anywhere on the net.
If you want to translate please ask first. 

****************************************
Material:

Tube: "Bunny 5", by LadyMishka Commission, you can purchase it here 
do not use without the proper #license.
PTU Kit "Bunny 5", by Blissful Designs, you can purchase it here 
Mask: Mask by Dee, DD_NFM_2015_4, here 
Font: Sunlight 

****************************************

--> Remember to save often and use my tag as reference if necessary. Use a Drop Shadow of your preference on layers. 


1. Create a new image 650x550

2. Open element 'BD_BunnyElement (8)' copy and paste as new layer. Arrange it to bottom.

3. Open element 'BD_BunnyElement (33)' copy and paste as new layer. Move this layer below the bridge layer. Arrange it to bottom.

4. Open element 'BD_BunnyElement (44)' copy and paste as new layer. Resize 30%. Arrange it to the bottom left behind the bridge a little above the grass we added there. (don't worry we'll add more elements there).

5. Open element 'BD_BunnyElement (63)' copy and paste as new layer. Resize 30%. Arrange it to the bottom left with the one we just added, a little more to the left of it.

6. Open element 'BD_BunnyElement (36)' copy and paste as new layer. Resize 50%. Arrange it to the bottom left in front of the flowers a little below it.

7. Open element 'BD_BunnyElement (1)' copy and paste as new layer. Resize 25%. Arrange it to the bottom left in front of the rocks there.

8. Open element 'BD_BunnyElement (35)' copy and paste as new layer. Resize 80%. Arrange it to the bottom right.

9. Open element 'BD_BunnyElement (71)' copy and paste as new layer. Resize 80%. Arrange it to the right.

10. Open your tube. Copy and paste as new layer. Resize as needed. Arrange it above the bridge. Clean the parts needed.

11. Open element 'BD_BunnyElement (30)' copy and paste as new layer. Resize 35%. Mirror. Move this layer above the bridge layer. Arrange it to bottom near the middle of the bridge.

12. open element 'BD_BunnyElement (69)' copy and paste as new layer. Resize 30%. Arrange it to bottom right.

13. Open element 'BD_BunnyElement (77)' copy and paste as new layer. Resize 30%. Arrange it to bottom left.

14. Open element 'BD_BunnyElement (5)' copy and paste as new layer. Resize 30%. Arrange it to botom right.

15. Open element BD_BunnyElement (16)' copy and paste as new layer. Resize 12%. Arrange it in front of the eggs at bottom left.

16. Open element 'BD_BunnyElement (49)' copy and paste as new layer. Resize 25%. Arrange it to bottom left.

17. Open element 'BD_BunnyElement (12)' copy and paste as new layer. Resize 20%. Arrange it near the basket (to the right).

18. Open element 'BD_BunnyElement (70)' copy and paste as new layer. Resize 40%. Arrange it to bottom right.

19. Open element 'BD_BunnyElement (32)' copy and paste as new layer. Resize 90%.


--> Add your copyright info and license#. Add your name and save as PNG. 


Aurika Babe

EASTER LOVE TUTORIAL


Tutorial written by Marcia Salgado on March 26th, 2016
for those who have a working knowledge of PSP.
I'm using PSP9 to create my tuts.
Any resemblance to any other tutorial is coincidental.
Do not copy and paste this tutorial anywhere on the net.
If you want to translate please ask first. 

****************************************
Material:

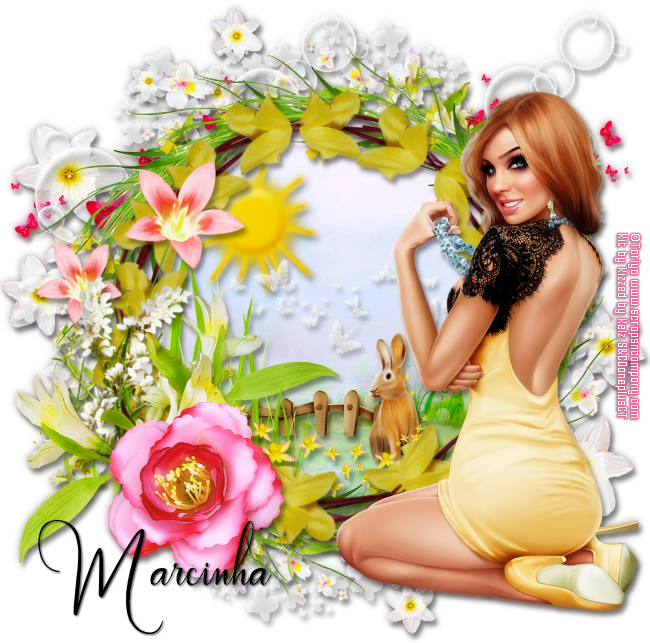
Tube: "Aurika Babe" by Toriya, you can purchase it here 
do not use without the proper #license.
PTU Kit "Aurika Babe" by Kizzed by Kelz, you can purchase it here 
Font: wallows

****************************************

--> Remember to save often and use my tag as reference if necessary. Use a Drop Shadow of your preference on layers. 


1. Create a new image 650x650.

2. Open KBK_AurikaBabe (96). Copy and paste as new layer. Rename it FR1.

3. Open KBK_AurikaBabe (39). Resize 80%. Copy and paste as new layer. Adjust it over the previous frame if needed. Duplicate. Fre Rotate: Right-18. Mirror. Erase all steams from this layer that are over the flowers from layer below. When finish, merge down.

4. Click on bottom layer (Raster 1). Open KBK_AurikaBabe (51). Copy and paste as new layer. Move it a little up and to left. Duplicate. Mirror. Move it a little down and to right. Merge down.

5. Open KBK_AurikaBabe (90). Resize 80%. Copy and paste as new layer. Move it down and to right. Duplicate. Mirror. Flip. Merge down.

6. Open KBK_AurikaBabe (126). Resize 60%. Copy and paste as new layer. Move it up and to right. Duplicate and move to left. Merge down.

7. Open KBK_AurikaBabe (84). Resize 80%. Mirror. Copy and paste as new layer. Move it down and to left. Duplicate. Mirror. Flip. Merge down.

8. Click on FR1 layer. Select inside the frame . Expand > 5. Add a new layer and move it below the frame layer. Open KBK_AurikaBabe (11). Copy and paste as new layer. Deselect.

9. Open KBK_AurikaBabe (93). Resize 35%, Move it down and to left. Place it inside the frame over the grass on the background.

10. Open KBK_AurikaBabe (64). Resize 45%. Copy and paste as new layer. Move it up and to left. Keep it inside the frame.

11. Open KBK_AurikaBabe (57). Resize 40%. Copy and paste as new layer. Move it down and to right. Keep it inside the frame.

12. Open KBK_AurikaBabe (61). Resize 50%. Copy and paste as new layer. Move it a little up. Keep it inside the frame.

13. Open KBK_AurikaBabe (74). Resize 50%. Mirror. Copy and paste as new layeMove it down and to left. Keep it inside the frame.

14. Open KBK_AurikaBabe (71). Resize 50%. Copy and paste as new layer. Move it down. Keep it inside the frame.

15. Click on first layer (should be the frame with yellow flowers). Open KBK_AurikaBabe (139). Resize 60%. Copy and paste as new layer. Move it to left and place it over the frames border.

16. Open KBK_AurikaBabe (28). Resize 45%. Mirror. Free Rotate: Left-130. Copy and paste as new layer. Move it to the left and place it over the previous flowers a little down.

17. Open KBK_AurikaBabe (69). Resize 50%. Copy and paste as new layer. Move it down and to left. Place it over the previous flowers, a little down.

18. Open KBK_AurikaBabe (3). Resize 40%. Copy and paste as new layer. Move it down and to left. Place it over the previous flowers, a little down.

19. Open your tube. Resize it. Copy and paste as new layer. Move it to the right.


--> Add your copyright info and license#. Add your name and save as PNG.


EASTER MORNING COLLAB

INNOCENT HAPPINESS TUTORIAL


Tutorial written by Marcia Salgado on March 26th, 2016
for those who have a working knowledge of PSP.
I'm using PSP9 to create my tuts.
Any resemblance to any other tutorial is coincidental.
Do not copy and paste this tutorial anywhere on the net.
If you want to translate please ask first. 

****************************************
Material:

Tube and Kit belong to a STORE COLLAB PACK 
called EASTER MORNING COLLAB
You can get it free with a purchase or you can buy it directly too.
More info HERE 
Please do not use any tube without the proper credit and license.
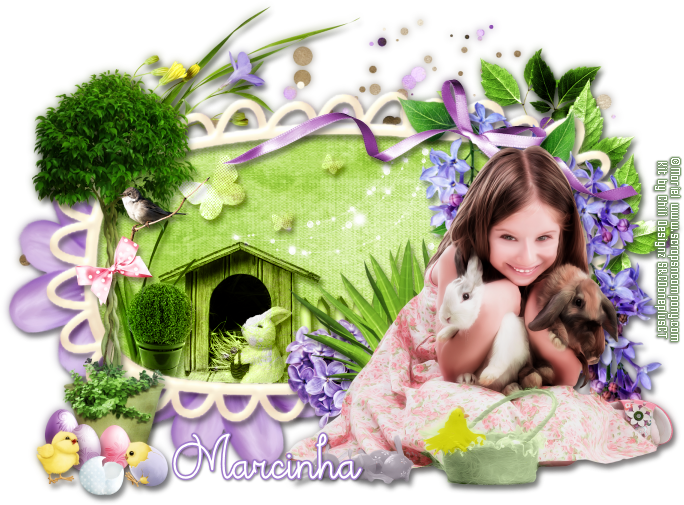
Tube used "Easter Morning" by Mariel and
Kit used "Easter Morning" by Chili Designz
Font: Theodista Decally

****************************************

--> Remember to save often and use my tag as reference if necessary. Use a Drop Shadow of your preference on layers. 


1. Create a new image 700x550. All extra spaces will be removed on the end.

2. Open CHILI_DESIGNZ_EasterMorning_frame5. Resize 75%. Copy and paste as new layer. Next elements you need to place around the frame.

3. Click on bottom layer. Open CHILI_DESIGNZ_EasterMorning_deco2. Resize 67%. Flip. Copy and paste as new layer. Move it up.

4. Open CHILI_DESIGNZ_EasterMorning_greenery3. Resize 40%. Mirror. Copy and paste as new layer. Move it to right and place it behind the frame.

5. Open CHILI_DESIGNZ_EasterMorning_deco4. Resize 40%. Copy and paste as new layer. Move it up and to left.

6. Open CHILI_DESIGNZ_EasterMorning_flower3. Resize 55%. Flip. Copy and paste as new layer. Move it down and to left. Duplicate. Free Rotate: Right-90. Move it a little up and more to left. When you satisfied with their places use merge down.

7. Click on frame layer. Select inside it and expand the selection by 5. Add a new layer and move it below the frame layer. Open CHILI_DESIGNZ_EasterMorning_paper5. Copy and paste into selection. Deselect.

8. Open CHILI_DESIGNZ_EasterMorning_sparkle4. Resize 50%. Copy and paste as new layer. Move it to right and keep it inside the frame. Blend Mode: Luminance (L).

9. Open CHILI_DESIGNZ_EasterMorning_butterflies. Resize 30%. Copy and paste as new layer. Move it a little to left and a little up. Keep it inside the frame. Blend Mode: Luminance (L).

10. Open CHILI_DESIGNZ_EasterMorning_house. Resize 30%. Copy and paste as new layer. Move it down and to left. Keep it inside the frame. Blend Mode: Luminance (L).

11. OPen CHILI_DESIGNZ_EasterMorning_fence. Resize 20%. Copy and paste as new layer. Move it down and to right. Place it on right side of the little house. Duplicate ad move it more to right. Merge down. Keep it inside the frame. Blend Mode: Luminance (L).

12. Open CHILI_DESIGNZ_EasterMorning_grass2. Resize 20%. Copy and paste as new layer. Move it down and to left. Keep it inside the frame. Blend Mode: Luminance (L).

13. OPen CHILI_DESIGNZ_EasterMorning_deco7. Resize 20%. Copy and paste as new layer. Move it down and to left. Keep it inside the frame. Blend Mode: Luminance (L).

14. Open CHILI_DESIGNZ_EasterMorning_rabbit. Resize 20%. Mirror. Copy and paste as new layer. Move it down and place it in front of the little house. Keep it inside the frame. Blend Mode: Luminance (L).

15. Click on frame layer. Open CHILI_DESIGNZ_EasterMorning_heart. Resize 40%. Copy and paste as new layer. Move it down and place over the frame bottom border. 

16. Open CHILI_DESIGNZ_EasterMorning_grass. Resize 40%. Copy and paste as new layer. Place it on right side of the purple heart.

17. Open CHILI_DESIGNZ_EasterMorning_flower2. Resize 60%. Mirror. Copy and paste as new layer. Move it to right and place it over the frame border.

18. Open CHILI_DESIGNZ_EasterMorning_ribbon. Resize 50%. Copy and paste as new layer. Move it up and to right. Place it over the frame border and the previous flower bunch.

19. Open CHILI_DESIGNZ_EasterMorning_deco6. Resize 60%. Move it a little down and to left.

20. Open CHILI_DESIGNZ_EasterMorning_bird. Resize 20%. Copy and paste as new layer. Place it on the little tree trunk.

21. Open CHILI_DESIGNZ_EasterMorning_bow2. Resize 20%. Copy and paste as new layer. Place it over the bird brunch and tree junction to hide it.

22. Open CHILI_DESIGNZ_EasterMorning_chicken, CHILI_DESIGNZ_EasterMorning_chicken2, CHILI_DESIGNZ_EasterMorning_egg, CHILI_DESIGNZ_EasterMorning_egg2, CHILI_DESIGNZ_EasterMorning_egg3 and CHILI_DESIGNZ_EasterMorning_egg8. Resize 20%. Copy and paste them all as new layer. Place them around the little tree base.

23. Open your tube. Resize it. Copy and paste as new layer. Move it down and to right. Rearrange all elements to better fit your tube.

24. Crop > Merged opaque and get rid of all extra space.


--> Add your copyright info and license#. Add your name and save as PNG.


Easter Morning ~ by Joanne Salgado


Tutorial written by Joanne Salgado on March 26th, 2016
for those who have a working knowledge of PSP.
Any resemblance to any other tutorial is coincidental.
Do not copy and paste this tutorial anywhere on the net.
If you want to translate please ask first. 

Tube: Easter Morning by Lysisange
Kit Easter Morning by Design by Joan
EASTER MORNING COLLAB - you can purchase here
Font: Andover

Don't forget to save often.
At any point if you have doubts check my tag.

1. Open a new image 650x550

2. Open element 'EASTER MORNING_DBJ-ELEM (2)' copy and paste as new layer. Resize 70%. Arrange it a little to the right.

3. Open element 'EASTER MORNING_DBJ-ELEM (28)' copy and paste as new layer. Move this layer below the frame layer. Arrange it to top.

4. Open paper 'EASTER MORNING_DBJ-PP (2)' copy and paste as new layer. Resize 40%. Arrange it inside the frame.

5. Open element 'EASTER MORNING_DBJ-ELEM (53)' copy and paste as new layer. Resize 70%. Mirror. Move this layer above the frame layer. Arrange it to bottom left.

6. Open element 'EASTER MORNING_DBJ-ELEM (34)' copy and paste as new layer. Arrange it to top right.

7. Open element 'EASTER MORNING_DBJ-ELEM (27)' copy and paste as new layer. Resize 50%. Arrange it to top right.

8. Open element 'EASTER MORNING_DBJ-ELEM (48)' copy and paste as new layer. Resize 70%. Arrange it to top left.

9. Open element 'EASTER MORNING_DBJ-ELEM (31)' copy and paste as new layer. Resize 50%. Rotate right 15. Arrange it to top right.

10. Open element 'EASTER MORNING_DBJ-ELEM (55)' copy and paste as new layer. Resize 30%. Arrange it to bottom right.

11. Open element 'EASTER MORNING_DBJ-ELEM (35)' copy and paste as new layer. Resize 70%. Arrange it to bottom.

12. Open element 'EASTER MORNING_DBJ-ELEM (52)' copy and paste as new layer. Resize 65%.

13. Open your tube. Copy and paste as new layer. Resize as needed and arrange it to bottom.

14. Open element 'EASTER MORNING_DBJ-ELEM (37)' copy and paste as new layer. Resize 30%. Arrange it to bottom left.

15. Add shadow as you prefer.

16. Add copyright. Add name. Save as PNG.