May 31, 2016

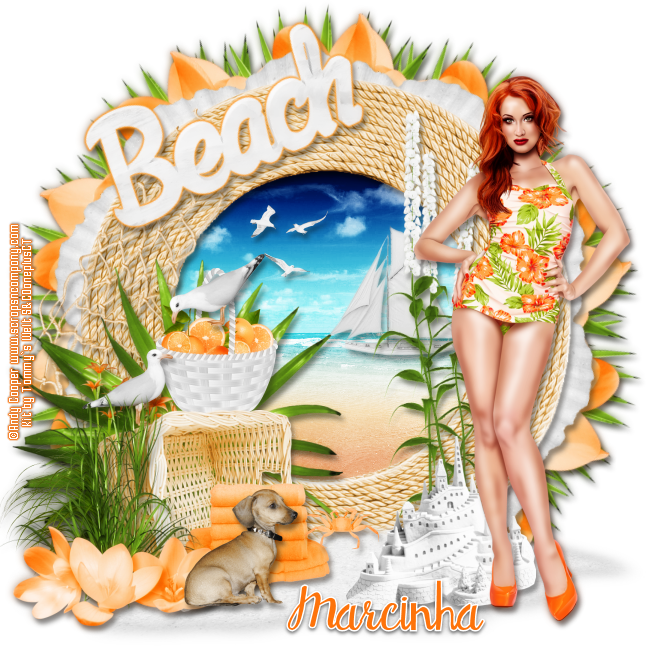
Bikini Redhead

BEACH TUTORIAL


Tutorial written by Marcia Salgado on May 30th, 2016
for those who have a working knowledge of PSP.
I'm using PSP9 to create my tuts.
Any resemblance to any other tutorial is coincidental.
Do not copy and paste this tutorial anywhere on the net.
If you want to translate please ask first. 

****************************************
Material:

Tube: "Bikini Redhead" by Andy Cooper, you can purchase it here 
do not use without the proper #license.
PTU Kit "Bikini Redhead" by Tammy's Welt, you can purchase it here 
Plugin: MuRa's Meister and Eye Candy 6
Material: my gradient, mar2016_beach1 (or mar2016_beach1 JPG), here
Font: Stephany

****************************************

--> Remember to save often and use my tag as reference if necessary. Use a Drop Shadow of your preference on layers. 


1. Create a new image 650x650.

2. Open bikini redhead (33). Resize 65%. Copy and paste as new layer. Apply MuRa's Meister > Copies > Encircle with settings below:


3. Open bikini redhead (54). Copy and paste as new layer. Use MuRa's Meister > Copies > Encircle with same settings before.

3. Open bikini redhead (71). Resize 45%. Copy and paste as new layer. Again, use MuRa's Mesiter > Copies > Encircle with same settings used before.

4. Open bikini redhead (10).png. Resize 80%. Copy and paste as new layer.

5. Select inside the frame. Expand > 10. Open paper 4. Copy and paste into selection. Keep selected.

6. Add a new layer. You can fill it using my gradient or open my mar2016_beach1 paper, copy and paste into selection. Blend Mode: Overlay. Deselect.

7. Open bikini redhead (69). Resize 20%. Copy and paste as new layer. Place it inside the frame on top at left side.

8. Open bikini redhead (60). Resize 35%. Copy and paste as new layer. Keep it inside the frame. Place it on middle at right.

9. Click on frame layer. Open bikini redhead (13). Resize 95%. Copy and paste as new layer. Move it to left and place it over the frame border.

10. Open bikini redhead (59). Copy and paste as new layer. Move it down. To keep the tag clean erase all parts showing below the whitesand layer (parts erased belong to the layers where was used MuRa's Maister filter on elements.)

11. Open bikini redhead (55). Resize 75%. Copy and paste as new layer. Move it to right. Place it over the frame border.

12. Open bikini redhead (66). Resize 50%. Copy and paste as new layer. Move it down and to right.

13. Open bikini redhead (31). Resize 60%. Copy and paste as new layer. Move it down and to left.

14. Open bikini redhead (38). Resize 45%. Copy and paste as new layer. Move it down and to left.

15. Open bikini redhead (6). Resize 30%. Copy and paste as new layer. Move it a little to left.

16. Open bikini redhead (9). Resize 30%. Mirror. Copy and paste as new layer. Place it above the oranges in the white basket.

17. Open bikini redhead (8). Resize 30%. Copy and paste as new layer. Place it near the white basket at left.

18. Open bikini redhead (14). Resize 60%. Mirror. Copy and paste as new layer. Place it below the white basket.

19. Open bikini redhead (42). Resize 30%. Copy and paste as new layer. Place it in front of the rattan basket.

20. Open bikini redhead (26). Resize 65%. Copy and paste as new layer. Move it down and to left.

21. Open bikini redhead (54). Resize 45%. Copy and paste as new layer. Move it down and to left.

22. Open bikini redhead (49). Resize 15%. Copy and paste as new layer. Move it down. Place it over the frame border at bottom.

23. Open bikini redhead (7). Resize 30%. Mirror. Copy and paste as new layer. Move it down and a little to left.

24. Open bikini redhead (67). Resize 45%. Free Rotate: Left-25. Copy and paste as new layer. Move it up and a little to left. Place it over the frame border. Add a border with color #fd730b using Eye Candy 6 > Gradient Glow with settings below:


25. Open your tube. Resize. Copy and paste as new layer. Move it to right.

26. Use Crop > Merged Opaque to get rid of all extra space.


--> Add your copyright and license#. Add your name and save as PNG.


May 30, 2016

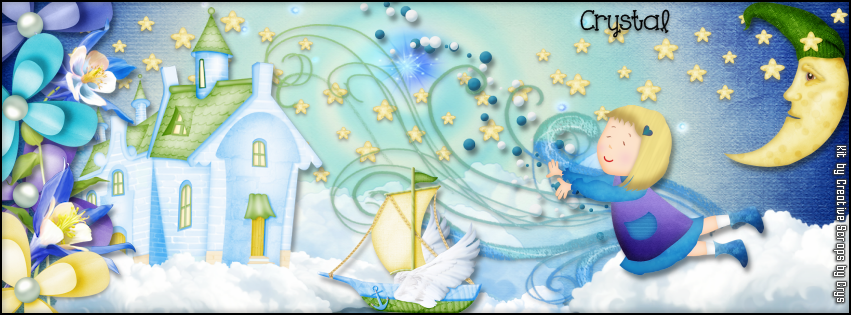
Paint Your Dreams

DREAMING TUTORIAL

**Click to see original size**

Tutorial written by Marcia Salgado on May 30th, 2016
for those who have a working knowledge of PSP.
Any resemblance to any other tutorial is coincidental.
Do not copy and paste this tutorial anywhere on the net.
If you want to translate please ask first. 

****************************************
Material:

PTU Kit "Paint Your Dreams" by Creative Scraps by Crys
you can purchase it here  
Font: KG One Thing

****************************************

--> Remember to save often and use my tag as reference if necessary. Use a Drop Shadow of your choice. 


1. Create a new image 851x315.

2. Open paper9. Copy and paste as new layer. Stretch it on both sides to fit the background size.

3. Open cloud2. Resize 45%. Copy and paste as new layer. Move way down. Showing only the top.

4. Open star. Resize 50%. Copy and paste as new layer. Move it up and to left. Duplicate. Mirror. Duplicate and move it a little down and to left, place it in the middle.

5. Open scatter. Resize 45%. Copy and paste as new layer. Move it up and a little to right.

6. Open breeze. Resize 75%. Mirror. Copy and paste as new layer. Move it to right.

7. Open moon. Resize 30%. Mirror, Copy and paste as new layer. Move it up and to right.

8. Open cloud. Resize 75%. Copy and paste as new layer. Move it down and to left. Showing only a quarter of the element.

9. Open house. Resize 65%. Mirror. Copy and paste as new layer. Move it to left.

10. Open boat. Resize 30%. Mirror. Copy and paste as new layer. Move it down.

11. Open flower 4, flower 5, flower 6 and flower 7. Resize 35%. Copy and paste them as new layer. Move them way to ledt. Use mirror and flip to better place them as a border.

12. Open flower. Resize 60%. Copy and paste as new layer. Move it up and way to left. Interlace it between the previous flowers layers.

13. Open flowers. Copy and paste as new layer. Move it down and interlace it between the flowers layers too.

14. Open dreamingirl. Resize 35%. Mirror. Copy and paste as new layer. Move it a little down and to right. 


--> Add your copyright info and license#. Add your name or initials. Save as PNG.

--> Sometimes I had to change my Timeline size to 846x313 because when I add it to Facebook the image has extra pixels and do not fit perfectly. So try this size if the same is happening to you.

-------------------------------------------------------------

My idea for the FB Picture Profile


May 29, 2016

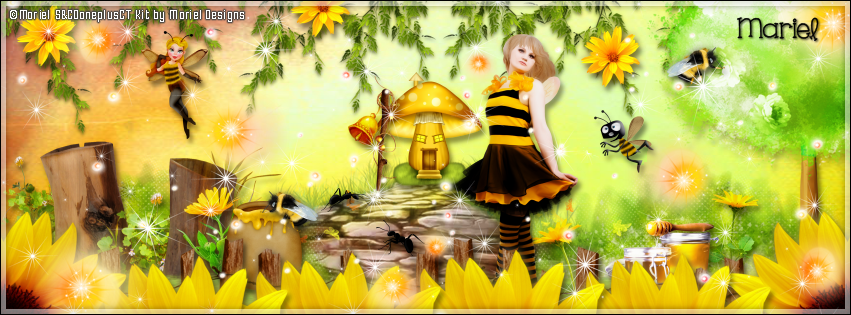
Bee Spring

BUZZING TUTORIAL

**Click to see original size**

Tutorial written by Marcia Salgado on May 29th, 2016
for those who have a working knowledge of PSP.
I'm using PSP9 to create my tuts.
Any resemblance to any other tutorial is coincidental.
Do not copy and paste this tutorial anywhere on the net.
If you want to translate please ask first. 

****************************************
Material:

Tube: "Bee Spring" by Mariel, you can purchase it here 
do not use without the proper #license.
PTU Kit "Bee Spring" by Mariel Designs, you can purchase it here 
Font: KG One Thing

****************************************

--> Remember to save often and use my tag as reference if necessary. Use a Drop Shadow of your preference on layers. 

1. Open a new image 851x315

2. Open paper 'PAPER 7' copy and paste as new layer. Use Raster Deform Tool and stretch the paper so it fills the canvas.

3. Open element '33' copy and paste as new layer. Arrange it to bottom.

4. Open element '81' copy and paste as new layer. Resize 20%. Arrange it at the end of the stone path.

5. Open element '97' copy and paste as new layer. Arrange it to the bottom right. Duplicate. Mirror.

6. Open element '14' copy and paste as new layer. Resize 50%. Arrange it to the bottom left.

7. Open element '109' copy and paste as new layer. Arrange it to the bottom right. Duplicate. Mirror.

8. Open element '48' copy and paste as new layer. Resize 15%. Arrange it to the bottom left.

9. Open element '27' copy and paste as new layer. Resize 15%. Arrange it to the bottom right.

10. Open element '26' copy and paste as new layer. Resize 15%. Arrange it to the left of the one we just added.

11. Open element '105' copy and paste as new layer. Resize 15%. Arrange it to the bottom left.

12. Open element '5' copy and paste as new layer. Resize 20%. Arrange it to the bottom right.

13. Open element '84' copy and paste as new layer. Arrange it to the top right. Duplicate. Mirror.

14. Open your tube. Copy and paste as new layer. Resize as needed and arrange it a little to the right.

15. Open element '119' copy and paste as new layer. Arrange it to the right.

16. Open element '111' copy and paste as new layer. Arrange it to the bottom right. Duplicate. Mirror.

17. Open element '116' copy and paste as new layer. Resize 10%. Arrange it to bottom.

18. Open element '117' copy and paste as new layer. Resize 10%. Arrange it to bottom.

19. Open element '28' copy and paste as new layer. Resize 10%. Arrange it to the top. Duplicate and arrange it around. Do as many as you want. I only used three.

20. Open element '31' copy and paste as new layer. Resize 20%. Arrange it to the top left.

21. Open element '32' copy and paste as new layer. Resize 12%. Arrange it to the right.

22. Open element '62' copy and paste as new layer. Resize 20%. Arrange it to the left of the mushroom.

23. Open element '113' copy and paste as new layer. Resize 10%. Arrange it above the honey pot. Duplicate. Mirror. Arrange it at the tree.

24. Open element '58' copy and paste as new layer. Resize 50%. Arrange it to the bottom right. Duplicate. Mirror. Duplicate. Arrange it to bottom. Duplicate and arrange it until you fill up all bottom part.

25. Open element '98' copy and paste as new layer. Arrange it to the left. Duplicate. Mirror/Flip.

26. Open element '79' copy and paste as new layer. Arrange it to the left. Duplicate. Mirror/Flip.

27. Add a new layer. Select all. Fill with white. Contract 6. Hit delete on your keyboard. Select none. Change opacity to 50.

28. Add a new layer. Select all. Fill with black. Contract 1. Hit delete on your keyboard. Select none.


--> Add your copyright info and license#. Add your name or initials. Save as PNG.

--> Sometimes I had to change my Timeline size to 846x313 because when I add it to Facebook the image has extra pixels and do not fit perfectly. So try this size if the same is happening to you.


--------------------------------------------------------------------

My idea for the FB Profile Picture


SHOW OFF - Yellow Spring


== NEW PTU TAG TINY TURTLE DESIGNS CT ==
AND THE ART OF ALEHANDRA VANHEK

Featuring "Geisha", tube by Alehandra Vanhek and
"Yellow Spring", Tiny Turtle Design kit at TinyTurtleDesign Store.

Alehandra Vanhek's tube can be found  at:
-> TinyTurtleDesign Store, here

Tiny Turtle Design kit can be found  at:
-> TinyTurtleDesign Store, here


She Whispers

HOPE TUTORIAL

**Click to see original size**

Tutorial written by Marcia Salgado on May 29th, 2016
for those who have a working knowledge of PSP.
I'm using PSP9 to create my tuts.
Any resemblance to any other tutorial is coincidental.
Do not copy and paste this tutorial anywhere on the net.
If you want to translate please ask first. 

****************************************
Material:

PTU Kit "She Whispers" by Hungry Hill,
you can purchase it here 
Wordart: by me, just click and save:
Font: KG Somebody That I Used to Know 

****************************************

--> Remember to save often and use my tag as reference if necessary. Use a drop shadow of your preference on layers.

1. Create a new image 851x315.

2. Open paper-4. Copy and paste as new layer.

3. Open gauze-3. Resize 75%. Copy and paste as new layer. Move it to right. Blend Mode: Overlay.

4. Open beads. Resize 65%. Copy and paste as new layer. Move it down and to right.

5. Open tiny-bling-3. Copy and paste as new layer. Move it very little to right.

6. Open wreath. Resize 50%. Copy and paste as new layer. Move it way to left. Showing only half of the wreath.

7. Open glitter. Resize 50%. Free Roatate: Right-90. Copy and paste as new layer. Move  it way to left.

8. Open light-effect. Resize 60%. Copy and paste as new layer. Move it to left. Duplicate. Mirror. Flip. Merge down.

9. Open greenery-2. Resize 45%. Copy and paste as new layer. Move it down.

10. Open rose-3. Resize 25%. Copy and paste as new layer. Move it down and a little to left.

11. Open lantern. Resize 39%. Copy and paste as new layer. Move it a little to left.

12. Open ribbon-1. Resize 40%. Copy and paste as new layer. Place it over the lantern on top.

13. Open flower-mist. Resize 50%. Mirror. Copy and paste as new layer. Move it half way to the left.

14. Open doodle-2. Resize 40%. Mirror. Copy and paste as new layer. Mo9ve it way to left.

15. Open doodle-1. Resize 40%. Mirror. Copy and paste as new layer. Move it way to right.

16. Open dove. Resize 30%. Mirror. Copy and paste as new layer. Move it very little up and a little to right.

17. Open my wordart. Copy and apste as new layer and place it on right.


--> Add your copyright info and license#. Add your name or initials. Save as PNG.

--> Sometimes I had to change my Timeline size to 846x313 because when I add it to Facebook the image has extra pixels and do not fit perfectly. So try this size if the same is happening to you.


------------------------------------------------------------

My idea for the FB Profile Picture


Queen ~ by Joanne Salgado


Tutorial written by Joanne Salgado on May 19th, 2016
for those who have a working knowledge of PSP.
I'm using PSP9 to create my tuts.
Any resemblance to any other tutorial is coincidental.
Do not copy and paste this tutorial anywhere on the net.
If you want to translate please ask first. 

****************************************
Material:

Tube: "Queens" by Toriya - you can purchase it here
do not use without the proper #license.
PTU Kit "Queen" by Kizzed by Kelz - you can purchase it here
Font: Perfumerie Script Old Style

****************************************

Don't forget to save often.
At any point if you have doubts check my tag.

1. Open a new image 650x550

2. Open element 'KBK_Queen (4)' copy and paste as new layer.

3. Open paper 'KBK_Queen (30)' copy and paste as new layer. Arrange it inside the frame and clean the outside parts.

4. Open element 'KBK_Queen (100)' copy and paste as new layer. Mirror. Arrange it to the top right.

5. Open element 'KBK_Queen (9)' copy and paste as new layer. Rotate left 5. Arrange it to the left.

6. Open element 'KBK_Queen (34)' copy and paste as new layer. Resize 50%. Move this layer below the layer from element (9). Arrange it to the right.

7. Open element 'KBK_Queen (62)' copy and paste as new layer. Resize 50%. Mirror. Arrange it to the bottom right.

8. Open element 'KBK_Queen (98)' copy and paste as new layer. Arrange it to the top left. Duplicate. Mirror. Arrange it to the bottom right.

9. Open element 'KBK_Queen (32)' copy and paste as new layer. Resize 50%. Arrange it to the top left.

10. Open element 'KBK_Queen (65)' copy and paste as new layer. Resize 50%. Arrange it to the bottom right.

11. Open element 'KBK_Queen (24)' copy and paste as new layer. Resize 50%. Arrange it to the right.

12. Open element 'KBK_Queen (67)' copy and paste as new layer. Resize 30%. Arrange it to the bottom right.

13. Open element 'KBK_Queen (61)' copy and past as new layer. Resize 50%. Arrange it to the top left. Duplicate. Mirror. Arrange it to the bottom right.

14. Open element 'KBK_Queen (35)' copy and paste as new layer. Resize 50%. Arrange it to the top right.

15. Open element 'KBK_Queen (59)' copy and paste as new layer. Resize 70%. Arrange it to bottom.

16. Open your tube. Copy and paste as new layer. Resize as needed. Move this layer above the layer from element (9). Arrange it above the element and clean the outside parts.

17. Open element 'KBK_Queen (5)' copy and paste as new layer. Resize 50%. Arrange it to the bottom left.

18. Add shadow as you prefer.

19. Add copyright. Add name. Save as PNG.

May 21, 2016

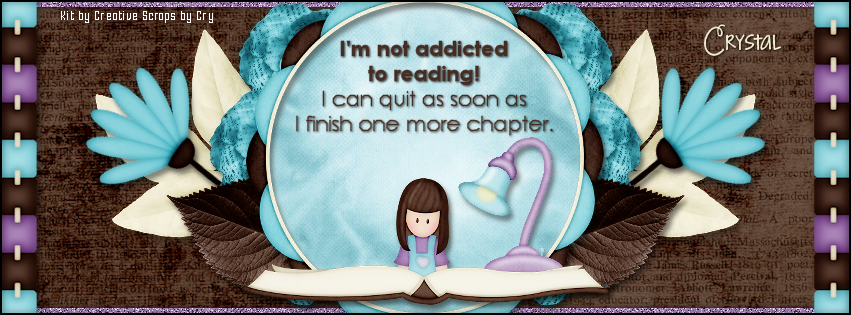
A Passion for Reading

READING TUTORIAL

**Click to see original size**

Tutorial written by Marcia Salgado on May 21th, 2016
for those who have a working knowledge of PSP.
Any resemblance to any other tutorial is coincidental.
Do not copy and paste this tutorial anywhere on the net.
If you want to translate please ask first. 

****************************************
Material:

PTU Kit "A Passion for Reading" by Creative Scraps by Crys
you can purchase it here 
Wordart: by me, just click and save.

Font: KG Strawberry Limeade

****************************************

--> Remember to save often and use my tag as reference if necessary. Use a Drop Shadow of your choice. 


1. Create a new image 815x315.

2. Open APFR_Paper_8. Copy and paste as new layer.

3. Open APFR_Paper_1. Copy and paste as new layer. Low the layer opacity to 64. Blend Mode: Soft Light.

4. Add a new layer. Select all. Fill it with #aa87b6. Contract > 7. Deselect. Noise: Random - 55 - Monochrome. 

5. Open APFR_Frame_3. Copy and paste as new layer. Move it way to left. Leave it showing only the right side of the frame. Duplicate. Mirror. Merge down.


6. Open APFR_Frame_2. Resize 60%. Copy and paste as new layer. 

7. Open APFR_Element_20. Resize 45%. Copy and paste as new layer. Move it up and to right. Duplicate. Mirror. Merge down.

8. Open APFR_Element_4. Resize 60%. Free Rotate: Left-55. Copy and paste as new layer. Move it to left. Duplicate. Mirror. Merge down.

9. Open APFR_Element_21. Resize 30%. Copy and paste as new layer. Move it up and to right. Duplicate it twice and place all three around the frame. Merge these three layers together. Duplicate. Mirror. Merge down.

10. Open APFR_Element_19. Resize 35%. Copy and paste as new layer. Move it down and to right. Duplicate. Mirror. Merge down.

11. Click on frame layer. Select inside the frame. Expand > 5. Add a new layer and move it below the frame layer. Open APFR_Paper_6. Copy and paste into selection. Deselect.

12. Click on frame layer again. Open APFR_Element_10. Resize 30%. Copy and paste as new layer. Move it a little down and a little to right.

13. Open APFR_Element_25. Resize 60%. Copy and paste as new layer. Move it down.

14. Open my wordart. Copy and paste as new layer. Move it up.


--> Add your copyright info and license#. Add your name or initials. Save as PNG.

--> Sometimes I had to change my Timeline size to 846x313 because when I add it to Facebook the image has extra pixels and do not fit perfectly. So try this size if the same is happening to you.


May 20, 2016

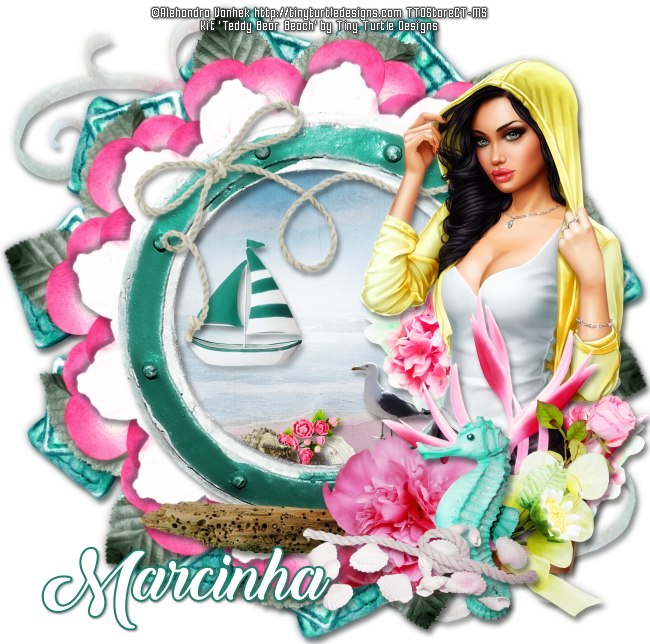
Teddy Bear Beach with Kate

ON THE BEACH TUTORIAL


Tutorial written by Marcia Salgado on May 20th, 2016
for those who have a working knowledge of PSP.
Any resemblance to any other tutorial is coincidental.
Do not copy and paste this tutorial anywhere on the net.
If you want to translate please ask first. 

****************************************
Material:

Tube: "Kate" by Alehandra Vanhek, you can purchase it here 
do not use without the proper #license.
PTU Kit "Teddy Bear Beach" by Tiny Turtle Designs, you can purchase it here 
Plugin: MuRa's Meister
Font: Back to Black Demo

****************************************

--> Remember to save often and use my tag as reference if necessary. Use a Drop Shadow of your preference.


1. Create a new image 650x650.

2. Open Teddy Bear Beach Elements (66). Copy and paste as new layer.

3. Open Teddy Bear Beach Elements (26). Resize 50%. Copy and paste as new layer. Apply MuRa's Meister > Copies > Encircle with settings below:


4. Open Teddy Bear Beach Elements (44). Resize 40%. Flip. Copy and paste as new layer. Move it up. Duplicate. Mirror. Flip. Merge down. Duplicate. Free Rotate: Left-60. Duplicate. Free Rotate: Left-60. Merge these three layers together.


5. Open Teddy Bear Beach Elements (25). Resize 40%. Copy and paste as new layer. Apply MuRa's Meister > Copies > Encircle with settings below:


6. Open Teddy Bear Beach Elements (33). Resize 35%. Copy and paste as new layer. Apply MuRa's Meister > Copies > Encircle with settings below:


7. Open Teddy Bear Beach Elements (22). Resize 70%. Copy and paste as new layer.

8. Select inside the frame. Expand > 5. Add a new layer and move it below the frame layer. Open Teddy Bear Beach Papers (10). Copy and paste into selection. Deselect.

9. The next four elements are to used inside the frame. Open Teddy Bear Beach Elements (2). Resize 20%. Copy and paste as new layer. Move it to left and place it over the water on paper background.

10. Open Teddy Bear Beach Elements (40). Resize 15%. Copy and paste as new layer. Move it down and to right. Place it over the sand on paper background.

11. Open Teddy Bear Beach Elements (50). Resize 15%. Copy and paste as new layer. Move it down and a little to left.

12. Open Teddy Bear Beach Elements (48). Resize 15%. Copy and paste as new layer. Move it down and place it in front of the first shell.

13. Open Teddy Bear Beach Elements (62). Resize 10%. Copy and paste as new layer. Move it down and a little to left. Place it in front of the previous flower a little more to left than the first shell.

14. Click on frame layer.Open Teddy Bear Beach Elements (60). Resize 70%. Copy and paste as new layer. Move it up and to left. Place it over the frame border.

15. Open your tube. Resize. Copy and paste as new layer. Move it to right.

16. Open Teddy Bear Beach Elements (6). Resize 35%. Free Rotate: Left-90. Copy and paste as new layer. Move it to right and send this layer below the tube layer. Place it on left side of the tube. Duplicate. Mirror. Move it more to right and a little down. Place both around the tube. When finish the placement, merge down.

17. Click on tube layer. Open Teddy Bear Beach Elements (17). Resize 45%. Mirror. Copy and paste as new layer. Move it a little down and to right.

18. Open Teddy Bear Beach Elements (27). Resize 35%. Copy and paste as new layer. Move it down and to right.

19. Open Teddy Bear Beach Elements (7). Resize 45%. Copy and paste as new layer. Move it down and to right.

20. Open Teddy Bear Beach Elements (74). Resize 60%. Copy and paste as new layer. Move it down and a little to left.

21. Open Teddy Bear Beach Elements (15). Resize 35%. Copy and paste as new layer. Move it down and a little to right. Place it on left side of previous flower.

22. Open Teddy Bear Beach Elements (114). Resize 35%. Mirror. Copy and paste as new layer. Move it down and to right. Place it between the rose and the yellow flower.

23. Open Teddy Bear Beach Elements (71). Resize 40%. Copy and paste as new layer. Move it down and a little to right.

24. Use Crop > Merged Opaque and get rid of all extra space.


--> Resize the tag if wanted. Add your copyright info and license#. Add your name and save as PNG.


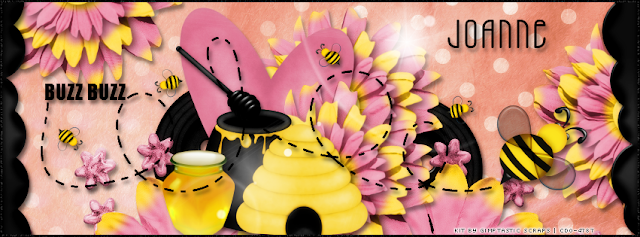
Buzz Buzz ~ by Joanne Salgado


Tutorial written by Joanne Salgado on May 20th, 2016
for those who have a working knowledge of PSP.
I'm using PSP9 to create my tuts.
Any resemblance to any other tutorial is coincidental.
Do not copy and paste this tutorial anywhere on the net.
If you want to translate please ask first. 

****************************************
Material:

PTU Kit "Cuddly Rigor Mortis-April-2016-bt" by Gimptastic Scraps - you can purchase it here
Font: A.D.MONO

****************************************

Don't forget to save often.
At any point if you have doubts check my tag.

1. Open a new image 851x315

2. Open paper 'GS-CRM_April2016BT_paper2' copy and paste as new layer.

3. Open paper 'GS-CRM_April2016BT_paper6' copy and paste as new layer. Change blend to soft light.

4. Open element 'GS-CRM_April2016BT_ele3' copy and paste as new layer. Resize 50%. Arrange it to bottom.

5. Open element 'GS-CRM_April2016BT_ele8' copy and paste as new layer. Move this layer below the beehive layer and arrange it to the right. Duplicate. Mirror.

6. Open element 'GS-CRM_April2016BT_ele19' copy and paste as new layer. Arrange it to bottom.

7. Open element 'GS-CRM_April2016BT_ele6' copy and paste as new layer. Arrange it to the top a little to the right.

8. Open element 'GS-CRM_April2016BT_ele2' copy and paste as new layer. Arrange it to the top a little to the left.

9. Open element 'GS-CRM_April2016BT_ele15' copy and paste as new layer. Arrange it to the bottom right. Duplicate. Mirror.

10. Open element 'GS-CRM_April2016BT_ele6' copy and paste as new layer. Arrange it to the top left. Duplicate. Arrange it behind the beehive a little to the right. Duplicate. Arrange it to the right.

11. Open element 'GS-CRM_April2016BT_ele4' copy and paste as new layer. Resize 50%. Arrange it behind the beehive a little to the left.

12. Open element 'GS-CRM_April2016BT_ele13' copy and paste as new layer. Resize 50%. Arrange it to the left of the black honey cup.

13. Open element 'GS-CRM_April2016BT_ele12' copy and paste as new layer. Resize 50%. Arrange it above the black honey cup.

14. Open element 'GS-CRM_April2016BT_ele20' copy and paste as new layer. Move this layer above the beehive. Arrange it to bottom left.

15. Open element 'GS-CRM_April2016BT_ele1' copy and paste as new layer. Resize 40%. Mirror. Arrange it to the right at the end of the bee trail.

16. Open element 'GS-CRM_April2016BT_wordart2'. Using the Freehand selection tool select the bees around the letter that are available to select without having to clean it all up and copy and paste it as new layer and arrange it around the canvas. Put as many as you want, I used 4. There are just two around this wordart to freely select, just mirror, flip ir around to change the ways they're going.

17. Open element 'GS-CRM_April2016BT_ele9' copy and paste as new layer. Arrange it at the center.

18. Open element 'GS-CRM_April2016BT_frame1' copy and paste as new layer. Use the border to create your own border. Arrange it to the left and the duplicate and arrange it to the right. See mine.

19. Add a new layer. Select all. Fill with black. Contract 1. Add noise uniform/50/monochrome checked. Contract 2. Hit delete on your keyboard. Select none.

20. Add shadow as you prefer.

21. Add copyright. Add name. Save as PNG.


May 19, 2016

Orchidee

MOUSELOVE TUTORIAL


Tutorial written by Marcia Salgado on May 19th, 2016
for those who have a working knowledge of PSP.
I'm using PSP9 to create my tuts.
Any resemblance to any other tutorial is coincidental.
Do not copy and paste this tutorial anywhere on the net.
If you want to translate please ask first. 

****************************************
Material:

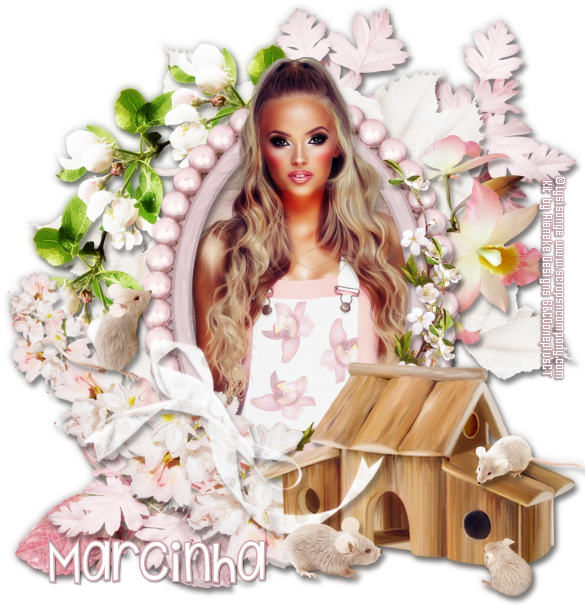
Tube: "Orchidee" by Lysisange, you can purchase it here 
do not use without the proper #license.
PTU Kit "Orchidee" by Rieneke Designs, you can purchase it here 
Font: KG Shake it Off

****************************************

--> Remember to save often and use my tag as reference if necessary. Use a Drop Shadow of your preference on layers.

1. Create a new image 650x650.

2. Open RD-Orchidee-element (5). Resize 80%. Copy and paste as new layer.

3. Select inside the frame. Expand > 5. Add anew layer and move it below the frame layer. Open RD-Orchidee-paper (2). Copy and paste into selection. Add a new layer. Open RD-Orchidee-paper (3). Copy and paste into selection. Enhance. Blend Mode: Multiply. Invert selection.

4. Click on frame layer. Open your tube, Resize if needed. Copy and paste as new layer. Place it inside the frame. Erase the parts outide the frame on both sides and at the bottom. Select all. Clip to canvas. Crop to selection.

5. Open RD-Orchidee-element (15). Resize 45%. Copy and paste as new layer. Move it down and to left. Send this layer to bottom.

6. Open RD-Orchidee-element (47). Resize 65%. Copy and paste as new layer. Move it up and to right.

7. Open RD-Orchidee-element (46). Resize 55%. Copy and paste as new layer. Move it down and to left.

8. Open RD-Orchidee-element (49). Copy and paste as new layer. Place it behind the frame.

9. Open RD-Orchidee-element (22). Resize 40%. Free Rotate: Left-90. Copy and paste as new layer. Move it to right.

10. Open RD-Orchidee-element (35). Resize 55%. Mirror. Copy and paste as new layer. Move it up and to left.

11. Click on frame layer. Open RD-Orchidee-element (50). Resize 55%. Copy and paste as new layer. Move it down and to right.

12. Click on tube layer. Open RD-Orchidee-element (16). Resize 70%. Copy and paste as new layer. Move it down and to left.

13. Open RD-Orchidee-element (20). Resize 60%. Copy and paste as new layer. Move it down and to right.

14. Open RD-Orchidee-element (26). Resize 50%. Free Rotate: Right-45. Copy and paste as new layer. Move it down and to left. Place over the frame border.

15. Open RD-Orchidee-element (10). Resize 30%. Copy and paste as new layer. Move it down and to right.

16. Open RD-Orchidee-element (19). Resize 25%. Mirror. Copy and paste as new layer. Move it to left. Place it over the ribbon.

17. Open RD-Orchidee-element (33). Resize 25%. Copy and paste as new layer. Move it down and to right. Place it over the woodhouse.

18. Open RD-Orchidee-element (14). Resize 15%. Copy and paste as new layer. Move it down and to right.

19. Use Crop > Merged Opaque to get rid of all extra spaces.


--> Add your copyright info and license#. Add your name and save as PNG.


Harmony ~ by Joanne Salgado


Tutorial written by Joanne Salgado on May 19th, 2016
for those who have a working knowledge of PSP.
I'm using PSP9 to create my tuts.
Any resemblance to any other tutorial is coincidental.
Do not copy and paste this tutorial anywhere on the net.
If you want to translate please ask first. 

****************************************
Material:

Tube: "Harmony" by Lysisange - you can purchase it here
do not use without the proper #license.
PTU Kit "Harmony" by Rieneke Designs - you can purchase it here
Mask 'DD_NFM_2015_5' by Dee here
Font: Dorayaki

****************************************

Don't forget to save often.
At any point if you have doubts check my tag.

1. Open a new image 650x550

2. Open paper 'RD-Harmony-paper (5)' copy and paste as new layer. Apply your mask and merge group.

3. Open element 'RD-Harmony-element (35)' copy and paste as new layer. Arrange it to the top left.

4. Open element 'RD-Harmony-element (52)' copy and paste as new layer. Arrange it to the bottom right.

5. Open element 'RD-Harmony-element (46)' copy and paste as new layer. Arrange it to the bottom left. Duplicate. Mirror.

6. Open element 'RD-Harmony-element (29)' copy and paste as new layer. Resize 50%. Arrange it to the bottom right.

7. Open element 'RD-Harmony-element (24)' copy and paste as new layer. Resize 60%. Mirror. Arrange it to the bottom left.

8. Open element 'RD-Harmony-element (34)' copy and paste as new layer. Arrange it to bottom.

9. Open element 'RD-Harmony-element (55)' copy and paste as new layer. Resize 70%. Arrange it to the bottom right.

10. Open element 'RD-Harmony-element (57)' copy and paste as new layer. Resize 20%. Arrange it to the bottom right of the rock.

11. Open element 'RD-Harmony-element (44)' copy and paste as new layer. Resize 20%. Arrange it to the top left of the rock.

12. Open element 'RD-Harmony-element (37)' copy and paste as new layer. Resize 40%. Arrange it to the bottom right.

13. Open element 'RD-Harmony-element (25)' copy and paste as new layer. Resize 20%. Arrange it to the bottom right.

14. Open element 'RD-Harmony-element (53)' copy and paste as new layer. Resize 60%. Arrange it to bottom.

15. Open element 'RD-Harmony-element (4)' copy and paste as new layer. Resize 30%. Arrange it to bottom.

16. Open element 'RD-Harmony-element (39)' copy and paste as new layer. Resize 20%. Arrange it above the rock.

17. Open element 'RD-Harmony-element (12)' copy and paste as new layer. Resize 20%. Arrange it above the rock.

18. Open element 'RD-Harmony-element (54)' copy and paste as new layer. Resize 30%. Arrange it to the bottom left.

19. Open element 'RD-Harmony-element (38)' copy and paste as new layer. Resize 20%. Arrange it to the bottom a little to the right. It will appear at the left of your tube. If needed arrange it again later.

20. Open element 'RD-Harmony-element (6)' copy and paste as new layer. Resize 20%. Arrange it above the wagon.

21. Open your tube. Copy and paste as new layer. Resize as needed and arrange it to the bottom right.

22. Open element 'RD-Harmony-element (19)' copy and paste as new layer. Resize 20%. Arrange it to the bottom left of your tube.

23. Add shadow as you prefer.

24. Add copyright. Add name. Save as PNG.

Kate Lee

PINK-A-LICIOUS TUTORIAL


Tutorial written by Marcia Salgado on May 19th, 2016
for those who have a working knowledge of PSP.
I'm using PSP9 to create my tuts.
Any resemblance to any other tutorial is coincidental.
Do not copy and paste this tutorial anywhere on the net.
If you want to translate please ask first. 

****************************************
Material:

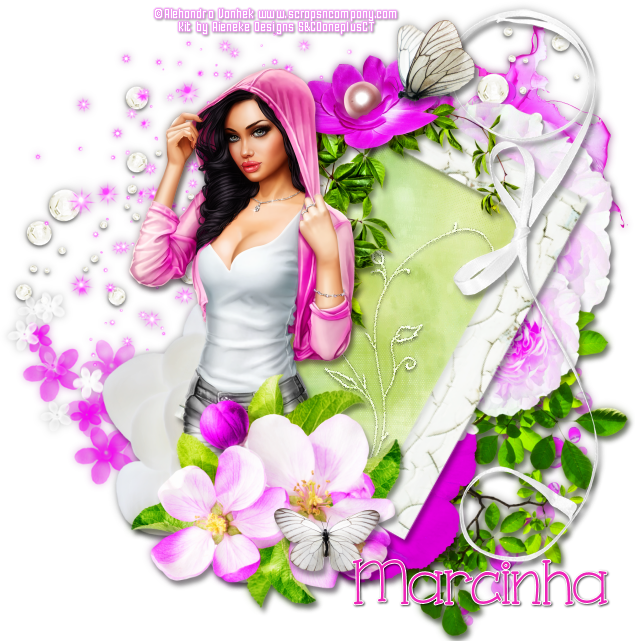
Tube: "Kate Lee" by Alehandra Vanhek, you can purchase it here 
do not use without the proper #license.
PTU Kit "Kate Lee" by Rieneke Designs, you can purchase it here 
Font: KG One Thing

****************************************

--> Remember to save often and use my tag as reference if necessary. Use a Drop Shadow of your preference on layers. 


1. Create a new image 650x650.

2. Open RD-KateLee-element (9). Resize 70%. Free Rotate: Right-120. Copy and paste as new layer. Move it to right.

3. Select inside the frame. Expand > 5. Add a new layer and move under the frame layer. Open RD-KateLee-paper (5). COpy and paste into seection. Deselect.

4. Open RD-KateLee-element (34). Resize 70%. Free Rotate: Left-35.  Copy and paste as new layer. Add Noise: Random, 55, Monochrome. Move it down and place it on right side of the frame.

5. Open RD-KateLee-element (14). Resize 50%. Copy and paste as new layer. Move it up and to right. Move this layer to bottom.

6. Open RD-KateLee-element (31). Copy and paste as new layer. Move it way to right.

7. Open RD-KateLee-element (40). Copy and paste as new layer. Move it up.

8. Open RD-KateLee-element (46). Copy and paste as new layer. Move it to left and a little up.

9. Open RD-KateLee-element (24). Resize 60%. Copy and paste as new layer. Move it up and to right. Duplicate Resize 60%. Move it a little down and a little more to right.

10. Open RD-KateLee-element (12). Resize 65%. Copy and paste as new layer. Move this layer down and keep it between the roses layers.

11. Open RD-KateLee-element (28). Resize 50%. Copy and paste as new layer. Move it down and to right.

12. Open RD-KateLee-element (25). Copy and paste as new layer. Move it down and to left.

13. Open RD-KateLee-element (48). Resize 70%. Copy and paste as new layer. Move it down and to left.

14. Click on first layer (should be the frame). Open RD-KateLee-element (22). Resize 55%. Copy and paste as new layer. Move it up and place on upper left frame corner.

15. Open RD-KateLee-element (38). Resize 30%. Copy and paste as new layer. Move it up and to left. Place it over the previous foliage.

16. Open your tube. Resize. Move it to left.

17. Open RD-KateLee-element (10). Resize 55%. Copy and paste as new layer. Place it over the tube's legs.

18. Open RD-KateLee-element (6). Copy and paste as new layer. Move it to right. Place it over the frame border.

19. Open RD-KateLee-element (30). Resize 25%. Copy and paste as new layer. Move it up and place it over the top flower.

20. Open RD-KateLee-element (29). Resize 20%. Copy and paste as new layer. Move it down and place it over the bottom flowers.

21. Use Crop > Merged Opaque to get rid of all extra spaces.


--> Add your copyright info and license#. Add your name and save as PNG.


May 18, 2016

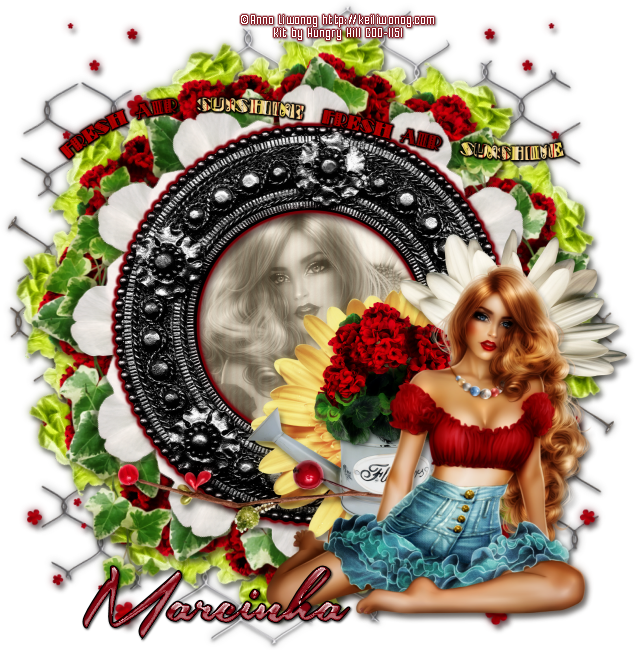
Down Home

BLOSSOM TUTORIAL


Tutorial written by Marcia Salgado on May 18th, 2016
for those who have a working knowledge of PSP.
I'm using PSP9 to create my tuts.
Any resemblance to any other tutorial is coincidental.
Do not copy and paste this tutorial anywhere on the net.
If you want to translate please ask first. 

****************************************
Material:

Tube: "Individual Tube 76-3" by Anna Liwanag, you can purchase it here,
do not use without the proper #license.
PTU Kit "Down Home" by Hungry Hill,
you can purchase it here 
Plugin: Eye Candy 6 and MuRa's Meister
Font: Southern Aire Personal Use Only 

****************************************

--> Remember to save often and use my tag as reference if necessary. Use a drop shadow of your preference on layers.

1. Create a new image 650x650.

2. Open chickenwire. Resize 75%. Copy and paste as new layer. Move it up. Duplicate. Mirror. Flip. Merge down.

3. Open flower-fall. Resize 75%. Copy and paste as new layer. Move it to left. Keep it over the wire border. Duplicate. Mirror. Merge down.

4. Open veggie-2. Resize 40%. Copy and paste as new layer. Apply MuRa's Meister > Copies > Encircle as I show below:


5. Open pitcher-1. Resize 30%. Copy and paste as new layer. Apply MuRa's Meister > Copies > Encircle with the same settings used before.

6. Open ivy-3. Resize 70%. Copy and paste as new layer.

7. Open flower-1. Resize 20%. Apply MuRa's Meister > Copies > Encircle with the same settings used before.

8. open frame-2. Resize 50%. Copy and paste as new layer.

9. Select inside the frame. Expand > 5. Add a new layer and move it below the frame layer. Open paper-6. Copy and paste into selection. Invert selection.

10. Open your tube close up. Resize if needed. I mirrored mine. Copy and paste as new layer. Place it inside the frame. Delete. Select all. Clip to canvas. Crop to selection. Colorize: 0-0. Low the layer opacity to 54.

11. Click on frame layer. Apply Eye Candy 6 > Gradient Glow using the color #81040f aborder with the settings below, twice (the effect is different when you apply the filter twice with this settings, but if you prefer just change from 1 to 2 on the first option):


12. Open flower-2. Resize 35%. Copy and paste as new layer. Move it down and to right. Place it over the bottom quarter of the frame.

13. Open daisy-2. Resize 30%. Copy and paste as new layer. Move it to right and a little down. Place it over the frame's border.

14. Open pitcher-1. Resize 30%. Copy and paste as new layer. Move it down and to right. Place it over the yellow flower.

15. Open berry-deco-3. Resize 35%. Copy and paste as new layer. Move it down and to left.

16. Open your tube. Resize. Copy and paste as new layer. Move it down and to right.

17. Open WA-2. Resize 65%. Apply Eye Candy > Gradient Glow using color Black with the same settings before, but only once this time. Copy and paste as new layer.

18. Use Crop > Merged Opaque and get rid of all extra spaces.


--> Resize it if wanted. Add your copyright info and license#. Add your name and save as PNG.


May 17, 2016

IB-CuddlyRigorMortis-May-2016-BT

BLOOMING TUTORIAL

**Click to see original size**

Tutorial written by Marcia Salgado on May 17th, 2016
for those who have a working knowledge of PSP.
I'm using PSP9 to create my tuts.
Any resemblance to any other tutorial is coincidental.
Do not copy and paste this tutorial anywhere on the net.
If you want to translate please ask first. 

****************************************
Material:

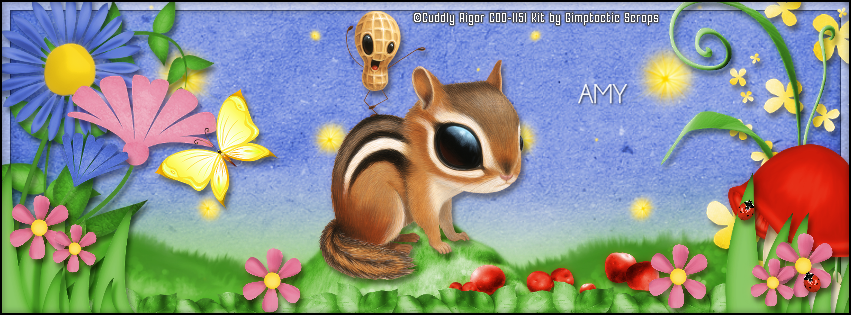
Tube: "Individual Tube 70-1" by Cuddly Rigor Mortis, you can purchase it here,
do not use without the proper #license.
PTU Kit "IB-CuddlyRigorMortis-May-2016-BT" by Gimptastic Scraps,
you can purchase it here 
Mask: by me, just click and save

Font: Champagne & Limousines 

****************************************

--> Remember to save often and use my tag as reference if necessary. Use a drop shadow of your preference on layers.

1. Create a new image 851x315.

2. Open GS-CRM_May2016BT_paper6. Copy and paste as new layer.

3. Open GS-CRM_May2016BT_paper1. Copy and paste as new layer. Apply my mask and merge group. The mask will show where you have to add the ground elements.

4. Open GS-CRM_May2016BT_ele10. Resize 50%. Copy and paste as new layer. Move it a little to left. Duplicate. Mirror. Merge down.

5. Add a new layer. Select all and fill it with White. Contract > 8. Delete. Fill it with black. Contract > 1. Delete. Deselect. Low the layer opacity to 50.

6. Open GS-CRM_May2016BT_ele2. Copy and paste as new layer. Move it down and to left. Duplicate. Mirror. Move a little more to right. Merge down.

7. Open GS-CRM_May2016BT_ele14. Resize 65%. Copy and paste as new layer. Move it down.

8. Open GS-CRM_May2016BT_ele3. Resize 50%. Copy and paste as new layer. Move down and to right.

9. Open GS-CRM_May2016BT_ele16. Resize 45%. Copy and paste as new layer. Move it down. Duplicate and move it to right. Duplicate again and move it to left. Create a line at the bottom. Merge all 3 layers together.

10. Open GS-CRM_May2016BT_ele18. Resize 75%. Copy and paste as ne layer. Move it way to left.

11. Open GS-CRM_May2016BT_ele17. Mirror. Copy and paste as ne layer. Move it a little up and way to left.

12. Open GS-CRM_May2016BT_ele4. Resize 60%. Mirror. Copy and paste as new layer. Move it a little down and to left.

13. Open GS-CRM_May2016BT_ele21. Resize 50%. Copy and paste as new layer. Move it down and to left.

14. Open GS-CRM_May2016BT_ele19. Resize 70%. Copy and paste as new layer. Move it way to right.

15. Open GS-CRM_May2016BT_ele1. Resize 50%. Copy and paste as new layer. Move it up and to left. Place near the flowers.

16. OPen GS-CRM_May2016BT_ele5. Resize 70%. Copy and paste as new layer. Move it way to right.

17. Open GS-CRM_May2016BT_ele22. Resize 60%. Mirror. Copy and paste as new layer. Move it down and way to right.

18. Open GS-CRM_May2016BT_ele7. Resize 45%. Copy and paste as new layer. Move it down and way to right. Duplicate and move it way to left. Merge down.

19. Open GS-CRM_May2016BT_ele9. Resize 20%. Copy and paste as new layer. Place it at the bottom. Duplicate and spread the little flower over the grass, you can resize it and do the same with the smaller version. Keep it simple, do not use too many.

20. Open GS-CRM_May2016BT_ele20. Resize 20%. Copy and paste as new layer. Move it down and to right. Place it over the grass. Duplicate. Mirror and move it a little higher than the first one. Merge down.

21. Open your tube. Resize. Copy and paste as new layer. Move it slightly up. 

22. Add a new layer. Select all. Fill it with black. Contract > 2. Delete. Deselect.


--> Add your copyright info and license#. Add your name or initials. Save as PNG.
--> Sometimes I had to change my Timeline size to 846x313 because when I add it to Facebook the image has extra pixels and do not fit perfectly. So try this size if the same is happening to you.


---------------------------------------------------------

My example for FB Picture Profile: