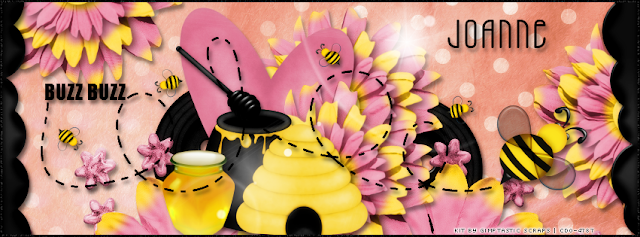
Tutorial written by Joanne Salgado on May 20th, 2016
for those who have a working knowledge of PSP.
I'm using PSP9 to create my tuts.
Any resemblance to any other tutorial is coincidental.
Do not copy and paste this tutorial anywhere on the net.
If you want to translate please ask first.
****************************************
Material:
PTU Kit "Cuddly Rigor Mortis-April-2016-bt" by Gimptastic Scraps - you can purchase it here
Font: A.D.MONO
****************************************
Don't forget to save often.
At any point if you have doubts check my tag.
1. Open a new image 851x315
2. Open paper 'GS-CRM_April2016BT_paper2' copy and paste as new layer.
3. Open paper 'GS-CRM_April2016BT_paper6' copy and paste as new layer. Change blend to soft light.
4. Open element 'GS-CRM_April2016BT_ele3' copy and paste as new layer. Resize 50%. Arrange it to bottom.
5. Open element 'GS-CRM_April2016BT_ele8' copy and paste as new layer. Move this layer below the beehive layer and arrange it to the right. Duplicate. Mirror.
6. Open element 'GS-CRM_April2016BT_ele19' copy and paste as new layer. Arrange it to bottom.
7. Open element 'GS-CRM_April2016BT_ele6' copy and paste as new layer. Arrange it to the top a little to the right.
8. Open element 'GS-CRM_April2016BT_ele2' copy and paste as new layer. Arrange it to the top a little to the left.
9. Open element 'GS-CRM_April2016BT_ele15' copy and paste as new layer. Arrange it to the bottom right. Duplicate. Mirror.
10. Open element 'GS-CRM_April2016BT_ele6' copy and paste as new layer. Arrange it to the top left. Duplicate. Arrange it behind the beehive a little to the right. Duplicate. Arrange it to the right.
11. Open element 'GS-CRM_April2016BT_ele4' copy and paste as new layer. Resize 50%. Arrange it behind the beehive a little to the left.
12. Open element 'GS-CRM_April2016BT_ele13' copy and paste as new layer. Resize 50%. Arrange it to the left of the black honey cup.
13. Open element 'GS-CRM_April2016BT_ele12' copy and paste as new layer. Resize 50%. Arrange it above the black honey cup.
14. Open element 'GS-CRM_April2016BT_ele20' copy and paste as new layer. Move this layer above the beehive. Arrange it to bottom left.
15. Open element 'GS-CRM_April2016BT_ele1' copy and paste as new layer. Resize 40%. Mirror. Arrange it to the right at the end of the bee trail.
16. Open element 'GS-CRM_April2016BT_wordart2'. Using the Freehand selection tool select the bees around the letter that are available to select without having to clean it all up and copy and paste it as new layer and arrange it around the canvas. Put as many as you want, I used 4. There are just two around this wordart to freely select, just mirror, flip ir around to change the ways they're going.
17. Open element 'GS-CRM_April2016BT_ele9' copy and paste as new layer. Arrange it at the center.
18. Open element 'GS-CRM_April2016BT_frame1' copy and paste as new layer. Use the border to create your own border. Arrange it to the left and the duplicate and arrange it to the right. See mine.
19. Add a new layer. Select all. Fill with black. Contract 1. Add noise uniform/50/monochrome checked. Contract 2. Hit delete on your keyboard. Select none.
20. Add shadow as you prefer.
21. Add copyright. Add name. Save as PNG.


