Showing posts with label Tagcatz Design. Show all posts

March 17, 2017

Dana ~ by Joanne Salgado


Tutorial written by Joanne Salgado on March 15th, 2017
for those who have a working knowledge of PSP.
I'm using PSP9 to create my tuts.
Any resemblance to any other tutorial is coincidental.
Do not copy and paste this tutorial anywhere on the net.
If you want to translate please ask first. 

****************************************
Material:

Tube: "Dana 3" by Toriya, you can purchase it here
do not use without the proper #license.
PTU Kit "Dana 3" by Tagcatz Designs, you can purchase it here
Font: Catfish line script

****************************************

--> Remember to save often and use my tag as reference if necessary.

1. Open a new image 650x550

2. Open element 'dtc_el42' copy and paste as new layer. Resize 80%.

3. Open paper 'dtc_p7' copy and paste as new layer. Move this layer below the frame layer. Clean outside parts.

4. Open element 'dtc_el18' copy and paste as new layer. Resize 80%. Arrange it to the right.

5. Open element 'dtc_el73' copy and paste as new layer. Resize 40%. Arrange it to bottom.

6. Open element 'dtc_el62' copy and paste as new layer. Resize 90%. Arrange it a little to the left.

7. Open element 'dtc_el39' copy and paste as new layer. Resize 40%. Mirror. Arrange it to the bottom right.

8. Open element 'dtc_el25' copy and paste as new layer. Resize 40%. Arrange it to the bottom right.

9. Open element 'dtc_el64' copy and paste as new layer. Resize 30%. Arrange it to the bottom right.

10. Open element 'dtc_el61' copy and paste as new layer. Resize 50%. Arrange it to the bottom left.

11. Open element 'dtc_el13' copy and paste as new layer. Resize 25%. Arrange it to the bottom left.

12. Open element 'dtc_el37' copy and paste as new layer. Arrange it to the left.

13. Open element 'dtc_el4' copy and paste as new layer. Resize 40%. Arrange it to bottom.

14. Open your tube. Copy and paste as new layer. Resize as needed and arrange it to the left.

15. Add shadow as you prefer.

16. Add copyright. Add name. Save as PNG.

December 4, 2016

Elegance ~ by Joanne Salgado


Tutorial written by Joanne Salgado on December 04th, 2016
for those who have a working knowledge of PSP.
I'm using PSP9 to create my tuts.
Any resemblance to any other tutorial is coincidental.
Do not copy and paste this tutorial anywhere on the net.
If you want to translate please ask first. 

****************************************
Material:

Tube: "Elegance" by Pandora Creations - you can purchase it here
do not use without the proper #license.
PTU Kit "Holiday Elegance" by Tagcatz Design - you can purchase it here
Font: Alex Brush

****************************************

Don't forget to save often.
At any point if you have doubts check my tag.

1. Open a new image 650x550

2. Open element 'hetc_el27' copy and paste as new layer. Resize 80%.

3. Open element 'hetc_el55' copy and paste as new layer. Resize 60%. Flip. Move this layer below the frame layer. Arrange it to the top.

4. Open element 'hetc_el51' copy and paste as new layer. Resize 60%. Arrange it to the left.

5. Open element 'hetc_el63' copy and paste as new layer. Arrange it to top.

6. Open element 'hetc_el72' copy and paste as new layer. Resize 60%. Arrange it to the top left.

7. Open element 'hetc_paper6' copy and paste as new layer. Resize 55%. Clean outside the frame.

8. Open element 'hetc_el28' copy and paste as new layer. Move this layer above the frame layer. 

9. Open element 'hetc_el9' copy and paste as new layer.

10. Open element 'hetc_el32' copy and paste as new layer. Resize 75%. Arrange it to the right.

11. Open element 'hetc_el70' copy and paste as new layer. Resize 25%. Arrange it to the top of the tree.

12. Open element 'hetc_el26' copy and paste as new layer. Resize 30%. Arrange it to the bottom right.

13. Open element 'hetc_el58' copy and paste as new layer. Resize 30%. Arrange it to the bottom right.

14. Open element 'hetc_el75' copy and paste as new layer. Resize 30%. Arrange it to the bottom right.

15. Open your tube. Copy and paste as new layer. Resize as needed and arrange it a little to the right.

16. Add shadow as you prefer.

17. Add copyright. Add name. Save as PNG.


Santa Babe 6 ~ by Joanne Salgado


Tutorial written by Joanne Salgado on December 04th, 2016
for those who have a working knowledge of PSP.
I'm using PSP9 to create my tuts.
Any resemblance to any other tutorial is coincidental.
Do not copy and paste this tutorial anywhere on the net.
If you want to translate please ask first. 

****************************************
Material:

Tube: "Santas Babe 6" by Oky Draft - you can purchase it here
do not use without the proper #license.
PTU Kit "Santa's Babe" by Tagcatz Design - you can purchase it here
Font: Theodista Decally

****************************************

Don't forget to save often.
At any point if you have doubts check my tag.

1. Open a new image 650x550

2. Open element 'sbtc_el42' copy and paste as new layer. Rotate right 90. Arrange it a little to bottom.

3. Open element 'sbtc_el29' copy and paste as new layer. Move this layer below the frame layer. Arrange it a little to bottom.

4. Open element 'sbtc_el82' copy and paste as new layer. Mirror. Arrange it to the left.

5. Open element 'sbtc_el98' copy and paste as new layer. Arrange it to bottom.

6. Open paper 'sbtc_paper3' copy and paste as new layer. Resize 85%. Arrange it inside the frame and clean outside.

7. Open element 'sbtc_el48' copy and paste as new layer. Resize 30%. Mirror. Move this layer above the frame layer. Arrange it to the left.

8. Open element 'sbtc_el65' copy and paste as new layer. Arrange it to the right.

9. Open element 'sbtc_el2' copy and paste as new layer. Resize 30%. Arrange it to the bottom left of the tree.

10. Open element 'sbtc_el93' copy and paste as new layer. Resize 30%. Arrange it to the right of the box we just added.

11. Open element 'sbtc_el49' copy and paste as new layer. Resize 30%. Arrange it between the ones we added.

12. Open element 'sbtc_el51' copy and paste as new layer. Resize 30%. Arrange it to the left of the one we just added.

13. Open your tube. Copy and paste as new layer. Resize as needed and arrange it to the right.

14. Open element 'sbtc_el50' copy and paste as new layer. Resize 40%. Arrange it to the bottom right.

15. Open element 'sbtc_el46' copy and paste as new layer. Resize 30%. Arrange it to the bottom left.

16. Open element 'sbtc_el64' copy and paste as new layer. Resize 30%. Arrange it to the bottom.

17. Open element 'sbtc_el56' copy and paste as new layer. Resize 50%. Arrange it to the left.

18. Open element 'sbtc_el59' copy and paste as new layer. Resize 30%. Arrange it to the bottom left.

19. Open element 'sbtc_el34' copy and paste as new layer. Resize 30%. Arrange it to the top right of the frame.

20. Open element 'sbtc_el35' copy and paste as new layer. Resize 50%. Arrange it to the bottom.

21. Open element 'sbtc_el37' copy and paste as new layer. Resize 30%. Arrange it to the bottom left.

22. Open element 'sbtc_el89' copy and paste as new layer. Resize 20%. Arrange it to the bottom right.

23. Add shadow as you prefer.

24. Add copyright. Add name. Save as PNG.

November 27, 2016

Princess ~ by Joanne Salgado


Tutorial written by Joanne Salgado on November 27th, 2016
for those who have a working knowledge of PSP.
I'm using PSP9 to create my tuts.
Any resemblance to any other tutorial is coincidental.
Do not copy and paste this tutorial anywhere on the net.
If you want to translate please ask first. 

****************************************
Material:

Tube: "Autumn Princess" by Toriya - you can purchase it here
do not use without the proper #license.
PTU Kit "Timeless" by Tagcatz Design - you can purchase it here
Font: Esplanade Script

****************************************

Don't forget to save often.
At any point if you have doubts check my tag.

1. Open a new image 650x650

2. Open element 'time_tc_el56' copy and paste as new layer.

3. Open element 'time_tc_el54' copy and paste as new layer. Move this layer below the frame layer. Arrange it to top. Duplicate. Mirror/Flip.

4. Open element 'time_tc_el29' copy and paste as new layer. Arrange it to the top left. Duplicate. Mirror/Flip.

5. Open element 'time_tc_el40' copy and paste as new layer. Resize 50%. MuRa'S copies encircle with settings below.

6. Open paper 'time_tc_paper7' copy and paste as new layer. Resize 65%. Arrange it inside the frame and clean the outside parts.

7. Open element 'time_tc_el21' copy and paste as new layer. Mirror/Flip. Arrange it to the top right of the frame.

8. Open element 'time_tc_el79' copy and paste as new layer.

9. Open your tube. Copy and paste as new layer. Resize as needed and arrange it inside the frame to the left.

10. Open element 'time_tc_el38' copy and paste as new layer. Resize 30%. Rotate right 25. Arrange it to the bottom left.

11. Open element 'time_tc_el85' copy and paste as new layer. Resize 30%. Mirror. Arrange it to bottom.

12. Open element 'time_tc_el77' copy and paste as new layer. Resize 40%. Arrange it behind the tube to the bottom right.

13. Open element 'time_tc_el76' copy and paste as new layer. Resize 40%. Arrange it behind the butterfly to the left.

14. Open element 'time_tc_el57' copy and paste as new layer. Resize 15%. Arrange it above the cat's head.

15. Open element 'time_tc_el46' copy and paste as new layer. Resize 30%. Arrange it to the top right.

16. Add shadow as you prefer.

17. Add copyright. Add name. Save as PNG.

November 26, 2016

Wonder Woman


== NEW PTU TUTORIAL S&CO. CT ==
ISMAEL RAC AND TAGCATZ DESIGN

Featuring "Cosplay Wonder Woman", an Ismael Rac tube and
 "Wonder Woman", Tagcatz Design kit at Scraps N Company - S&Co.


My heroine! Wonder Woman - nostalgic, fun, great role model and perfect for tags. 
Wonder Woman is a match for Ismael Rac's great Wonder Woman tube
It has 80 elements and 6 papers. PU only. 
Not all shown. Drop shadows on preview only. 
Very versatile and can be used with any other tubes and artists you have.

Tube can be found  at:
-> Scraps N Company - S&Co., here 

Kit can be found  at:
-> Scraps N Company - S&Co., here 


November 20, 2016

SHOW OFF - Store Collab Winter Love


== NEW PTU S&CO. CT ==
FOR KELLY LYNN AND TAGCATZ DESIGNS

Featuring "Winter" tube by Kelly Lynn and
"Winter Love" Kit by Tagcatz Designs at Scraps N Company - S&Co.

WINTER LOVE STORE COLLAB - you can purchase here


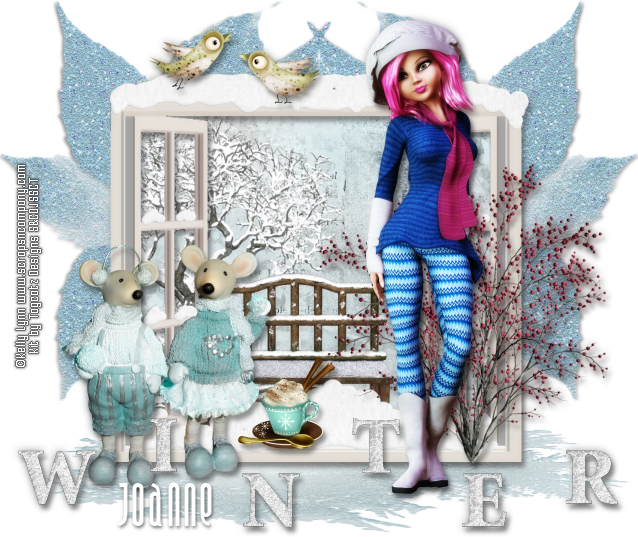
Sweet Cold ~ by Joanne Salgado


Tutorial written by Joanne Salgado on November 20th, 2016
for those who have a working knowledge of PSP.
I'm using PSP9 to create my tuts.
Any resemblance to any other tutorial is coincidental.
Do not copy and paste this tutorial anywhere on the net.
If you want to translate please ask first. 

****************************************
Material:

Tube: "Sweet Cold" by Andy Cooper - you can purchase it here
do not use without the proper #license.
PTU Kit "Sweet Cold" by Tagcatz Design - you can purchase it here
Font: Capella

****************************************

Don't forget to save often.
At any point if you have doubts check my tag.

1. Open a new image 650x550

2. Open element 'sc_tc_el12' copy and paste as new layer. Resize 80%.

3. Open element 'sc_tc_el28' copy and paste as new layer. Resize 90%. Move this layer below the frame layer.

4. Open paper 'sc_tc_paper4' copy and paste as new layer. Resize 50%.

5. Open element 'sc_tc_el73' copy and paste as new layer. Resize 50%. Arrange it to the top right. Clean parts outside the frame.

6. Open element 'sc_tc_el83' copy and paste as new layer. Resize 60%.

7. Open element 'sc_tc_el11' copy and paste as new layer. Resize 60%. Arrange it to the left inside the frame.

8. Open element 'sc_tc_el38' copy and paste as new layer. Resize 25%. Move this layer above the frame layer. Arrange it to the right above the frame.

9. Open element 'sc_tc_el35' copy and paste as new layer. Resize 25%. Arrange it to the right above the frame.

10. Open element 'sc_tc_el54' copy and paste as new layer. Resize 25%. Mirror. Arrange it to the top right.

11. Open element 'sc_tc_el85' copy and paste as new layer. Resize 60%. Arrange it to the bottom left.

12. Open element 'sc_tc_el17' copy and paste as new layer. Resize 50%. Arrange it to the bottom left.

13. Open element 'sc_tc_el1' copy and paste as new layer. Resize 35%. Mirror. Arrange it to the bottom right.

14. Open your tube. Copy and paste as new layer. Resize as needed and arrange it to the left.

15. Open element 'sc_tc_el27' copy and paste as new layer. Resize 50%. Arrange it to the bottom left.

16. Add shadow as you prefer.

17. Add copyright. Add name. Save as PNG.

SHOW OFF - Green Skull


== NEW PTU TUTORIAL S&CO. CT ==
FOR ANDY COOPER AND TAGCATZ DESIGN

Featuring "Green Skull" tube by Andy Cooper and
"Green Skull" Kit by Tagcatz Design at Scraps N Company - S&Co.

Tube by Andy Cooper - you can purchase here

Kit by Tagcatz Design - you can purchase here


November 14, 2016

Xmas Deer ~ by Joanne Salgado


Tutorial written by Joanne Salgado on November 15th, 2016
for those who have a working knowledge of PSP.
I'm using PSP9 to create my tuts.
Any resemblance to any other tutorial is coincidental.
Do not copy and paste this tutorial anywhere on the net.
If you want to translate please ask first. 

****************************************
Material:

Tube: "Xmas Deer 7" by Oky Draft - you can purchase it here
do not use without the proper #license.
PTU Kit "Oh Deer" by Tagcatz Design - you can purchase it here
Font: Claudia

****************************************

Don't forget to save often.
At any point if you have doubts check my tag.

1. Open a new image 650x550

2. Open element 'xdtc_el56' copy and paste as new layer.

3. Open element 'xdtc_el39' copy and paste as new layer. Move this layer below the frame layer and arrange it to the top left.

4. Open element 'xdtc_el38' copy and paste as new layer. Arrange it to bottom.

5. Open element 'xdtc_paper6' copy and paste as new layer. Resize 50%. Arrange it inside the frame and clean outside.

6. Open element 'xdtc_el55' copy and paste as new layer. Resize 80%. Move this layer above the frame layer. Arrange it to the left.

7. Open element 'xdtc_el10' copy and paste as new layer. Arrange it to the left.

8. Open element 'xdtc_el65' copy and paste as new layer. Resize 30%. Arrange it to the bottom left.

9. Open element 'xdtc_el26' copy and paste as new layer. Resize 30%. Mirror. Arrange it to the bottom left.

10. Open element 'xdtc_el12' copy and paste as new layer. Resize 30%. Mirror. Arrange it to the bottom left.

11. Open element 'xdtc_el25' copy and paste as new layer. Resize 30%. Arrange it to the top right.

12. Open element 'xdtc_el41' copy and paste as new layer. Resize 40%. Arrange it to the top right.

13. Open element 'xdtc_el81' copy and paste as new layer. Resize 70%.

14. Open your tube. Copy and paste as new layer. Resize as needed and arrange it to bottom.

15. Open element 'xdtc_el58' copy and paste as new layer. Resize 35%. Arrange it to bottom.

16. Open element 'xdtc_el21' copy and paste as new layer. Resize 20%. Arrange it to the bottom left.

17. Add shadow as you prefer.

18. Add copyright. Add name. Save as PNG.