October 31, 2016

Kiss Of Death ~ by Joanne Salgado


Tutorial written by Joanne Salgado on October 31th, 2016
for those who have a working knowledge of PSP.
I'm using PSP9 to create my tuts.
Any resemblance to any other tutorial is coincidental.
Do not copy and paste this tutorial anywhere on the net.
If you want to translate please ask first. 

****************************************
Material:

Tube: "Ines" by Alehandra Vanhek - you can purchase it here
do not use without the proper #license.
PTU Kit "Kiss Of Death" by Gimptastic Scraps - you can purchase it here
Font: Whisper

****************************************

Don't forget to save often.
At any point if you have doubts check my tag.

1. Open a new image 650x550

2. Open element 'GS-KOD_frame3' copy and paste as new layer. Resize 80%.

3. Open element 'GS-KOD_ele27' copy and paste as new layer. Move this layer below the frame layer. Arrange it to the top right.

4. Open element 'GS-KOD_ele38' copy and paste as new layer. Arrange it to the right.

5. Open element 'GS-KOD_ele49' copy and paste as new layer. Resize 50%. Arrange it to the bottom right.

6. Open paper 'GS-KOD_paper4' copy and paste as new layer. Resize 50%. Arrange it inside the frame and clean the outside parts.

7. Open element 'GS-KOD_ele41' copy and paste as new layer. Resize 50%. Move this layer above the frame layer. Arrange it to the top left.

8. Open element 'GS-KOD_ele1' copy and paste as new layer. Resize 50%. Mirror. Arrange it to the bottom right.

9. Open element 'GS-KOD_ele33' copy and paste as new layer. Arrange it to the bottom left.

10. Open element 'GS-KOD_ele28' copy and paste as new layer. Resize 50%. Rotate 90 right. Arrange it to the bottom left.

11. Open element 'GS-KOD_ele18' copy and paste as new layer. Resize 40%. Arrange it to the bottom right.

12. Open element 'GS-KOD_ele30' copy and paste as new layer. Resize 50%. Mirror. Arrange it to the bottom right.

13. Open element 'GS-KOD_ele36' copy and paste as new layer. Resize 50%. Arrange it to the bottom left.

14. Open element 'GS-KOD_ele21' copy and paste as new layer. Resize 60%. Mirror. Arrange it to the right.

15. Open element 'GS-KOD_ele14' copy and paste as new layer. Resize 50%. Rotate 20 left. Arrange it to the bottom left.

16. Open your tube. Copy and paste as new layer. Resize as needed and arrange it to bottom.

17. Open element 'GS-KOD_ele50' copy and paste as new layer. Resize 23%. Arrange it to the bottom right.

18. Open element 'GS-KOD_wordart' copy and paste as new layer. Resize 80%. Arrange it to the bottom left.

19. Add shadow as you prefer.

20. Add copyright. Add name. Save as PNG.

SHOW OFF - Hocus Pocus


== NEW PTU S&CO. CT ==
FOR RIENEKE DESIGNS

Featuring "Hocus Pocus" Kit by Rieneke Designs at Scraps N Company - S&Co.

Kit by Rieneke Designs - you can purchase here


Hunni Bear ~ by Joanne Salgado


Tutorial written by Joanne Salgado on October 31th, 2016
for those who have a working knowledge of PSP.
I'm using PSP9 to create my tuts.
Any resemblance to any other tutorial is coincidental.
Do not copy and paste this tutorial anywhere on the net.
If you want to translate please ask first. 

****************************************
Material:

PTU Kit "Hunni Bear" by Hungry Hill - you can purchase it here
Font: Whisper

****************************************

Don't forget to save often.
At any point if you have doubts check my tag.

1. Open a new image 650x550

2. Open element 'frame-4' copy and paste as new layer. Resize 70%.

3. Open paper 'paper 5' copy and paste as new layer. Resize 50%. Move this layer below the frame layer. Arrange it inside the frame and clean the outside parts.

4. Open element 'flower-bush' copy and paste as new layer. Resize 20%. Move this layer above the frame layer. Arrange it to bottom at the middle.

5. Open element 'tree' copy and paste as new layer. Resize 60%. Arrange it to the left.

6. Open element 'flower-3' copy and paste as new layer. Resize 20%. Mirror. Arrange it to the bottom left.

7. Open element 'bear-1' copy and paste as new layer. Resize 40%. Arrange it to the bottom right.

8. Open element 'apple-2' copy and paste as new layer. Resize 7%. Rotate 90 right. Arrange it to the bottom right.

9. Open element 'apple' copy and paste as new layer. Resize 7%. Arrange it to the bottom right.

10. Open element 'bumblybee-1' copy and paste as new layer. Resize 15%. Arrange it to the left.

11. Open element 'bumblybee-2' copy and paste as new layer. Resize 15%. Arrange it to the top above the tree.

12. Open element 'flutterby' copy and paste as new layer. Resize 15%. Rotate 20 right. Arrange it to the top right.

13. Open element 'footbridge' copy and paste as new layer. Resize 35%. Arrange it to the bottom left.

14. Open element 'hunnipot' copy and paste as new layer. Resize 15%. Arrange it to bottom.

15. Open element 'stones' copy and paste as new layer. Resize 15%. Arrange it to the bottom left.

16. Open element 'WordArt' copy and paste as new layer. Resize 80%. Arrange it to top.

17. Add shadow as you prefer.

18. Add copyright. Add name. Save as PNG.


SHOW OFF - Deathly Fall


== NEW PTU TAG TINY TURTLE DESIGNS CT ==
AND THE ART OF NATALIA NZ

Featuring "Sallma", tube by Natalia NZ and
"Deathly Fall", Tiny Turtle Design kit at TinyTurtleDesign Store.

Natalia NZ's tube can be found  at
-> TinyTurtleDesign Store, here

Tiny Turtle Design kit can be found  at
-> TinyTurtleDesign Store, here


Lost Ghost

SILENCED TUTORIAL


Tutorial written by Marcia Salgado on October 24th, 2016
for those who have a working knowledge of PSP.
I'm using PSP9 to create my tuts.
Any resemblance to any other tutorial is coincidental.
Do not copy and paste this tutorial anywhere on the net.
If you want to translate please ask first. 

****************************************
Material:

Tube: "Lost Ghost" by Danny Lee, you can purchase it here 
do not use without the proper #license.
PTU Kit "Lost Ghost" by Bibi's Collection, you can purchase it here 
Font: Esplanade Script PERSONAL USE

****************************************

--> Remember to save often and use my tag as reference if necessary. Use a Drop Shadow of your preference on layers. 


1. Create a new image 650x650.

2. Open BIBI-LOST GHOST ELEM (91). Resize 70%. Copy and paste as new layer.

3. Open BIBI-LOST GHOST ELEM (57). Resize 40%. Copy and paste as new layer. Move it to left.

4. Open BIBI-LOST GHOST ELEM (28). Resize 35%. Mirror. Copy and paste as new layer. Move it up and a little to left.

5. Open BIBI-LOST GHOST ELEM (54). Copy and paste as new layer. Move it up and a little to left.

6. Open BIBI-LOST GHOST ELEM (22). Resize 40%. Free Rotate: Right-38. Copy and paste as new layer. 

7. Select inside the frames. Expand > 5. Add a new layer and move it below the frame layer. Open BIBI-LOST GHOST PAPER (1) Copy and paste into selection. Deselect.

8. Click on frame layer. Open BIBI-LOST GHOST ELEM (92). Resize 40%. Free Rotate: Left-38. Copy and paste as new layer. Move it a little up. Place over the frame.

9. Open BIBI-LOST GHOST ELEM (112). Resize 40%. Copy and paste as new layer. Move it down and to left to cover the rope at bottom. 

10. Open BIBI-LOST GHOST ELEM (113). Resize 55%. Free Rotate: Left-90. Copy and paste as new layer. Move it a little up.

11. Open BIBI-LOST GHOST ELEM (111). Resize 76%. Copy and paste as new layer. Move it a little down.

12. Open BIBI-LOST GHOST ELEM (74). Resize 75%. Copy and paste as new layer. Move it down.

13. Open BIBI-LOST GHOST ELEM (80). Resize 40%. Copy and paste as new layer. Move it down.

14. Open BIBI-LOST GHOST ELEM (10). Resize 40%. Free Rotate: Left-38. Copy and paste as new layer. Place it over the frame.

15. Open your tube. Resize. Copy and paste as new layer. Move it to right. Now you may need to re-arrange some elements to better fit with your tube

16. Use Crop > Merged Opaque to get rid of all extra spaces.


--> Add your copyright info and license#. Add your name and save as PNG.


October 30, 2016

Month Pink

DEEP ROSE TUTORIAL


Tutorial written by Marcia Salgado on October 26th, 2016
for those who have a working knowledge of PSP.
I'm using PSP9 to create my tuts.
Any resemblance to any other tutorial is coincidental.
Do not copy and paste this tutorial anywhere on the net.
If you want to translate please ask first. 

****************************************
Material:

Tube: "Month Pink" by Andy Cooper, you can purchase it here 
do not use without the proper #license.
PTU Kit "Month Pink" by Lil Mz's Brainstorms, you can purchase it here 
Font: KG One Thing

****************************************

--> Remember to save often and use my tag as reference if necessary. Use a Drop Shadow of your preference on layers. 


1. Create a new image 650x650.

2. Open LMB_MonthPink_Element (100). Copy and paste as new layer. Move it up.

3. Open LMB_MonthPink_Element (14). Resize 75%. Copy and paste as new layer. Move it down and to right.

4. Open LMB_MonthPink_Element (68). Free Rotate: Left-30. Copy and paste as new layer. Move it down and to right.

5. Open LMB_MonthPink_Element (31). Resize 30%. Free Rotate: Left-25. Copy and paste as new layer. Move it up.

6. Open LMB_MonthPink_Element (6). Copy and paste as new layer. Move it down.

7. Open LMB_MonthPink_Element (73). Copy and paste as new layer. Move it to right.

8. Open LMB_MonthPink_Element (36). Resize 65%. Copy and paste as new layer. Move it down and to left.

9. Open LMB_MonthPink_Element (67). Resize 50%. Free Rotate: Left-90. Copy and paste as new layer. Move it a little up and to left.

10. Open LMB_MonthPink_Element (34). Resize 50%. Copy and paste as new layer. Place it over the previous roses.

11. Open LMB_MonthPink_Element (16). Free Rotate: Right-20. Copy and paste as new layer. Move it to right.

12. Select inside the frame. Expand > 5. Add a new layer and move it below the frame layer.

13. Open LMB_MonthPink_Paper (5). Copy and paste into selection. Deselect.

14. Click on frame layer. Open LMB_MonthPink_Element (15). Resize 50%. Copy and paste as new layer. Place it over the golden frame a little to right.

15. Open your tube. Resize. Copy and paste as new layer. Move it to left and a little down.

16. Use Crop > Merged Opaque to get rid of all extra spaces.


--> Add your copyright info and license#. Add your name and save as PNG.


October 27, 2016

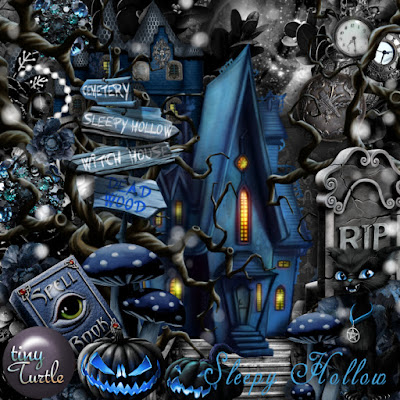
Sleepy Hollow kit with Kawaii Witch


**Click to see original size**


== NEW PTU TAG TINY TURTLE DESIGNS CT ==
AND THE ART OF LADY MISHKA

Featuring "Kawaii Witch 01", Art from © Lady Mishka CU tube and
 "Sleepy Hollow", Tiny Turtle Design kit at TinyTurtleDesign Store.


Tiny Turtle Design kit has 20 papers and 131 elements so you can play with it. 

Lady Mishka's tube can be found  at:
-> TinyTurtleDesign Store, here 

Tiny Turtle Design kit can be found  at:
-> TinyTurtleDesign Store, here 


October 26, 2016

Holly Steam

FIRE IN THE DARK TUTORIAL


Tutorial written by Marcia Salgado on October 24th, 2016
for those who have a working knowledge of PSP.
I'm using PSP9 to create my tuts.
Any resemblance to any other tutorial is coincidental.
Do not copy and paste this tutorial anywhere on the net.
If you want to translate please ask first. 

****************************************
Material:

Tube: "Holly Steam" by Selisan Al-Gaib, you can purchase it here 
do not use without the proper #license.
PTU Kit "Holy Steam" by Bibi's Collection, you can purchase it here 
Font: Pasternak

****************************************

--> Remember to save often and use my tag as reference if necessary. Use a Drop Shadow of your preference on layers. 


1. Open BIBI-HOLLY STEAM ELEM (57). Resize 80%. Copy and paste as new layer.

2. Open BIBI-HOLLY STEAM ELEM (55). Resize 60%. Copy and paste as new layer.

3. Open BIBI-HOLLY STEAM ELEM (74). Resize 45%. Copy and paste as new layer. Move it down.

4. Open BIBI-HOLLY STEAM ELEM (27). Resize 35%. Copy and paste as new layer. Move it to right.

5. Open your tube, Resize. Copy and paste as new layer. Move it a little to right. You may want to re-arrange some elements.

6. Open BIBI-HOLLY STEAM ELEM (43). Resize 30%. Copy and paste as new layer. Move it a little down and way to right.

7. Open BIBI-HOLLY STEAM ELEM (35). Resize 30%. Copy and paste as new layer. Place over the leave's bottom part.

8. Open BIBI-HOLLY STEAM ELEM (22). Resize 35%. Copy and paste as new layer. Move it down and to right.

9. Open BIBI-HOLLY STEAM ELEM (32). Resize 50%. Copy and paste as new layer. Move it down and place it over the black bottom.

10. Open BIBI-HOLLY STEAM ELEM (10). Resize 40%. Mirror. Copy and paste as new layer. Move it down and very little to right.

11. Open BIBI-HOLLY STEAM ELEM (89). Resize 20%. Copy and paste as new layer. Move it down and to right.

12. Open BIBI-HOLLY STEAM ELEM (4). Resize 20%. Copy and paste as new layer. Move it down and to right. Place it over the bouquet stem.


--> Add your copyright info and license#. Add your name and save as PNG.


SHOW OFF - Halloween Flight


== NEW CT CREATIVE SCRAPS BY CRYS PTU ==

Featuring "Fantasmita 8" by Oky Draft and
"Halloween Flight" Kit by Creative Scraps by Crys.


All Hallows Eve brings flying bats across the moon, Wiches working in their book of shadows and pumpkins all aglow!  Come have fun with Halloween Flight and cast a spell or 2.  Kit includes 65 Elements and 14 papers

Kit can be found at:
-> Mystical Scraps here

Don't forget to visit her blog

SHOW OFF - Boo Parade


== NEW PTU TAG TINY TURTLE DESIGNS CT ==
AND THE ART OF NATALIA NZ

Featuring "Scully", tube by Natalia NZ and
"Boo Parade", Tiny Turtle Design kit at TinyTurtleDesign Store.

Natalia NZ's tube can be found  at
-> TinyTurtleDesign Store, here

Tiny Turtle Design kit can be found  at
-> TinyTurtleDesign Store, here


Sweet Dreams ~ by Joanne Salgado


Tutorial written by Joanne Salgado on October 26th, 2016
for those who have a working knowledge of PSP.
I'm using PSP9 to create my tuts.
Any resemblance to any other tutorial is coincidental.
Do not copy and paste this tutorial anywhere on the net.
If you want to translate please ask first. 

****************************************
Material:

Tube: "Sweet Dreams" by Ismael Rac - you can purchase it here
do not use without the proper #license.
PTU Kit "Sweet Dreams" by Rieneke Designs - you can purchase it here
Font: Dorayaki

****************************************

Don't forget to save often.
At any point if you have doubts check my tag.

1. Open a new image 650x550

2. Open element 'RD-SweetDreams-element (41)' copy and paste as new layer. Resize 75%. Rotate 90 right.

3. Open element 'RD-SweetDreams-element (39)' copy and paste as new layer. Resize 50%. Move this layer below the frame layer. Arrange it to the bottom right. Duplicate. Mirror.

4. Open element 'RD-SweetDreams-element (14)' copy and paste as new layer. Resize 50%. Arrange it to top.

5. Open element 'RD-SweetDreams-element (15)' copy and paste as new layer. Resize 50%. Arrange it to the top right. Duplicate. Mirror. Arrange it to the top left.

6. Open element 'RD-SweetDreams-element (14)' again, copy and paste as new layer. Resize 50%. Arrange it to the right. Duplicate. Mirror.

7. Open paper 'RD-SweetDreams-paper (2)' copy and paste as new layer. Resize 40%. Arrange it inside the frame and clean the outside parts.

8. Open element 'RD-SweetDreams-element (42)' copy and paste as new layer. Resize 90%. Move this layer above the frame layer.

9. Open your tube. Copy and paste as new layer. Resize as needed and arrange it inside the frame.

10. Open element 'RD-SweetDreams-element (47)' copy and paste as new layer. Resize 40%. Mirror. Arrange it to the left.

11. Open element 'RD-SweetDreams-element (37)' copy and paste as new layer. Resize 50%. Arrange it to the bottom right.

12. Open element 'RD-SweetDreams-element (40)' copy and paste as new layer. Resize 30%. Arrange it to the bottom right.

13. Open element 'RD-SweetDreams-element (46)' copy and paste as new layer. Resize 35%. Arrange it above the skull.

14. Open element 'RD-SweetDreams-element (4)' copy and paste as new layer. Resize 30%. Arrange it to the bottom left.

15. Open element 'RD-SweetDreams-element (28)' copy and paste as new layer.

16. Add shadow as you prefer.

17. Add copyright. Add name. Save as PNG.

Night of Frights ~ by Joanne Salgado


Tutorial written by Joanne Salgado on October 26th, 2016
for those who have a working knowledge of PSP.
I'm using PSP9 to create my tuts.
Any resemblance to any other tutorial is coincidental.
Do not copy and paste this tutorial anywhere on the net.
If you want to translate please ask first. 

****************************************
Material:

Tube: "Witch Hat" by Di Halim - you can purchase it here
do not use without the proper #license.
PTU Kit "Witch Hat" by Bibi's Collection - you can purchase it here
Font: BachelorScript

****************************************

Don't forget to save often.
At any point if you have doubts check my tag.

1. Open a new image 650x550

2. Open element 'BIBI-WITCH HAT ELEMS (107)' copy and paste as new layer. Resize 70%. Mirror.

3. Open element 'BIBI-WITCH HAT ELEMS (100)' copy and paste as new layer. Resize 50%. Rotate 15 left. Arrange it to the top left.

4. Open element 'BIBI-WITCH HAT ELEMS (97)' copy and paste as new layer. Resize 20%. Arrange it to the top left.

5. Open element 'BIBI-WITCH HAT ELEMS (74)' copy and paste as new layer. Resize 20%. Arrange it to the top right of the wordart.

6. Open element 'BIBI-WITCH HAT ELEMS (75)' copy and paste as new layer. Resize 15%. Arrange it to the bottom left of the wordart.

7. Open element 'BIBI-WITCH HAT ELEMS (76)' copy and paste as new layer. Resize 40%. Rotate right 20. Arrange it at the middle.

8. Open element 'BIBI-WITCH HAT ELEMS (15)' copy and paste as new layer. Resize 45%. Mirror.

9. Open element 'BIBI-WITCH HAT ELEMS (17)' copy and paste as new layer. Resize 40%. Arrange it to bottom.

10. Open element 'BIBI-WITCH HAT ELEMS (41)' copy and paste as new layer. Resize 20%. Mirror. Arrange it to the bottom left.

11. Open element 'BIBI-WITCH HAT ELEMS (43)' copy and paste as new layer. Resize 18%. Arrange it to the bottom left.

12. Open element 'BIBI-WITCH HAT ELEMS (6)' copy and paste as new layer. Resize 60%. Arrange it to bottom.

13. Open your tube. Copy and paste as new layer. Resize as needed and arrange it to the right.

14. Open element 'BIBI-WITCH HAT ELEMS (37)' copy and paste as new layer. Resize 20%. Arrange it to bottom.

15. Add shadow as you prefer.

16. Add copyright. Add name. Save as PNG.

Black Bride ~ by Joanne Salgado


Tutorial written by Joanne Salgado on October 26th, 2016
for those who have a working knowledge of PSP.
I'm using PSP9 to create my tuts.
Any resemblance to any other tutorial is coincidental.
Do not copy and paste this tutorial anywhere on the net.
If you want to translate please ask first. 

****************************************
Material:

Tube: "Black Dress Bride" by Andy Cooper - you can purchase it here
do not use without the proper #license.
PTU Kit "Black Dress Bride" by Rieneke Designs - you can purchase it here
Font: Theodista Decally

****************************************

Don't forget to save often.
At any point if you have doubts check my tag.

1. Open a new image 700x500

2. Open element 'RD-BlackDressBride-element (44)' copy and paste as new layer. Resize 70%.

3. Open paper 'RD-BlackDressBride-paper (3)' copy and paste as new layer. Resize 35%. Move this layer below the frame layer. Arrange it inside the frame and clean outside parts.

4. Open element 'RD-BlackDressBride-element (45)' copy and paste as new layer. Resize 60%. Arrange it inside the frame and clean the outside parts.

5. Open element 'RD-BlackDressBride-element (36)' copy and paste as new layer. Resize 50%. Mirror. Move this layer above the frame layer. Arrange it to the bottom left.

6. Open element 'RD-BlackDressBride-element (3)' copy and paste as new layer. Resize 70%. Arrange it to the bottom right.

7. Open element 'RD-BlackDressBride-element (4)' copy and paste as new layer. Resize 20%. Arrange it to the right.

8. Open element 'RD-BlackDressBride-element (1)' copy and paste as new layer. Resize 40%. Arrange it to the bottom right.

9. Open element 'RD-BlackDressBride-element (29)' copy and paste as new layer. Resize 30%. Arrange it to the bottom left.

10. Open element 'RD-BlackDressBride-element (30)' copy and paste as new layer. Resize 20%. Mirror. Arrange it to the left.

11. Open element 'RD-BlackDressBride-element (18)' copy and paste as new layer. Resize 12%. Mirror. Arrange it to the bottom left.

12. Open element 'RD-BlackDressBride-element (20)' copy and paste as new layer. Resize 12%. Arrange it to the bottom left.

13. Open element 'RD-BlackDressBride-element (12)' copy and paste as new layer. Resize 10%. Arrange it to the bottom right.

14. Open element 'RD-BlackDressBride-element (11)' copy and paste as new layer. Resize 10%. Arrange it to the right.

15. Open element 'RD-BlackDressBride-element (10)' copy and paste as new layer. Resize 10%. Arrange it to the top right.

16. Open your tube. Copy and paste as new layer. Resize as needed and arrange it to the right.

17. Open element 'RD-BlackDressBride-element (14)' copy and paste as new layer. Resize 75%. Arrange it to the left.

18. Add shadow as you prefer.

19. Add copyright. Add name. Save as PNG.

Pirate Bandit

PIRATE'S COVE TUTORIAL


Tutorial written by Marcia Salgado on October 21th, 2016
for those who have a working knowledge of PSP.
I'm using PSP9 to create my tuts.
Any resemblance to any other tutorial is coincidental.
Do not copy and paste this tutorial anywhere on the net.
If you want to translate please ask first. 

****************************************
Material:

Tube: "Pirate Bandit" by Danny Lee, you can purchase it here 
do not use without the proper #license.
PTU Kit "Pirate Bandit" by Mariel Designs, you can purchase it here 
Mask: 565InsatiableDreams
Plugin: MuRa's Meister and Eye Candy 6
Font: Pirata One

****************************************

--> Remember to save often and use my tag as reference if necessary. Use a Drop Shadow of your preference on layers. 

1. Create a new image 650x650.

2. Add anew layer. Select all. Open PAPER 1. Copy and paste into selection. Deselect. Apply the mask. Merge group.

3. Open 'element' 20. Copy and paste as new layer. Move it way down and to right.

4. Open 'element' 103. Resize 40%. Copy and paste as new layer. Move it up and to right.

5. Open 'element' 22. Mirror. Copy and paste as new layer. Move it down.

6. Open 'element' 64. Resize 15%.  Copy and paste as new layer. Apply MuRa's Meister > Copies > Encircle with settings bellow:


7. Open FRAME 2. Resize 65%. Copy and paste as new layer. Apply a white border using Eye Candy 6 > Gradient Glow, settings bellow, twice.


8. Select inside the frame. Expand > 7. Open PAPER 3. Copy and paste into selection. Deselect. Next elements are used inside the frame.

9. Open 'element' 43. Resize 60%. Copy and paste as new layer.

10. Open 'element' 105. Resize 35%. Copy and paste as new layer. Move it to left.

11. Open 'element' 46. Resize 48%. Copy and paste as new layer. move it a little down.

12. Open 'element' 52. Resize 25%. Copy and paste as new layer. Move it to left.

13. Open 'element' 18. Resize 25%. Copy and paste as new layer. Move it to right.

14. Open 'element' 67. Resize 20%. Copy and paste as new layer. Move it a little down.

15. Open 'element' 45. Resize 25%. Copy and paste as new layer. Move it down. Place in front the treasure chest.

16. Open 'element' 60. Resize 20%. Mirror. Copy and paste as new layer. Place it on the right side inside the frame.

17. Click on frame layer. Open 'element' 53. Resize 50%. Copy and paste as new layer. Move it way to left.

18. Open 'element' 59. Resize 40%. Copy and paste as new layer. Move it down and to left. Place it in front of the door.

19. Open 'element' 32. Resize 30%. Copy and paste as new layer. Move it down and to left.

20. Open 'element' 36. Resize 40%. Copy and paste as new layer. Move it down and to left. Place on the log's right side, a little up.

21. Open 'element' 79. Resize 85%. Copy and paste as new layer. Move it to left and a little down.

22. Open 'element' 101. Resize 20%. Copy and paste as new layer. Move it down and a little to left. Place at the bottom of the previous plant.

23. Open 'element' 27. Resize 50%. Copy and paste as new layer. Move it down and to right.

24. Open 'element' 28. Resize 40%. Copy and paste as new layer. Move it down and to right. In front of the first foliage.

25. Open 'element' 90. Resize 20%. Copy and paste as new layer. Move it down and to right.

26. Open 'element' 104. Resize 25%. Copy and paste as new layer. Place it above he pink skull.

27. Open your tube. Resize. Copy and paste as new layer. Move it to left.


--> Add your copyright info and license#. Add your name and save as PNG.


Gothic Princess 4

DARK MOON TUTORIAL


Tutorial written by Marcia Salgado on October 21th, 2016
for those who have a working knowledge of PSP.
I'm using PSP9 to create my tuts.
Any resemblance to any other tutorial is coincidental.
Do not copy and paste this tutorial anywhere on the net.
If you want to translate please ask first. 

****************************************
Material:

Tube: "Gothic Princess 4" by Oky Draft Dolls, you can purchase it here 
do not use without the proper #license.
PTU Kit "Gothic Princess 4" by Chachaz Creationz, you can purchase it here 
Mask: 565InsatiableDreams 
Font: Egregio Script_demo

****************************************

--> Remember to save often and use my tag as reference if necessary. Use a Drop Shadow of your preference on layers. 


1. Create a new image 650x650.

2. Add a new layer. Select all. Open Paper7. Copy and paste as new layer. Apply the mask. Merge group and low the layer opacity to 56.

3. Open Element41. Copy and paste as new layer. Move it way to left. Duplicate. Mirror. Merge down.

4. Open Element32. Copy and paste as new layer. Move it a little up.

5. Open Element45. Copy and paste as new layer. Move it up.

6. Open Element78. Copy and paste as new layer. Move it down.

7. Open Element73. Copy and paste as new layer. Move it to right and a little up.

8. Open Element40. Resize 70%. Mirror. Copy and paste as new layer. Move it down and to right.

9. Open Element80. Resize 50%. Copy and paste as new layer. Move it up and midway to left.

10. Open Element38. Copy and paste as new layer. Move it a little down.

11. Open Element37. Resize 70%. Mirror. Copy and paste as new layer. Move it down and to left.

12. Open Element67. Resize 50%. Copy and paste as new layer. Hang it on top branch at left.

13. Open Element2. Resize 50%. Copy and paste as new layer. Move it down and to right.

14. Open Element4. Resize 40%. Mirror. Copy and paste as new layer. Move it down and to right. Place it on first roses left side.

15. Open Element72. Resize 50%. Copy and paste as new layer. Move it down and to left.

16. Open Element76. Resize 40%. Copy and paste as new layer. Move it down and to left.

17. Open your tube. Resize. Copy and paste as new layer. Move it to right. You may want to re-arrange some elements to better fit your tube.

18. Use Crop > Merged Opaque to get rid of all extra spaces.


--> Add your copyright info and license#. Add your name and save as PNG.


October 25, 2016

Steam Land kit with Daitie tube


== NEW PTU TAG TINY TURTLE DESIGNS CT ==
AND THE ART OF SELISAN AL-GAIB

Featuring "Daitie", a Selisan Al-Gaib tube and
 "SteamLand", Tiny Turtle Design kit at TinyTurtleDesign Store.


Tiny Turtle Design kit has 35 papers and 119 elements so you can play with it. 

Selisan Al-Gaib's tube can be found  at:
-> TinyTurtleDesign Store, here 

Tiny Turtle Design kit can be found  at:
-> TinyTurtleDesign Store, here 


October 24, 2016

SHOW OFF - Suri


== NEW PTU TAG TINY TURTLE DESIGNS CT ==
AND THE ART OF ALEHANDRA VANHEK

Featuring "Clare", tube by Alehandra Vanhek and
"Suri", Tiny Turtle Design kit at TinyTurtleDesign Store.

Alehandra Vanhek's tube can be found  at
-> TinyTurtleDesign Store, here

Tiny Turtle Design kit can be found  at
-> TinyTurtleDesign Store, here


Autumn Princess ~ by Joanne Salgado


Tutorial written by Joanne Salgado on October 24th, 2016
for those who have a working knowledge of PSP.
I'm using PSP9 to create my tuts.
Any resemblance to any other tutorial is coincidental.
Do not copy and paste this tutorial anywhere on the net.
If you want to translate please ask first. 

****************************************
Material:

Tube: "Autumn Princess" by Toriya - you can purchase it here
do not use without the proper #license.
PTU Kit "Beauty Autumn" by Design by Joan - you can purchase it here
Font: KazincBarcika

****************************************

Don't forget to save often.
At any point if you have doubts check my tag.

1. Open a new image 650x550

2. Open element 'BEAUTY AUTUMN_DBJ-ELEM (80)' copy and paste as new layer. Resize 55%. Arrange it to the left. Duplicate. Mirror 20 right. Arrange it to the right. Move this layer below the frame layer.

3. Open element 'BEAUTY AUTUMN_DBJ-ELEM (87)' copy and paste as new layer. Resize 50%. Move this layer below both frame layers. Arrange it to top.

4. Open element 'BEAUTY AUTUMN_DBJ-ELEM (74)' copy and paste as new layer. Resize 50%. Arrange it to the top right.

5. Open element 'BEAUTY AUTUMN_DBJ-ELEM (84)' copy and paste as new layer. Resize 50%. Arrange it to the right. Duplicate. Arrange it to the left.

6. Open element 'BEAUTY AUTUMN_DBJ-ELEM (51)' copy and paste as new layer. Resize 50%. Arrange it to the bottom right.

7. Open element 'BEAUTY AUTUMN_DBJ-ELEM (45)' copy and paste as new layer. Resize 50%. Arrange it to the bottom left.

8. Open element 'BEAUTY AUTUMN_DBJ-ELEM (7)' copy and paste as new layer. Resize 50%. Arrange it to the right. Duplicate. Mirror.

9. Open element 'BEAUTY AUTUMN_DBJ-ELEM (40)' copy and paste as new layer. Resize 60%. Arrange it to bottom.

10. Open element 'BEAUTY AUTUMN_DBJ-ELEM (68)' copy and paste as new layer. Resize 50%. Arrange it to the top left.

11. Open paper 'BEAUTY AUTUMN_DBJ-PP (2)' copy and paste as new layer. Resize 50%. Arrange it inside the frame, clean outside it. Paste paper again, rotate 20 right. Arrange it inside the other frame. Clean outside.

12. Open element 'BEAUTY AUTUMN_DBJ-ELEM (64)' copy and paste as new layer. Resize 80%. Move this layer above both frame layers.

13. Open your tube. Copy and paste as new layer. Resize as needed and arrange it between the frames.

14. Open element 'BEAUTY AUTUMN_DBJ-ELEM (66)' copy and paste as new layer. Resize 50%. Arrange it to bottom. (I used this one to cover my legless tube)

15. Open element 'BEAUTY AUTUMN_DBJ-ELEM (43)' copy and paste as new layer. Resize 80%. Arrange it to the left.

16. Open element 'BEAUTY AUTUMN_DBJ-ELEM (60)' copy and paste as new layer. Resize 30%. Mirror. Arrange it to the bottom right.

17. Open element 'BEAUTY AUTUMN_DBJ-ELEM (47)' copy and paste as new layer. Resize 25%. Arrange it to the bottom left.

18. Open element 'BEAUTY AUTUMN_DBJ-ELEM (81)' copy and paste as new layer.

19. Add shadow as you prefer.

20. Add copyright. Add name. Save as PNG.