April 28, 2015

Dark Butterfly ~ by Joanne Salgado


Tutorial written by Joanne Salgado on April 28th, 2015
for those who have a working knowledge of PSP.
Any resemblance to any other tutorial is coincidental.
Do not copy and paste this tutorial anywhere on the net.
If you want to translate please ask first. 

Tube: Dark Butterfly by Danny Lee - you can purchase here 
Kit Dark Butterfly by Design by Joan - you can purchase here 
Font: Almond Script

Don't forget to save often.
At any point if you have doubts check my tag.

1. Open a new image 851x315.

2. Open paper 'PPDARKBUTTERFLY-8' copy and paste as new layer. Use Raster Deform Tool and stretch the image to fill your canvas. Arrange for the top of the paper to appear.

3. Open element 'DARKBUTTERFLY_DBJ114' copy and paste as new layer. Arrange it to the right. Duplicate and arrange it to the left (so it fills all the background).

4. Open element 'DARKBUTTERFLY_DBJ103' copy and paste as new layer. Arrange it to the top left corner (just a small part will appear).

5. Open element 'DARKBUTTERFLY_DBJ50' copy and paste as new layer. Arrange it to the bottom left (just the top part will appear). Duplicate and arrange it to the bottom right.

6. Open your tube. Copy and paste as new layer. Resize as you prefer and arrange it to the right.

7. Open element 'DARKBUTTERFLY_DBJ123' copy and paste as new layer. Arrange it above the tube.

8. Add shadow if you want. I didn't use any.

9. Add copyright.

10. Add name. I used: Almond Script / size: 36

Save as PNG.

Lolli ~ by Joanne Salgado


Tutorial written by Joanne Salgado on April 28th, 2015
for those who have a working knowledge of PSP.
Any resemblance to any other tutorial is coincidental.
Do not copy and paste this tutorial anywhere on the net.
If you want to translate please ask first. 

Tube + Kit: Girly Glam Collab - you can purchase here 
Font: BPscript

Don't forget to save often.
At any point if you have doubts check my tag.

1. Open a new image 500x500

2. Open element 'gg12' copy and paste as new layer. Resize 70%.

3. Open element 'gg19' copy and paste as new layer. Resize 50%. Move this layer below the frame layer. Make sure the white part of the flower is always outside. Duplicate and Mirror when necessary. Arrange it around the frame (you should end with 6 flowers).

4. Open element 'gg28' copy and paste as new layer. Resize 50%. Duplicate and arrange it around the frame between the flowers we just added. (you should end with 6 flowers).

5. Open paper 'ggp4' copy and paste as new layer. Clean all the parts of the paper that appears outside the frame.

6. Open your close up tube. Copy and paste as new layer. Arrange it inside the frame. Change blend mode to soft light. Clean all the parts from the tube that appears outside the frame.

7. Open element 'gg35' copy and paste as new layer. Arrange it to the upper part of the frame, clean the parts that appears above the face of your tube, but leave the rest.

8. Open element 'gg9' copy and paste as new layer. Resize 55%. Move this layer above the frame layer. Arrange it to the bottom of the frame.

9. Open your tube. Copy and paste as new layer. Resize as you prefer and arrange it to the right.

10. Open element 'gg40' copy and paste as new layer. Resize 50%. Arrange it to the bottom of the frame.

11. Open element 'gg35' again, copy and paste as new layer. Arrange it to the bottom.

12. Open element 'gg46' copy and paste as new layer. Resize 40%. Arrange it to the bottom left. Duplicate. Mirror. Resize 70%. Arrange it to the right.

13. Add shadow. I used: 1-1-65-2 #808080.

14. Add copyright.

15. Add name. I used: BPscript / size: 48

Save as PNG

April 27, 2015

Glam Lady ~ by Joanne Salgado


Tutorial written by Joanne Salgado on April 27th, 2015
for those who have a working knowledge of PSP.
Any resemblance to any other tutorial is coincidental.
Do not copy and paste this tutorial anywhere on the net.
If you want to translate please ask first. 

Tube + Kit: Girly Glam Collab - you can purchase here 
Font: KG Miss Kindergarten

Don't forget to save often.
At any point if you have doubts check my tag.

1. Open a new iamge 600x500.

2. Open cluster 'Bibi_girlyglamcollab_cluster' copy and paste as new layer. Resize 60%.

3. Open element 'BIBIGIRLYGLAM COLLAB ELEM (57)' copy and paste as new layer. Resize 50%. Move this layer below the cluster layer. Arrange it to the top left. Duplicate. Mirror/Flip.

6. Open element 'BIBIGIRLYGLAM COLLAB ELEM (36)' copy and paste as new layer. Resize 70%. Arrange it to the left. Duplicate. Mirror.

7. Open element 'BIBIGIRLYGLAM COLLAB ELEM (11)' copy and paste as new layer. Resize 40%. Mirror/Flip. Arrange it to the bottom left of the cluster.

8. Open paper 'BIBIGIRLYGLAM COLLAB PAPERS (4)' copy and paste as new layer. Arrange it inside the cluster and clean the paper that appears outside the cluster.

9. Open wordart 'glam girl wallpaper' copy and paste as new layer. Resize 50%.

10. Open your tube. Copy and paste as new layer. Move this layer above the cluster layer. Resize as you prefer and arrange it inside the cluster. Clean the lower parts that appears outside the cluster.

11. Open element 'BIBIGIRLYGLAM COLLAB ELEM (66)' copy and paste as new layer. Resize 25%. Mirror. Arrange it to the left.

12. Add shadow. I used: 1-1-65-2 #170b14

13. Add copyright.

14. Add name. I used: KG Miss Kindergarten / size: 36

Save as PNG

April 26, 2015

Honey Bee ~ by Joanne Salgado


Tutorial written by Joanne Salgado on April 26th, 2015
for those who have a working knowledge of PSP.
Any resemblance to any other tutorial is coincidental.
Do not copy and paste this tutorial anywhere on the net.
If you want to translate please ask first. 

Tube: Honey Bee by Danny Lee - you can purchase here 
Kit Honey Bee by DnScraps - you can purchase here 
Template by me here 
Font: AR CHRISTY

Don't forget to save often.
At any point if you have doubts check my tag.

1. Open the template. Duplicate. Close the original. Delete the INFO layer.

2. Open element 'Honeybeekitpuspakles2' copy and paste as new layer. Resize 60%. Mirror.

3. Open element 'Honeybeekitpuhoney' copy and paste as new layer. Clean all the upper part of the element, we need just the floor honey. Arrange it to the bottom.

4. Open element 'Honeybeekitpubarrel' copy and paste as new layer. Resize 30%. Arrange it to the left.

5. Open element 'Honeybeekitpubee2' copy and paste as new layer. Resize 15%. Arrange it above the barrel.

6. Open element 'Honeybeekitpubee' copy and paste as new layer. Resize 15%. Arrange it to the top of the circle.

7. Open element 'Honeybeekitpulights' copy and paste as new layer. Resize 80%.

8. Open element 'Honeybeekitpulights2' copy and paste as new layer. Resize 79%.

9. Open your tube. Copy and paste as new layer. Resize as you prefer and arrange it to the right.

10. Open element 'Honeybeekitpucutestars' copy and paste as new layer. Resize 70%. Mirror. Arrange it to the bottom right.

11. Add shadow. I used: 1-1-65-2 black.

12. Add copyright.

13. Add name. I used: AR CHRISTY / size: 48

Save as PNG

Sensual ~ by Joanne Salgado


Tutorial written by Joanne Salgado on April 26th, 2015
for those who have a working knowledge of PSP.
Any resemblance to any other tutorial is coincidental.
Do not copy and paste this tutorial anywhere on the net.
If you want to translate please ask first. 

Tube: Sensual by SoulDesigner - you can purchase here 
Kit Sensual by Bibi's Collection - you can purchase here 
Mask 'DD_SM_9' by Dee here 
Font: Great Vibes

Don't forget to save often.
At any point if you have doubts check my tag.

1. Open a new image 600x500.

2. Open paper 'BIBI-SENSUAL PAPERS (1)' copy and paste as new layer. Open your mask, I used DD_SM_9, apply it. Merge group. Change opacity to 50.

3. Open element 'BIBI-SENSUAL ELEMS (30)' copy and paste as new layer. Arrange it to the top left corner.

4. Open element 'BIBI-SENSUAL ELEMS (44)' copy and paste as new layer. Resize 60%. Arrange it to the right.

6. Open element 'BIBI-SENSUAL ELEMS (18)' copy and paste as new layer. Resize 40%. Mirror. Move this layer below the frame layer. Arrange it to the bottom left of the frame.

7. Open paper 'BIBI-SENSUAL PAPERS (2)' copy and paste as new layer. Resize 60%. Arrange it inside the frame. Clean all the parts that appears outside the frame.

8. Open element 'BIBI-SENSUAL ELEMS (16)' copy and paste as new layer, Resize 60%. Move this layer above the frame layer. Arrange it to the left of the frame.

9. Open your tube. Copy and paste as new layer. Resize as you prefer and arrange it inside the frame. Clean all the lower parts of your tube that appears outside the frame.

10. Open element 'BIBI-SENSUAL ELEMS (78)' copy and paste as new layer. Arrange it to the bottom of the frame.

11. Open element 'BIBI-SENSUAL ELEMS (34)' copy and paste as new layer. Resize 40%. Arrange it to the bottom right of the frame.

12. Add shadow. I used: 1-1-65-2 black.

13. Add copyright.

14. Add name. I used: Great Vibes / size: 55

Save as PNG

Ellie Mae Blue ~ by Joanne Salgado


Tutorial written by Joanne Salgado on April 26th, 2015
for those who have a working knowledge of PSP.
Any resemblance to any other tutorial is coincidental.
Do not copy and paste this tutorial anywhere on the net.
If you want to translate please ask first. 

Tube: Ellie Mae by Toriya - you can purchase here 
Kit Ellie~Mae by Devilish Dezines - you can purchase here 
Font: BankGothic Lt BT

Don't forget to save often.
At any point if you have doubts check my tag.

1. Open a new image 500x500

2. Open element 'element22' copy and paste as new layer. Resize 60%. Arrange it to the top.

3. Open element 'element46' copy and paste as new layer. Resize 60%.

4. Open element 'element7' copy and paste as new layer. Resize 40%. Arrange it to the bottom left. Duplicate, mirror.

5. Open element 'element31' copy and paste as new layer. Resize 40%. Arrange it to the bottom between the two blue flowers.

6. Open element 'element38' copy and paste as new layer. Resize 40%. Arrange it to the bottom.

7. Open element 'element32' copy and paste as new layer. Resize 20%. Free rotate right-25. Arrange it to the bottom right.

8. Open element 'element9' copy and paste as new layer. Resize 20%. Arrange it to the top right.

9. Open your tube. Copy and paste as new layer. Resize as you prefer and arrange it to the bottom center.

10. Add shadow as you prefer. I used: 1-1-65-2 black.

11. Add copyright.

12. Add name. I used: BankGothic Lt BT / size: 48

Save as PNG.

Ellie Mae Red ~ by Joanne Salgado


Tutorial written by Joanne Salgado on April 26th, 2015
for those who have a working knowledge of PSP.
Any resemblance to any other tutorial is coincidental.
Do not copy and paste this tutorial anywhere on the net.
If you want to translate please ask first. 

Tube: Ellie Mae by Toriya - you can purchase here 
Kit Ellie Mae by Bibi's Collection - you can purchase here 
Font: PonytailScriptSSK

Don't forget to save often.
At any point if you have doubts check my tag.

1. Open a new image 500x500

2. Open element 'BIBI-ALLIE MAE ELEMS (79)' copy and paste as new layer. Resize 80%.

3. Open element 'BIBI-ALLIE MAE ELEMS (58)' copy and paste as new layer. Resize 45%. Free rotate right-25.

4. Open element 'BIBI-ALLIE MAE ELEMS (76)' copy and paste as new layer. Resize 50%. Move this layer below the frame layer. Arrange it to the top left corner of the frame. Duplicate, mirror. Arrange it to the right of the frame.

5. Open element 'BIBI-ALLIE MAE ELEMS (17)' copy and paste as new layer. Resize 70%. Arrange it to the top right corner of the frame.

6. Open paper 'BIBI-ELLIE MAE PAPERS (5)' copy and paste as new layer. Resize 30%. Arrange ir behind the frame and clean the parts that appears outside it. Plugins/penta.com/jeans with amout: 62 and border width: 4.

7. Open element 'BIBI-ALLIE MAE ELEMS (32)' copy and paste as new layer. Resize 50%. Mirror. Move this layer above the frame layer. Arrange it to the bottom right.

8. Open your tube. Copy and paste as new layer. Resize as you prefer and arrange it to the left.

9. Add shadow as you prefer. I used: 1-1-65-2 black.

10. Add copyright.

11. Add name. I used: PonytailScriptSSK / size: 48

Save as PNG

Once Upon a Time ~ by Joanne Salgado


Tutorial written by Joanne Salgado on April 26th, 2015
for those who have a working knowledge of PSP.
Any resemblance to any other tutorial is coincidental.
Do not copy and paste this tutorial anywhere on the net.
If you want to translate please ask first. 

Tube: Teen Angel 4 by LadyMishka Dolls - you can purchase here 
Kit Once Upon a Time by Ginnibug Designz - you can purchase here 
Font: MA Sexy

Don't forget to save often.
At any point if you have doubts check my tag.

1. Open a new image 500x500

2. Open element 'ouat60' copy and paste as new layer. Resize 60%. Arrange it to bottom.

3. Open element 'ouat10' copy and paste as new layer. Resize 65%. Move this layer below the cloud layer.

4. Open element 'ouat21' copy and paste as new layer. Resize 60%. Hue and Saturation/Colorize withboth = 0. Change opacity to 26. Plugins/penta.com with 62 / 4. Arrange it to the top. Clean the lower part.

5. Open element 'ouat90' copy and paste as new layer. Resize 65%.

6. Open element 'ouat61' copy and paste as new layer. Resize 30%. Arrange it to the left.

7. Open element 'ouat23' copy and paste as new layer. Resize 30%. Mirror. Arrange it to the bottom left.

8. Open your tube, copy and paste as new layer. Resize as you prefer. Arrange it to the right. Clean the lower part.

9. Add shadow. I used: 1-1-65-5 #404040.

10. Add copyright.

11. Add name. I used: MA Sexy / size: 55

Save as PNG

April 25, 2015

Nun ~ by Joanne Salgado


Tutorial written by Joanne Salgado on April 25th, 2015
for those who have a working knowledge of PSP.
Any resemblance to any other tutorial is coincidental.
Do not copy and paste this tutorial anywhere on the net.
If you want to translate please ask first. 

Tube: Nun by Danny Lee - you can purchase here 
Kit Nun by Bibi's Collection - you can purchase here 
Font: Canter Bold

Don't forget to save often.
At any point if you have doubts check my tag.

1. Open a new image 500x500

2. Open element 'BIBI-NUN ELEMS (4)' copy and paste as new layer. Resize 75%.

3. Open element 'BIBI-NUN ELEMS (84)' copy and paste as new layer. Resize 78%.

4. Open paper 'BIBI-NUN PAPERS (8)' copy and paste as new layer. Resize 40%. Move this layer below the frame layer. Arrange inside the frame with the moon appearing. Clean all paper that appears outside.

5. Open element 'BIBI-NUN ELEMS (88)' copy and paste as new layer. Resize 40%. Move this layer above the frame layer. Arrange it to the bottom right.

6. Open element 'BIBI-NUN ELEMS (91)' copy and paste as new layer. Resize 30%. Arrange it to the bottom right.

7. Open element 'BIBI-NUN ELEMS (19)' copy and paste as new layer. Resize 45%.Arrange it to the top. Clean the stem.

8. Open element 'BIBI-NUN ELEMS (45)' copy and paste as new layer. Resize 45%. Arrange it to the bottom right, to the left of the tombstone.

9. Open element 'BIBI-NUN ELEMS (52)' copy and paste as new layer. Resize 30%. Arrange it to the bottom left.

10. Open element 'BIBI-NUN ELEMS (77)' copy and paste as new layer. Resize 30%. Arrange it to the top, below the moon.

11. Open element 'BIBI-NUN ELEMS (123)' copy and paste as new layer. Resize 70%. Arrange it to bottom.

12. Open your tube. Copy and paste as new layer. Resize as you perfer and arrange it to the left.

13. Add shadow. I used: 1-1-65-2 black.

14. Add copyright.

15. Add name. I used: Canter Bold / size: 40.

Save as PNG

Yellow Road ~ by Joanne Salgado


Tutorial written by Joanne Salgado on April 25th, 2015
for those who have a working knowledge of PSP.
Any resemblance to any other tutorial is coincidental.
Do not copy and paste this tutorial anywhere on the net.
If you want to translate please ask first. 

Tube: Bonnie Rubia by LadyMishka Dolls - you can purchase here 
Kit Wizard of Oz by Bibi's Collection - you can purchase here 
Font: Sprinklescolors

Don't forget to save often.
At any point if you have doubts check my tag.

1. Open a new image 500x500

2. Open element 'BIBIWIZARDOFOZ ELEM (102)' copy and paste as new layer. Resize 60%.

3. Open element 'BIBIWIZARDOFOZ ELEM (85)' copy and paste as new layer. Resize 30%. Mirror. Arrange it to the top right.

4. Open element 'BIBIWIZARDOFOZ ELEM (188)' copy and paste as new layer. Resize 30%. Arrange it to the bottom.

5. Open your tube. Copy and paste as new layer. Resize as you prefer and arrange it to the right.

6. Open element 'BIBIWIZARDOFOZ ELEM (175)' copy and paste as new layer. Resize 40%. Arrange it to the bottom right, next the tube.

7. Open element 'BIBIWIZARDOFOZ ELEM (33)' copy and paste as new layer. Resize 40%. Mirror. Arrange it to the left.

8. Open element 'BIBIWIZARDOFOZ ELEM (6)' copy and paste as new layer. Resize 30%. Arrange it to the bottom right.

9. Open element 'BIBIWIZARDOFOZ ELEM (4)' copy and paste as new layer. Resize 30%. Arrange it to the bottom right.

10. Open element 'BIBIWIZARDOFOZ ELEM (162)' copy and paste as new layer. Resize 30%. Arrange it to the bottom right.

11. Open element 'BIBIWIZARDOFOZ ELEM (155)' copy and paste as new layer. Resize 30%. Arrange it to the bottom right.

12. Open element 'BIBIWIZARDOFOZ ELEM (122)' copy and paste as new layer. Resize 30%. Mirror. Arrange it to the left, above the dog.

13. Open element 'BIBIWIZARDOFOZ ELEM (10)' copy and paste as new layer. Resize 20%. Mirror. Arrange it to the bottom right.

14. Open element 'BIBIWIZARDOFOZ ELEM (42)' copy and paste as new layer. Resize 15%. Arrange it to the bottom right.

15. Open element 'BIBIWIZARDOFOZ ELEM (153)' copy and paste as new layer. Resize 30%. Arrange it to the bottom left.

16. Add shadow. I used: 1-1-65-2 #404040.

17. Add copyright.

18. Add name. I used: SendFlowers / size: 48

Save as PNG

Blooming ~ by Joanne Salgado


Tutorial written by Joanne Salgado on April 25th, 2015
for those who have a working knowledge of PSP.
Any resemblance to any other tutorial is coincidental.
Do not copy and paste this tutorial anywhere on the net.
If you want to translate please ask first. 

Tube: Bonnie Blue by LadyMishka Dolls - you can purchase here 
Kit Those Blooming Bunnies by Kissing Kate - you can purchase here 
Font: Rookies Showtimes

Don't forget to save often.
At any point if you have doubts check my tag.

1. Open a new image 500x500

2. Open element 'ELEMENT 57' copy and paste as new image. Resize 70%. Arrange it to the left. Manual color correction with source: #597e2f and target: e5cb1c. Mirror, flip.

3. Open element 'ELEMENT 12' copy and paste as new image. Resize 65%. Free rotate right-45.

4. Open element 'ELEMENT 74' copy and paste as new image. Resize 50%. Mirror. Move this layer below the frame layer. Arrange it to the top left of the frame.

5. Open element 'ELEMENT 72' copy and paste as new image. Resize 50%. Arrange it to the bottom left of the frame.

6. Open paper 'PAPER 10' copy and paste as new image. Resize 50%. Clean the paper outside the frame. Textures/Weave with 1-5-1-white-white-fill gaps checked.

7. Open your closeup tube, copy and paste as new image. Arrange it inside the frame. Change blend mode to luminance (L) and opacity to 20. Clean outside the frame.

8. Open your tube, copy and paste as new image. Resize as you prefer. Arrange it to the right. Move this layer above the frame layer.

9. Add shadow. I used: 1-1-65-5 #404040.

10. Add copyright.

11. Add name. I used: Rookies Showtimes / size: 48

Save as PNG

Beauty On Wheels ~ by Joanne Salgado


Tutorial written by Joanne Salgado on April 25th, 2015
for those who have a working knowledge of PSP.
Any resemblance to any other tutorial is coincidental.
Do not copy and paste this tutorial anywhere on the net.
If you want to translate please ask first. 

Tube: Beauty on Wheels by Danny Lee - you can purchase here 
Kit Beauty on Wheels by Kai Kreations - you can purchase here 
Font: Dancing Script

Don't forget to save often.
At any point if you have doubts check my tag.

1. Open a new image 500x500

2. Open element 'kai-bow-e8' copy and paste as new layer. Resize 70%. Arrange it to bottom.

3. Open element 'kai-bow-e29' copy and paste as new layer. Resize 55%. Arrange it behind the grass. Move this layer below the grass layer.

4. Open element 'kai-bow-e55' copy and paste as new layer. Resize 70%. Arrange it to the top.

5. Open element 'kai-bow-e24' copy and paste as new layer. Resize 60%. Move this layer above the grass layer. Arrange it to the bottom left.

6. Open element 'kai-bow-e6' copy and paste as new layer. Resize 70%. Arrange it to the right.

7. Open element 'kai-bow-e10' copy and paste as new layer. Resize 25%. Arrange it to the right of the fence.

8. Open element 'kai-bow-e45' copy and paste as new layer. Resize 25%. Arrange it above the fence next the tree.

9. Open element 'kai-bow-e22' copy and paste as new layer. Resize 15%. Arrange it to the bottom right next the flower.

10. Add shadow. I used: 1-1-65-2 #808080.

11. Add copyright.

12. Add name. I used: Dancing Script / size: 48

Save as PNG

Jade ~ by Joanne Salgado


Tutorial written by Joanne Salgado on April 25th, 2015
for those who have a working knowledge of PSP.
Any resemblance to any other tutorial is coincidental.
Do not copy and paste this tutorial anywhere on the net.
If you want to translate please ask first. 

Tube: Jade by Sweet Doll Artist - you can purchase here 
Kit Sweet Jade by Ginnibug Designz - you can purchase here 
Font: MA Sexy

Don't forget to save often.
At any point if you have doubts check my tag.

1. Open a new image 500x500.

2. Open element 'j56' copy and paste as new layer. Arrange it to bottom.

3. Open element 'j6' copy and paste as new layer. Resize 40%. Arrange it to the bottom left.

4. Open element 'j17' copy and paste as new layer. Resize 70%. Arrange it to the left.

5. Open element 'j18' copy and paste as new layer. Resize 70%.

6. Open element 'j25' copy and paste as new layer. Resize 25%. Mirror. Arrange it to the bottom left.

7. Open your tube. Copy and paste as new layer. Resize as you prefer and arrange it to the right.

8. Open element 'j45' copy and paste as new layer. Resize 55%. Arrange it to bottom.

9. Add shadow. I used: 1-1-65-2 #a38a6e.

10. Add copyright.

11. Add name. I used: MA Sexy / size: 36

Save as PNG

Magic Fairy ~ by Joanne Salgado


Tutorial written by Joanne Salgado on April 25th, 2015
for those who have a working knowledge of PSP.
Any resemblance to any other tutorial is coincidental.
Do not copy and paste this tutorial anywhere on the net.
If you want to translate please ask first. 

Tube: Fairy by Celinart - you can purchase here 
Kit Magic Fairy by Bibi's Collection - you can purchase here 
Font: Sweethearts Love Letters

Don't forget to save often.
At any point if you have doubts check my tag.

1. Open a new image 500x500.

2. Open element 'BIBI-MAGICFAIRY ELEM (81)' copy and paste as new layer. Resize 68%.

3. Open element 'BIBI-MAGICFAIRY ELEM (85)' copy and paste as new layer. Resize 55%. Arrange it to bottom.

4. Open element 'BIBI-MAGICFAIRY ELEM (75)' copy and paste as new layer. Resize 50%. Arrange it to the top right.

5. Open your tube. Copy and paste as new layer. Resize as you prefer and arrange it to the left.

6. Open element 'BIBI-MAGICFAIRY ELEM (55)' copy and paste as new layer. Resize 65%. Arrange it to bottom.

7. Open element 'BIBI-MAGICFAIRY ELEM (16)' copy and paste as new layer. Resize 40%. Arrange it to bottom.

8. Open element 'BIBI-MAGICFAIRY ELEM (26)' copy and paste as new layer. Resize 40%. Arrange it to the bottom right.

9. Open element 'BIBI-MAGICFAIRY ELEM (94)' copy and paste as new layer.

10. Add shadow. I used: 1-1-65-2 black.

11. Add copyright.

12. Add name. I used: Sweethearts Love Letters / size: 48

Save as PNG

Red Doll

AMOR CARMIM TUTORIAL


Tutorial written by Marcia Salgado on April 17th, 2015
for those who have a working knowledge of PSP.
Any resemblance to any other tutorial is coincidental.
Do not copy and paste this tutorial anywhere on the net.
If you want to translate please ask first. 

****************************************
Material:

Tube: "Red Doll" ©Exclusive Lady Mishka,
you can purchase it here
do not use without the proper #license.
PTU Kit "Be My Love" by Bibi's Collection Scraps,
you can purchase it here
Font: Broadmoor

****************************************

--> Remember to save often and use my tag as reference if necessary. Used the Drop Shadow: 1-1-50-5 in most layers. 

1. Create a new image 600x450. Open BIBI-MYLOVE ELEMS (62). Resize 40%. Copy and paste as new layer. Move it to right. Duplicate. Mirror.

2. Open BIBI-MYLOVE ELEMS (19). Resize 30%. Mirror. Copy and paste as new layer. Duplicate. Free Rotate: Left-45. Move it up and left.

3. Open BIBI-MYLOVE ELEMS (23). Resize 75%. Copy and paste as new layer. Select inside. Expand > 4. Open BIBI-MYLOVE PAPERS (5). Add a new layer. Copy and paste into selection. Move it below frame layer.

4. Open BIBI-MYLOVE ELEMS (67). Resize 50%. Copy and paste as new layer. Move it right down. 

5. Click on frame layer, should be the first layer. Open BIBI-MYLOVE ELEMS (58). Resize 20%. Copy and paste as new layer. Move it to right and place it over frame border. 

6. Open BIBI-MYLOVE ELEMS (60).Resize 60%. Copy and paste as new layer. Move it to frame top. Open BIBI-MYLOVE ELEMS (46). Resize 30%. Copy and paste as new layer. Move it to right and place it over the golden curtain.

7. Open BIBI-MYLOVE ELEMS (82). Resize 24%. Copy and paste as new layer. Move it to bottom left.

8. Open your tube and resize it if needed. Copy and paste as new layer. Move it to left. Add a suitable shadow.

--> Add your copyright info and license#. Add your name and save as PNG.


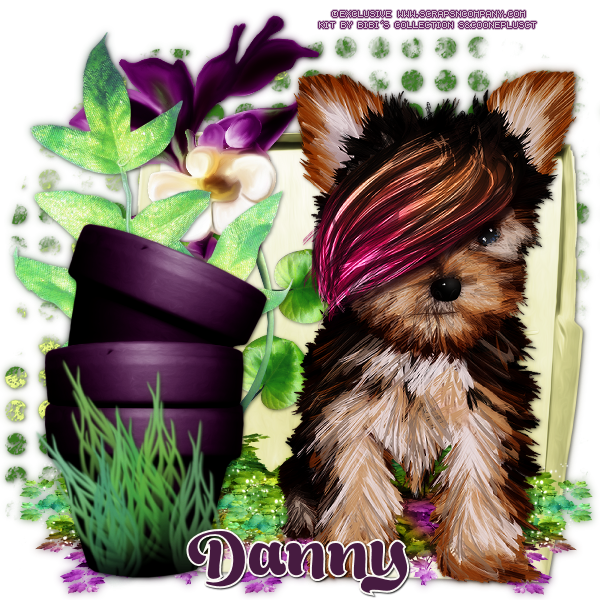
Emo Yorkie

YORKIE TUTORIAL


Tutorial written by Marcia Salgado on April 18th, 2015
for those who have a working knowledge of PSP.
Any resemblance to any other tutorial is coincidental.
Do not copy and paste this tutorial anywhere on the net.
If you want to translate please ask first. 

****************************************
Material:

Tube: "Emo Yorkie" Danny Lee Commission,
you can purchase it here
do not use without the proper #license.
PTU Kit "Flower" by Bibi's Collection Scraps,
you can purchase it here
Font: Bready Regular Demo

****************************************

--> Remember to save often and use my tag as reference if necessary. Used the Drop Shadow: 1-1-50-5 in most layers. 

1. Create a new image 600x600. Open BIBI-FLORALCOLAB ELEMS (4).Resize 80%. Copy and paste as new layer. Open BIBI-FLORALCOLAB ELEMS (35). Copy and paste as new layer. Move it to bottom right.

2. Open BIBI-FLORALCOLAB ELEMS (55).Resize 60%. Copy and paste as new layer. Move it to way left. Duplicate. Move it to middle. Duplicate. Move it to right.

3. Open BIBI-FLORALCOLAB ELEMS (69).Resize 60%. Mirror. Copy and paste as new layer. Move it left. Open BIBI-FLORALCOLAB ELEMS (21).Resize 40%. Copy and paste as new layer. Move it to left.

4. Open BIBI-FLORALCOLAB ELEMS (39). Copy and paste as new layer. Move it way left. Open BIBI-FLORALCOLAB ELEMS (33). Copy and paste as new layer. Move it to bottom left.

5. Open BIBI-FLORALCOLAB ELEMS (38).Resize 60%. Copy and paste as new layer. Move it bottom left. Place it in front of the vase.

6. Open your tube. Resize it if needed. Copy and paste as new layer. Move it to right.

--> Add your copyright info and license#. Add your name and save as PNG.


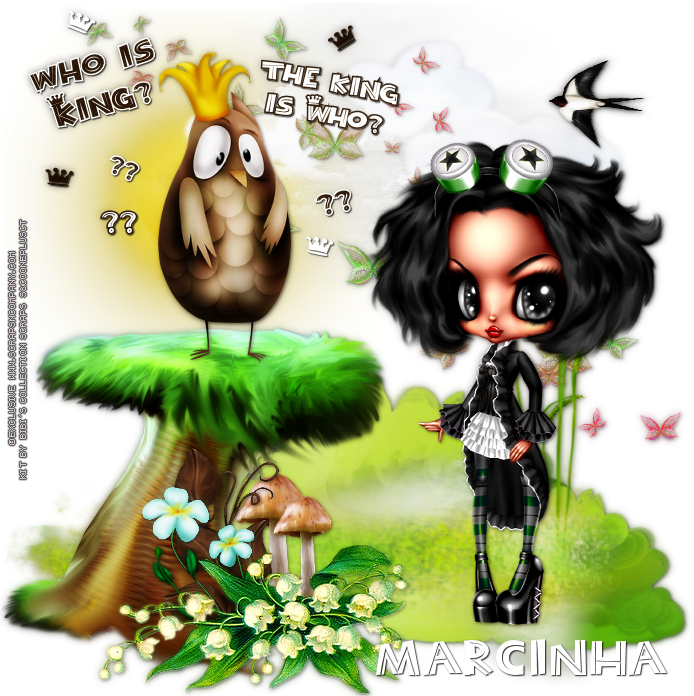
Maya Steampunk 3

KING WHO? TUTORIAL


Tutorial written by Marcia Salgado on April 18th, 2015
for those who have a working knowledge of PSP.
Any resemblance to any other tutorial is coincidental.
Do not copy and paste this tutorial anywhere on the net.
If you want to translate please ask first. 

****************************************
Material:

Tube: "Maya Steampunk 3" ©Exclusive Lady Mishka,
you can purchase it here
do not use without the proper #license.
PTU Kit "Green Fairy Tale" by Bibi's Collection Scraps,
you can purchase it here
Font: Bayou Cowboy

****************************************

--> Remember to save often and use my tag as reference if necessary. Used the Drop Shadow: 1-1-50-5 in most layers. 

1. Create a new image 700x700. Open BIBIGREENFAIRYTALE ELEMS (21).Resize 60%. Copy and paste as new layer. Move it to left. Open BIBIGREENFAIRYTALE ELEMS (51).Resize 60%. Copy and paste as new layer. Move it up, a little to right.

2. Open BIBIGREENFAIRYTALE ELEMS (61).Resize 60%. Copy and paste as new layer. Move it up right. Open BIBIGREENFAIRYTALE ELEMS (27). Copy and paste as new layer. Move it down and a little to right.

3. Open BIBIGREENFAIRYTALE ELEMS (31).Resize 30%. Mirror. Copy and paste as new layer. Move it up right. Open BIBIGREENFAIRYTALE ELEMS (47).Resize 70%. Copy and paste as new layer. Move it down a little. 

4. Open BIBIGREENFAIRYTALE ELEMS (55).Resize 50%. Copy and paste as new layer. Move it down left. Open BIBIGREENFAIRYTALE ELEMS (14).Resize 30% . Copy and paste as new layer. Move it down left in front of the little tree. Duplicate.Resize 80%. Move it to right to be at the side of the bigger mushroom. 

5. Open BIBIGREENFAIRYTALE ELEMS (33).Resize 40%. Copy and paste as new layer. Move it down and place it at the left side of the mushrooms. Open BIBIGREENFAIRYTALE ELEMS (43).Resize 30%. Copy and paste as new layer. Move it keft down. Again, place it on front of the mushrooms. Open BIBIGREENFAIRYTALE ELEMS (54). Copy and paste as new layer. Move it down and leave it on front all previous elements.

6. Open BIBIGREENFAIRYTALE ELEMS (20).Resize 80%. Copy and paste as new layer. Mirror. Copy and paste as new layer. Place the owl on top of the little tree. Open BIBIGREENFAIRYTALE ELEMS (18).Resize 40%. Free Rotate: Left-10. Copy and paste as new layer. Place the crown on owl's head.

7. Open your tube and resize if needed. Copy and paste as new layer. Move it to right. The wordart is optional but if you want mine just click on it and save.


--> Add your copyright info and license#. Add your name and save as PNG.


April 24, 2015

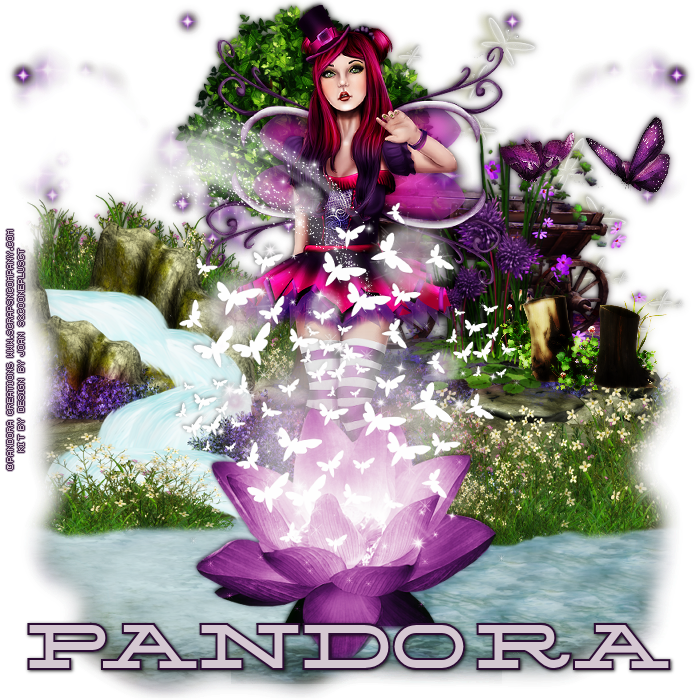
St. Patrick Patrizia

MAGICAL FAIRY TUTORIAL


Tutorial written by Marcia Salgado on April 10th, 2015
for those who have a working knowledge of PSP.
Any resemblance to any other tutorial is coincidental.
Do not copy and paste this tutorial anywhere on the net.
If you want to translate please ask first. 

****************************************
Material:

Tube: "St. Patrick Patrizia" by Pandora Creations,
you can purchase it at S&Co., here
do not use without the proper #license.
PTU Kit "St. Patrick Patrizia" by Design by Joan,
you can purchase it at S&Co., here
Font: Silverfake

****************************************

--> Remember to save often and use my tag as reference if necessary. Used the Drop Shadow: 1-1-50-5 in most layers. 

1. Create a new image 700x700. Open SPPATRIZIA_DBJ65. Resize 70%. Copy and paste as new layer. Move it to left top corner. Duplicate. Mirror. Merge Down. Open SPPATRIZIA_DBJ51. Resize 80%. Copy and paste as new layer.

2. 
Open SPPATRIZIA_DBJ57. Resize 80%. Copy and paste as new layer. Move it up and just a little to left. Open SPPATRIZIA_DBJ68. Resize 70%. Copy and paste as new layer. Move it up right.

3. Open SPPATRIZIA_DBJ50. Resize 80%. Copy and paste as new layer. Move it to right. Keep it over the landscape ground. Open SPPATRIZIA_DBJ71. Resize 40%. Copy and paste as new layer. Place it over the purple rug border to soften it.

4. Open your tube. Resize if needed. Copy and paste as new layer and keep it centered. Add a suitable shadow.

5. Open SPPATRIZIA_DBJ64. Resize 80%. Copy and paste as new layer. Move it down and over the tube legs. Open SPPATRIZIA_DBJ33. Resize 30%. Copy and paste as new layer. Move it up right.

6. Open SPPATRIZIA_DBJ69. Resize 50%. Copy and paste as new layer. Mirror. Move it to left but keep it over the centered buttlerflies.

--> Resize it if wanted. Add your copyright info and license#. 
Add your name and save as PNG.