August 28, 2015

Margo ~ by Joanne Salgado


Tutorial written by Joanne Salgado on August 28th, 2015
for those who have a working knowledge of PSP.
Any resemblance to any other tutorial is coincidental.
Do not copy and paste this tutorial anywhere on the net.
If you want to translate please ask first. 

Tube: Margo by Kate Miller - you can purchase here
Kit Classy Lady by Disturbed Scraps - you can purchase here
Font: Scriptina

Don't forget to save often.
At any point if you have doubts check my tag.

1. Open a new image 650x600

2. Open element 'DS - CL Element (80)' copy and paste as new layer. Resize 50%. Free Rotate right-12.

3. Open your tube. Copy and paste as new layer. Resize as you prefer. Arrange it inside the frame and clean so it looks like its coming from inside the frame.

4. Open paper 'DS - CL Paper 6' copy and paste as new layer. Resize 50%. Free Rotate right-12. Move this layer below all layers.

5. Open paper 'DS - CL Paper 13' copy and paste as new layer. Resize 50%. Free Rotate right-12. Change blend mode to overlay - hue and saturation 0 on both.

6. Open element 'DS - CL Element (57)' copy and paste as new layer. Resize 50%. Move this layer above all layers, arrange it to the bottom left of the frame.

7. Open element 'DS - CL Element (77)' copy and paste as new layer. Resize 60%. Move this layer below all layers. Arrange it to the bottom right. Duplicate. Mirror/Flip.

8. Open element 'DS - CL Element (71)' copy and paste as new layer. Resize 60%. Arrange it to the top right. Duplicate. Mirror/Flip.

9. Open element 'DS - CL Element (35)' copy and paste as new layer. Arrange it to the top right.

10. Open element 'DS - CL Element (30)' copy and paste as new layer. Arrange it to the top left.

11. Open element 'DS - CL Element (53)' copy and paste as new layer. Mirror. Arrange it to the left.

12. Open element 'DS - CL Element (36)' copy and paste as new layer. Resize 80%. Arrange it to the right.

13. Open element 'DS - CL Element (33)' copy and paste as new layer. Arrange it to the right.

14. Open element 'DS - CL Element (31)' copy and paste as new layer. Arrange it to the left.

15. Open element 'DS - CL Element (85)' copy and paste as new layer. Resize 85%. Arrange it to the left. Duplicate. Arrange it to the right.

16. Open element 'DS - CL Element (84)' copy and paste as new layer. Move this layer above all layers. Resize 85%. Arrange it to bottom.

17. Add shadow. I used: 1-1-65-2 black.

18. Add copyright.

19. Add name.

Save as PNG

August 23, 2015

TAG SHOW OFF


== NEW PTU TAG TINY TURTLE DESIGNS CT ==
AND THE ART OF NATALIA NZ

Featuring "Lora", tube by Natalia NZ and 
"Witchy Nights", Tiny Turtle Design kit at TinyTurtleDesign Store.

Natalia NZ's tube can be found  at:
-> TinyTurtleDesign Store, here

Tiny Turtle Design kit can be found  at:
-> TinyTurtleDesign Store, here


Butterfly Beauty ~ by Joanne Salgado


Tutorial written by Joanne Salgado on August 23th, 2015
for those who have a working knowledge of PSP.
Any resemblance to any other tutorial is coincidental.
Do not copy and paste this tutorial anywhere on the net.
If you want to translate please ask first. 

Tube: Butterfly Beauty by Andy Cooper - you can purchase here
Kit Butterfly Beauty by Tammy's Welt - you can purchase here
Font: Almond Script

Don't forget to save often.
At any point if you have doubts check my tag.

1. Open a new image 650x600

2. Open element 'butterfly beauty (48)' copy and paste as new layer. Resize 85%.

3. Open element 'butterfly beauty (13)' copy and paste as new layer. Resize 80%. Mirror. Arrange it to the right.

4. Open element 'butterfly beauty (61)' copy and paste as new layer. Move this below the frame layer. Arrange it to the bottom left.

5. Open element 'butterfly beauty (60)' copy and paste as new layer. Arrange it to the left.

6. Open element 'butterfly beauty (11)' copy and paste as new layer. Resize 50%. Arrange it to the top left.

7. Open element 'butterfly beauty (18)' copy and paste as new layer. Resize 50%. Arrange it to the top.

8. Open element 'butterfly beauty (43)' copy and paste as new layer. Resize 50%. Arrange it to the bottom right.

9. Open paper 'paper 4' copy and paste as new layer. Arrange it inside the frame and clean the outside parts.

10. Open element 'butterfly beauty (53)' copy and paste as new layer. Resize 50%. Move this above the frame layer. Arrange it to the top right (above the frame).

11. Open element 'butterfly beauty (37)' copy and paste as new layer. Resize 35%. Arrange it to the bottom left.

12. Open element 'butterfly beauty (49)' copy and paste as new layer. Resize 50%. Arrange it to the right.

13. Open element 'butterfly beauty (68)' copy and paste as new layer. Resize 95%.

14. Open your tube. Copy and paste as new layer. Resize as you prefer and arrange it to the left.

15. Open element 'butterfly beauty (70)' copy and paste as new layer. Arrange it to the bottom left.

16. Add shadow. I used: 1-1-65-2 black.

17. Add copyright.

18. Add name.

Save as PNG

Caramel

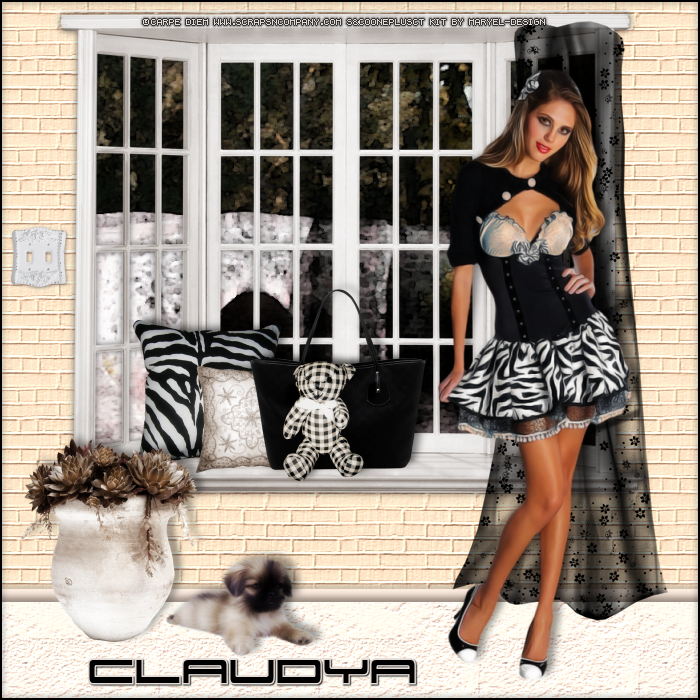
BAY WINDOW TUTORIAL


Tutorial written by Marcia Salgado on August 23th, 2015
for those who have a working knowledge of PSP.
Any resemblance to any other tutorial is coincidental.
Do not copy and paste this tutorial anywhere on the net.
If you want to translate please ask first. 

****************************************
Material:

Tube: "Caramel"by Carpe Diem, you can purchase it here
do not use without the proper #license.
PTU Kit "Caramel" by Maryel Designs, you can purchase it here
Texture: Brick Wall - Click and save.


Font: 911 Porscha

****************************************

--> Remember to save often and use my tag as reference if necessary. Use a suitable shadow on layers.

1. Create a new image 700x700. Add a new layer. Fill it with #E4C1A9. Apply the texture Brick Wall with settings bellow:


2. Add a new layer. Create a Custom Selection: Left:0, Top:600, Right:700, Bottom:700. Fill it with #E5DBD5. Use a texture you like. 

3. Add anew layer. Create a new Custom Selection: Left:0, Top:590, Right:700, Bottom:602. Fill it with #D0BFB4. Inner Bevel with settings bellow. Stretch a little on both sides to get rid to the inner bevel endings.


4. Open 'element' 69. Copy and paste as new layer. Move it up. Select outside the window. Add a new layer. Move it below the window layer.

5. Invert the selection. Contract > 5. Open Paper 7. Copy and paste into selection.

6. Open 'element' 64. Resize 30%. Copy and paste as new layer. Move it to left and down. Place it over the window base.

7. Open 'element' 63. Resize 20%. Copy and paste as new layer. Place it in frent of previous cushion.

8. Open 'element' 61. Resize 35%. Copy and paste as new layer. Place it on the right side of cushions.

9. Open 'element' 19. Resize 20%. Copy and paste as new layer. Place it in front of the black bag.

10. Open 'element' 54. Resize 25%. Copy and paste as new layer. Move it down left.

11. Open 'element' 73. Copy and paste as new layer. Move it to right.

12. Open 'element' 8. Resize 10%. Copy and paste as new layer. Move it up ald way left.

13. Open 'element' 80. Resize 40%. Copy and paste as new layer. Move it left down.

14. Open your tube. Resize if needed. Copy and paste as new layer. Move it to right.

15. Add a new layer. Select all. Fill with black. Contract > 2. Delete.

--> Resize if wanted. Add your copyright info and license#. Add your name and save as PNG.


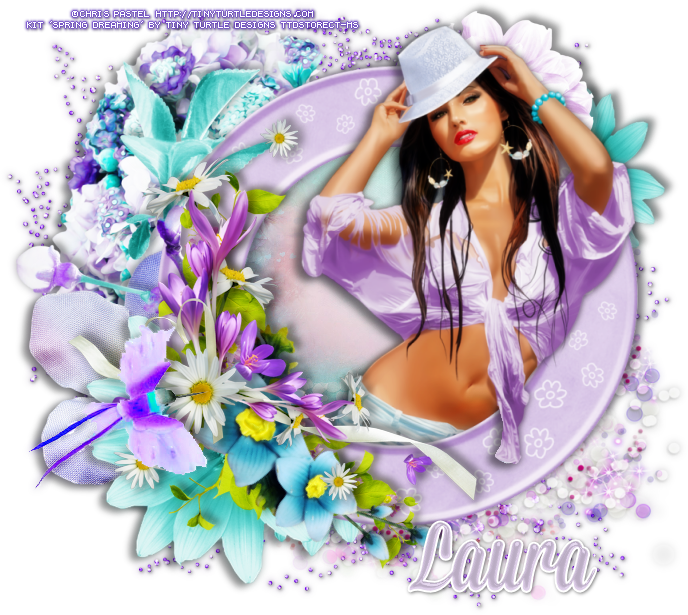
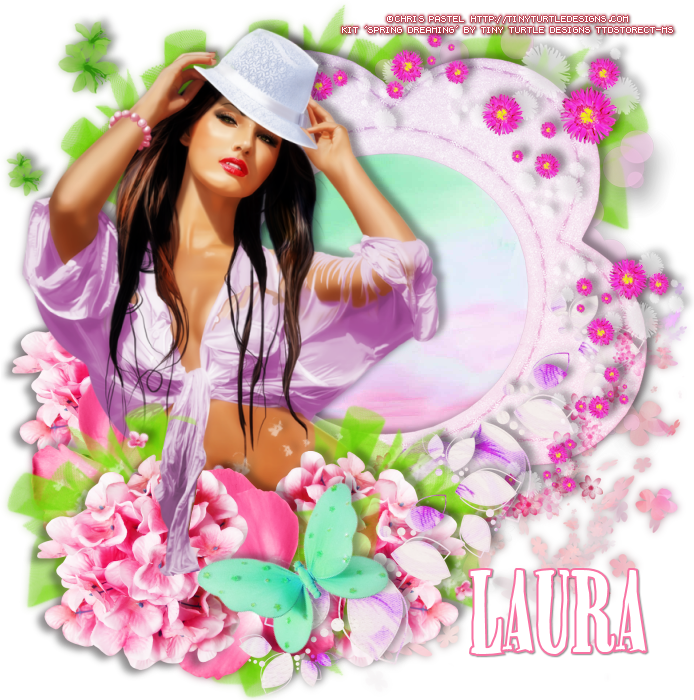
Spring Dreaming with Shana - Show Off


== NEW PTU TAG TINY TURTLE DESIGNS CT ==
AND THE ART OF CHRIS PASTEL

Featuring "Shana", a Chris Pastel tube and
"Spring Dreaming", Tiny Turtle Design kit at TinyTurtleDesign Store.

Tiny Turtle Design kit has 43 papers and 214 elements so you can play with it. 

Chris Pastel's tube can be found  at:
-> TinyTurtleDesign Store, here

Tiny Turtle Design kit can be found  at:
-> TinyTurtleDesign Store, here


August 21, 2015

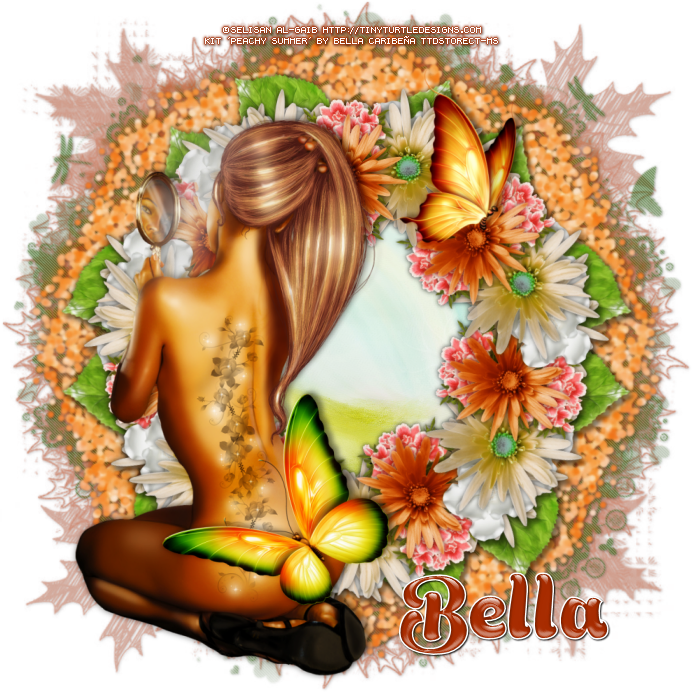
Peachy Summer with Imagine - Show Off


**Click to see original size **


== NEW PTU TAG BELLA CARIBEÑA CT ==
AND THE ART OF SELISAN AL-GAIB

Featuring "Imagine", a Selisan Al-Gaib tube
and "Peachy Summer", Bella Caribeña kit at TinyTurtleDesign Store.

Bella Caribeña kit has 11 papers and 105 elements so you can play with it. 

Selisan Al-Gaib's tube can be found  at:
-> TinyTurtleDesign Store, here

Bella Caribeña kit can be found  at:
-> TinyTurtleDesign Store, here


August 12, 2015

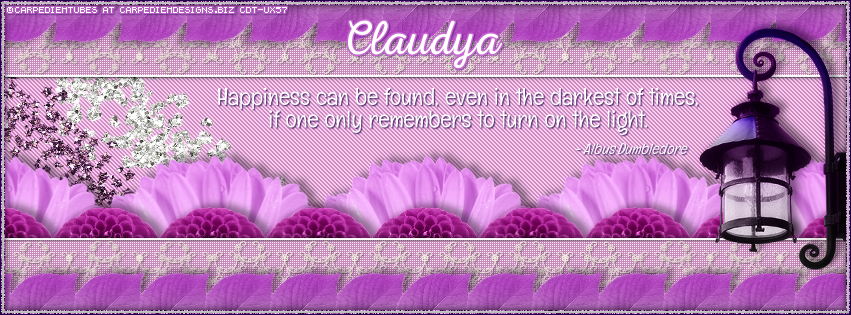
Designer Mix Pack 1 - Show Off


**Click to see original size**


== NEW PTU TIMELINE CARPE DIEM CT ==

Featuring "DESIGNER MIX PACK 1", a Carpe Diem kit 
at CarpeDiem Designs and Tube Art.
  
Carpe Diem's kit has awesome resources for you use. Personal or Commercial Use. Tagger Size. 72 DPI. No drop shadows. The pack contains: 1 lace, 1 jewel, 1 lantern, 1 tulip , 7 leafs, 3 flowers, and 2 glitter scatters.

Carpe Diem's kit can be found  at:
-> CarpeDiem Designs and Tube art, here


SHOW OFF - Joanne Salgado


== NEW PTU TAG TINY TURTLE DESIGNS CT ==
AND THE ART OF CHRIS PASTEL

Featuring "Tenderness", tube by Chris Pastel and 
"Noir Melody", Tiny Turtle Design kit at TinyTurtleDesign Store. 

Chris Pastel's tube can be found  at:
-> TinyTurtleDesign Store, here

Tiny Turtle Design kit can be found  at:
-> TinyTurtleDesign Store, here


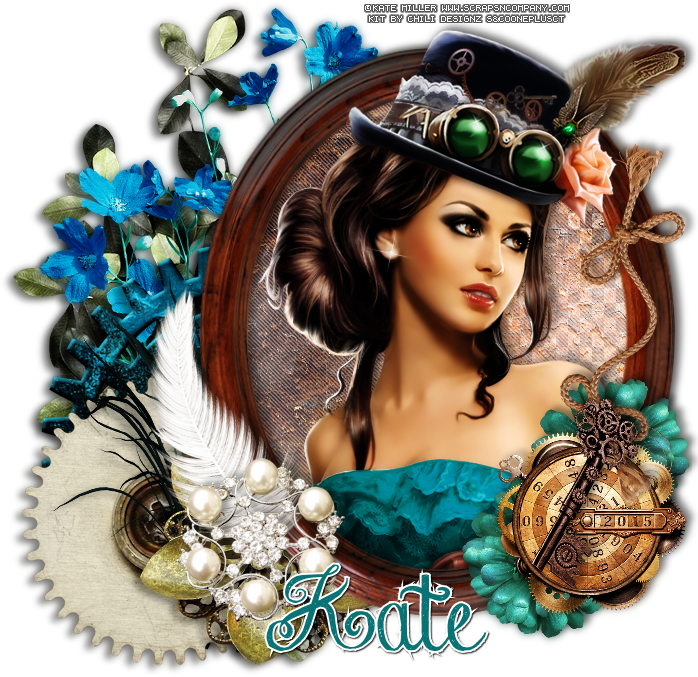
Purple Blue Steampunk with Steampunkd

STEAMED TUTORIAL


Tutorial written by Marcia Salgado on August 12th, 2015
for those who have a working knowledge of PSP.
Any resemblance to any other tutorial is coincidental.
Do not copy and paste this tutorial anywhere on the net.
If you want to translate please ask first. 

****************************************
Material:

Tube: "Purple Blue Steampunk" by Kate Miller, you can purchase it here
do not use without the proper #license.
PTU Kit "Steampunkd" by Chili Designz, you can purchase it here
Plugin: Penta.com
Font: Chalk-Hand-Lettering

****************************************

--> Remember to save often and use my tag as reference if necessary. Use a suitable Drop Shadow on layers.

1. Create a new image 700x700.

2. Open CHILI_DESIGNZ_Steampunkd_frame3. Free Rotate: Right-90. Copy and paste as new layer. Move it to right.

3. Open CHILI_DESIGNZ_Steampunkd_leaves2. Resize 70%. Free Rotate: Right-90. Copy and paste as new layer. Move this layer below frame layer and move the element to left.

4. Open CHILI_DESIGNZ_Steampunkd_flowers. Resize 70%. Copy and paste as new layer. Move it to left and up.

5. Open CHILI_DESIGNZ_Steampunkd_cog6. Copy and paste s new layer. Move it to left and down.

6. Open CHILI_DESIGNZ_Steampunkd_cog14. Copy and paste as new layer. Move it to bottom left corner.

7. Open CHILI_DESIGNZ_Steampunkd_grass. Resize 60%. Copy and paste as new layer. Move it down left.

8. Open CHILI_DESIGNZ_Steampunkd_flower3. Resize 65%. Copy and paste as new layer. Move it to left and place it over the blue grass base.

9. Click on frame layer, should be the first one. Select inside the frame. Expand > 3. Add a new layer and move it below frame layer. Open CHILI_DESIGNZ_Steampunkd_paper13. Copy and paste into selection. Keep selected and add a new layer. Open CHILI_DESIGNZ_Steampunkd_paper8. Paste into selection. Blend Mode: Screen. Apply Penta.com > Jeans > Default. Keep selected.

10. Open your tube. I'm using the blue version of the tube and no hat. Copy merged. Paste as new layer. Position it inside the frame. Invert selection. Delete. Select all. Selections > Clip to Canvas. Image > Crop to selection.

11. Open CHILI_DESIGNZ_Steampunkd_flower. Resize 50%. Copy and paste as new layer. Place it over the frame's right border at bottom. Duplicate it and move it over the border up.

12. Open CHILI_DESIGNZ_Steampunkd_deco2. Resize 40%. Copy and paste as new layer. Place it over the flowers.

13. Click on frame layer again. Open CHILI_DESIGNZ_Steampunkd_string. Resize 60%. Copy and paste as new layer. Place it over frame's right border.

14. Open CHILI_DESIGNZ_Steampunkd_key2. Resize 50%. Copy and paste as new layer. Place it over the string's bottom knot.

15. My tube has a hat layer. Copy the hat. Paste as new layer. Place it over the tube's head.

16. Open CHILI_DESIGNZ_Steampunkd_feather2. Resize 70%. Free Rotate: Right-100. Copy and paste as new layer. Place it over the frame left border at bottom. 

17. Open CHILI_DESIGNZ_Steampunkd_jewelry5. Copy and paste as new layer. Move it to left at bottom. Place it over the feather.

--> Resize if wanted. Add your copyright info and license#. Add your name and save as PNG.


Yellow Blood with Yellow

YELLOWMANIA TUTORIAL

**Click to see original size**

Tutorial written by Marcia Salgado on August 11th, 2015
for those who have a working knowledge of PSP.
Any resemblance to any other tutorial is coincidental.
Do not copy and paste this tutorial anywhere on the net.
If you want to translate please ask first. 

****************************************
Material:

Tube: "Yellow Blood" by Danny Lee, you can purchase it here
do not use without the proper #license.
PTU Kit "Yellow" by Kizzed by Kelz, you can purchase it here
Font: Canter Bold

****************************************

--> Remember to save often and use my tag as reference if necessary. Use a suitable Drop Shadow on layers. 

1. Create a new image 851x315.

2. Open KBK_Yellow (10). Copy and paste as new layer. Using Deform Tool (or Pick Tool in PSP newer versions) stretch it a little on the sides.

3. Open KBK_Yellow (5). Copy and paste as new layer. Using Deform Tool (or Pick Tool in PSP newer versions) stretch it a little on the sides. Move it down. Blend Mode: Overlay.

4. Open KBK_Yellow (119). Resize 70&%. Free Rotate: Right-90. Copy and paste as new layer. Move it halfway to right.

5. Open KBK_Yellow (75). Resize 40%. Copy and paste as new layer. Move it right down. Duplicate. Resize 70%. Move it up and more to right.

6. Open KBK_Yellow (67). Resize 70%. Copy and paste as new layer. Move it right up.

7. Open KBK_Yellow (35). Resize 60%. Copy and paste as new layer. Move it way bottom left corner.

8. Open KBK_Yellow (123). Resize 40%. Copy and paste as new layer. Move it way left and down.

9. Open KBK_Yellow (27). Resize 40%. Copy and paste as new layer. Move it way top left corner.

10. Open KBK_Yellow (84). Resize 40%. Flip. Copy and paste as new layer. Move it way left and up.

11. Open KBK_Yellow (24). Resize 20%. Copy and paste as new layer. Move it way left.

12. Open KBK_Yellow (116). Resize 45%. Copy and paste as new layer. Move it halfway right down.

13. Open KBK_Yellow (107). Resize 60%. Copy and paste as new layer. Move it to left.

14. Open KBK_Yellow (7). Resize 20%. Copy and paste as new layer. Place it over the bear's neck as a tie.

15. Open KBK_Yellow (70). Resize 60%. Copy and paste as new layer. Move it to right down.

16. Open KBK_Yellow (53), KBK_Yellow (54) and KBK_Yellow (55). Resize them 30%. Copy and paste as new layer. Place them around the bear.

17. Open KBK_Yellow (114). Resize 60%. Copy and paste as new layer. Move it to left and place it over the bear. Select inside the heart. Add a layer below bear layer.

18. Open KBK_Yellow (18). Copy and paste into selection. Keep selected.

19. Click on bear layer. Invert selection. Delete. Deselect.

20. Open KBK_Yellow (51). Resize 60%. Free Rotate: Left-90. Copy and paste as new layer. Move a little to left.

21. Open KBK_Yellow (96). Resize 50%. Copy and paste as new layer. Place it over the bush stem end.

22. Click on first layer. Add a new layer. Select all. Fill it with white. Contract  > 10. Delete. Keep selected. In same layer. Fill with black. Contract > 1. Delete. Deselect. Low the layer opacity to 50.

23. Ope your tube close up. Resize it needed. Copy and paste as new layer. Mirror. Move it to right. Add a suitable shadow.

24. Add a new layer. Select all. Fill with black. Contract > 1. Delete. Deselect.

--> Add your copyright info (no URL by Facebook TOU) and license#. Add your name. Save as PNG.

--> Sometimes I had to change my Timeline size to 846x313 because when I add it to Facebook the image has extra pixels and do not fit perfectly. So try this size if the same is happening to you.

August 11, 2015

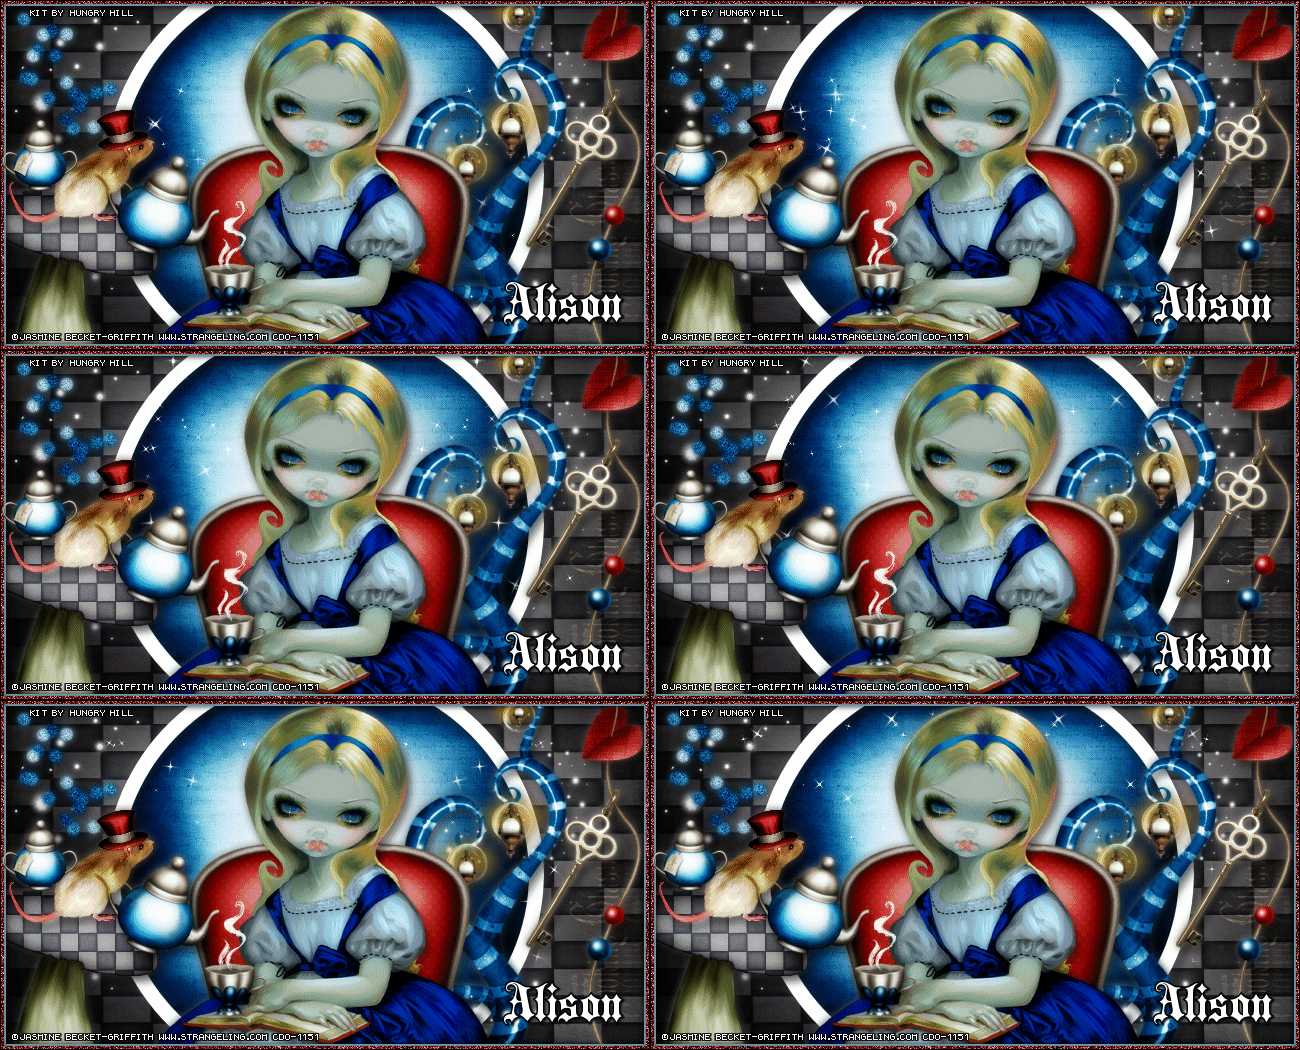
Go Ask Alice

WONDERTEA TUTORIAL


Tutorial written by Marcia Salgado on August 10th, 2015
for those who have a working knowledge of PSP and Animation Shop.
Any resemblance to any other tutorial is coincidental.
Do not copy and paste this tutorial anywhere on the net.
If you want to translate please ask first. 

****************************************
Material:

Tube: "Alice And The Bouguereau Princesses" by Jasmine Becket Griffith,
you can purchase it here,
do not use without the proper #license.
PTU Kit "Go Ask Alice" by Hungry Hill,
you can purchase it here
Animation: Scrappy Bit of Fun, SimoneAni-CelineMatch4-004 here
Font: Blackletter 

****************************************

--> Remember to save often and use my tag as reference if necessary. Use a suitable drop shadow on layers.

1. Create a new image 650x350. Select all. Add a new layer.

2. Open paper-7. Copy and paste into selection. Deselect.

3. Open sparkles. Resize 40%. Copy and paste as new layer. Move it way left and up. Duplicate. Mirror.

4. Open sparkles-2. Resize 70%. Mirror. Copy and paste as new layer.

5. Using your Preset Shape tool, with white on foreground color and background color null, draw a big circle with 15px of stroke. No matter if your top and bottom are outside of the image. Object > Align. Center in canvas. Convert to raster layer. Rename this layer to CIRCLE. Select inside the circle. Add a new layer and move it below the shape layer.

6. Open paper-1. Copy and paste into selection. Deselect.

7. Click on first layer. Open lanterns. Resize 50%. Copy and paste as new layer. Move it to right. Rename the layer to LANTERNS.

8. Open heartstring. Copy and paste as new layer. Move it down to show the heart and key then move it to right.

9. Open chair. Resize 50%. Copy and paste as new layer. Move it down.

10. Open your tube, resize if needed. Copy and paste as new layer. Place it over the chair. Add a suitable shadow.

11. Open mushroom-2. Resize 30%. Copy and paste as new layer. Move it down and to left.

12. Open teapot. Resize 15%. Mirror. Copy and paste as new layer. Place it over the mushroom's right edge.

13. Open mouse. Resize 20%. Copy and paste as new layer. Move it to left and place it like it is holding the teapot.

14. Open teacup. Resize 15%. Copy and paste as new layer. Move it down left. I placed mine over Alice's book. Before add any shadow, select the smoke, copy and paste as new image. Reserve it for later.

15. Add a new layer and fill it with #8fbed2. Select all. Contract > 6. Delete. Deselect.

16. Add a new layer and fill it with #760f0f. Select all. Contract > 4. Delete. Deselect.

17. Add a new layer and fill it with black. Select all. Contract > 1. Delete. Deselect. Noise: Gaussian - 100 - Monochrome.

18. Open sugarbowl. Resize 10%. Copy and paste as new layer. Move it to left and place it on mushroom's left edge.

--> Add your copyright info and license#. Add your name. If you do not want it animate you can save it here as PNG.

ANIMATION

1. PSP -> Turn layers from LANTERNS up invisible. Copy merged. 

2. ANIMATION SHOP -> Paste as new animation. Duplicate this frame to a total of 13 frames. Click on first frame and select all. Activate Propagate Paste.

3. ANIMATION SHOP -> Open the sparkle animation. It has 13 frames. Select all. Copy. Paste into selected frame. Position it on left side and click to paste it on all frames.

4. ANIMATION SHOP -> Basck to sparkle animation. Mirror. Copy and paste into selected frame, now place it on right side and click to paste it on all frames.

5. PSP -> Turn layers from LANTERNS up visible. Turn layyers from CIRCLE down invisible. Copy merged.

6. ANIMATION SHOP -> Paste as new animation. Copy. Activate the background you made. Paste into selected frames.

7. PSP -> Click on the smoke image you reserved. Resize canvas to 120x120 - Center. Copy merged.

8. ANIMATION SHOP -> Paste as new animation. Insert image effect. Look for Underwater and use the settings below:


9. ANIMATION SHOP -> Delete the first frame. Select all. Copy. Activate the tag you made. Paste into selected frames. Place it over the cup smoke and click to paste it on all layers. Save as GIF.

--------------------------------------------------

ANOTHER VERSION
Just changed the position of the sparkle animation. 
I added it behind the circle frame here and used a smaller copy of it than the one I used on the tutorial tag.


August 8, 2015

Steampunk ~ by Joanne Salgado


Tutorial written by Joanne Salgado on August 08th, 2015
for those who have a working knowledge of PSP.
Any resemblance to any other tutorial is coincidental.
Do not copy and paste this tutorial anywhere on the net.
If you want to translate please ask first. 

Tube: Steampunk by Kate Miller - you can purchase here
Kit Steam Pretty by Bibi's Collection - you can purchase here
Font: Adine Kimberg

Don't forget to save often.
At any point if you have doubts check my tag.

1. Open a new image 

2. Open element 'BIBI-STEAM PRETTY ELEMS (92)' copy and paste as new layer. Resize 90%.

3. Open element 'BIBI-STEAM PRETTY ELEMS (49)' copy and paste as new layer. Resize 40%. Mirror. Arrange it to the top right.

4. Open element 'BIBI-STEAM PRETTY ELEMS (118)' copy and paste as new layer. Resize 70%. Move this layer below all layers. Arrange it to the bottom left.

5. Open element 'BIBI-STEAM PRETTY ELEMS (119)' copy and paste as new layer. Resize 70%. Arrange it to the bottom right.

6. Open element 'BIBI-STEAM PRETTY ELEMS (91)' copy and paste as new layer. Resize 50%. Mirror. Arrange it to the top right.

7. Open element 'BIBI-STEAM PRETTY ELEMS (121)' copy and paste as new layer. Resize 50%. Arrange it to the bottom right. Behind the frames.

8. Open element 'BIBI-STEAM PRETTY ELEMS (59)' copy and paste as new layer. Resize 50%. Free Rotate left-15. Arrange it to the left.

9. Open element 'BIBI-STEAM PRETTY ELEMS (15)' copy and paste as new layer. Resize 70%. Arrange it to the left.

10. Open element 'BIBI-STEAM PRETTY ELEMS (39)' copy and paste as new layer. Resize 50%. Arrange it to the right.

11. Open your tube. Copy and paste as new layer. Resize if needed. Arrange it inside one of the frames. Duplicate. Mirror. Arrange it inside the other frame. Clean the outside parts.

12. Open element 'BIBI-STEAM PRETTY ELEMS (79)' copy and paste as new layer. Resize 40%. Free Rotate right-15. Move this layer above the bird layer. Arrange it to the middle between the frames.

13. Open element 'BIBI-STEAM PRETTY ELEMS (42)' copy and paste as new layer. Resize 50%. Arrange it to the bottom a little above the brown butterfly.

14. Add shadow. I used: 1-1-65-2 #1b0a01

15. Add copyright.

16. Add name.

Save as PNG

Gothic Dina ~ by Joanne Salgado


Tutorial written by Joanne Salgado on August 08th, 2015
for those who have a working knowledge of PSP.
Any resemblance to any other tutorial is coincidental.
Do not copy and paste this tutorial anywhere on the net.
If you want to translate please ask first. 

Tube: Gothic Dina by Ishika Chowdhury - you can purchase here
Kit Gothic Dina by Whisper In The Wind - you can purchase here
Font: Mirielle

Don't forget to save often.
At any point if you have doubts check my tag.

1. Open a new image 650x550

2. Open element 'WITWGothicDina El 70png' copy and paste as new layer. Resize 70%. Arrange it to bottom.

3. Open element 'WITWGothicDina El 16' copy and paste as new layer. Resize 60%. Arrange it to the bottom left.

4. Open element 'WITWGothicDina El 6' copy and paste as new layer. Resize 50%. Arrange it behind the couch (move the layer below the couch layer).

5. Open element 'WITWGothicDina El 36' copy and paste as new layer. Resize 50%. Arrange it behind the couch to the left.

6. Open element 'WITWGothicDina El 48' copy and paste as new layer. Resize 50%. Arrange it behind the couch to the right.

7. Open element 'WITWGothicDina El 27' copy and paste as new layer. Resize 60%. Move this layer above the couch layer. Arrange it to the center.

8. Open element 'WITWGothicDina El 47' copy and paste as new layer. Resize 20%. Mirror. Arrange it above the couch to the left.

9. Open your tube. Copy and paste as new layer. Resize as you prefer and arrange it a little to the right.

10. Open element 'WITWGothicDina El 72png' copy and paste as new layer. Resize 25%. Arrange it to the left.

11. Open element 'WITWGothicDina El 30' copy and paste as new layer. Resize 20%. Arrange it above the little table we just added.

12. Open element 'WITWGothicDina El 7' copy and paste as new layer. Resize 60%. Mirror. Arrange it to the bottom.

13. Open element 'WITWGothicDina El 2' copy and paste as new layer. Resize 70%. Arrange it to the bottom, a little to the right.

14. Open element 'WITWGothicDina El 96' copy and paste as new layer. Resize 70%. Arrange it to the right.

15. Open element 'WITWGothicDina El 75png' copy and paste as new layer. Resize 30%. Arrange it to the bottom left (at the end of the blue lace we added).

16. Open element 'WITWGothicDina El 39' copy and paste as new layer. Resize 30%. Arrange it to the bottom right.

17. Open element 'WITWGothicDina El 17' copy and paste as new layer. Resize 20%. Mirror. Free Rotate right-15. Add sharpen. Arrange it to the bottom right.

18. Open element 'WITWGothicDina El 38' copy and paste as new layer. Resize 30%. Arrange it to the bottom right.

19. Open element 'WITWGothicDina El 91' copy and paste as new layer. Resize 20%. Free Rotate left-20. Add sharpen. Arrange it to the right.

20. Using the blue lace as the end of the images, clean the ground pattern, the couch legs, so it looks like my tag.

21. Add shadow. I used: 1-1-65-2 #404
040

22. Add copyright.

23. Add name.

Save as PNG
August 6, 2015

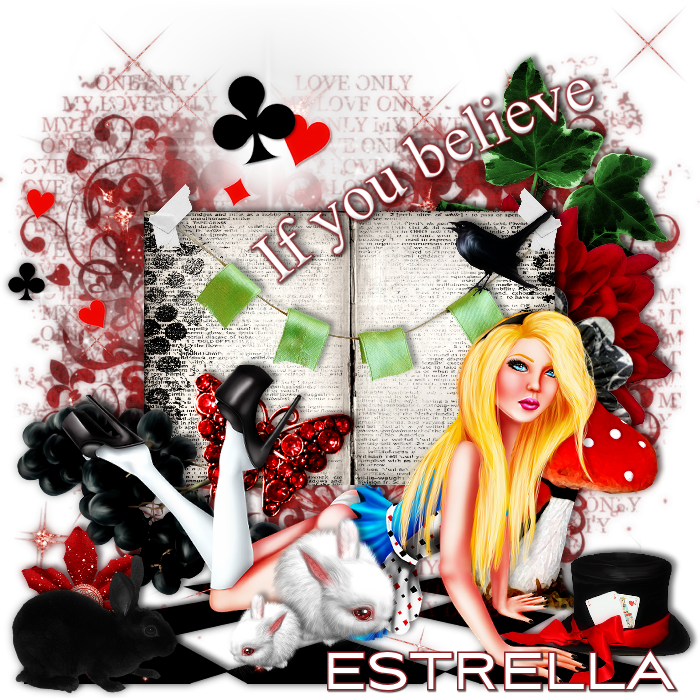
Alice with High Heels Alice

HIGH HEELS ALICE TUTORIAL


Tutorial written by Marcia Salgado on August 6th, 2015
for those who have a working knowledge of PSP.
Any resemblance to any other tutorial is coincidental.
Do not copy and paste this tutorial anywhere on the net.
If you want to translate please ask first. 

****************************************
Material:

Tube: "Alice" by Pandora Creations, you can purchase it here
do not use without the proper #license.
PTU Kit "High Heels Alice" by Chili Designs, you can purchase it here 
Mask: Dee's mask, DD_VMask_6, here
Font: Aviano Sans

****************************************

--> Remember to save often and use my tag as reference if necessary. Use a Drop Shadow you like on layers. 

1. Crete a new image 700x700. 

2. Open CHILI_DESIGNZ_HighHeelsAlice_floor. Resize 60%. Copy and paste as new layer. Move it down. Add a new layer. Select all.

3. Open CHILI_DESIGNZ_HighHeelsAlice_paper15. Copy and paste into selection. Deselect. Apply Dee's mask. Merge group. 

4. Open CHILI_DESIGNZ_HighHeelsAlice_sparkles4. Copy and paste as new layer.

5. Open CHILI_DESIGNZ_HighHeelsAlice_deco3. Resize 80%. Copy and paste as new layer. Move it to left top.

6. Open CHILI_DESIGNZ_HighHeelsAlice_greenery. Resize 50%. Copy and paste as new layer. Move it to right.

7. Open CHILI_DESIGNZ_HighHeelsAlice_flower. Resize 70%. Copy and paste as new layer. Move it to right.

8. Open CHILI_DESIGNZ_HighHeelsAlice_flower4. Copy and paste as new layer. Move it to right.

9. Open CHILI_DESIGNZ_HighHeelsAlice_book4. Resize 70%. Copy and paste as new layer. Select outside the book. Invert selection. Add a new layer.

10. Open CHILI_DESIGNZ_HighHeelsAlice_txtoverlay. Copy and paste into selection. Deselect.

11. Open CHILI_DESIGNZ_HighHeelsAlice_banner. Resize 47% Copy and paste as new layer. Move it up.

12. Open CHILI_DESIGNZ_HighHeelsAlice_tape. Resize 20%. Copy and paste as new layer. Move it up right and place it on rope edge. Duplicate. Mirror. Place it over the left rope edge.

13. Open CHILI_DESIGNZ_HighHeelsAlice_bird. Resize 30%. Copy and paste as new layer. Move it to right and up. Place it over one of the green banners.

14. Open CHILI_DESIGNZ_HighHeelsAlice_grapes. Resize 60%. Copy and paste as new layer. Move it down left.

15. Open CHILI_DESIGNZ_HighHeelsAlice_butterfly. Resize 60%. Copy and paste as new layer. Move it down and left.

16. Open CHILI_DESIGNZ_HighHeelsAlice_mushroom. Resize 60%. Copy and paste as new layer. Move it down and right.

17. Open your tube. Resize if needed. Copy and paste as new layer. Move it down. Apply a suitable drop shadow.

18. Open CHILI_DESIGNZ_HighHeelsAlice_rabbit2. Resize 60%. Copy and paste as new layer. Move it down. Duplicate. Resize 60%. Mirror. Move it left and a little down.

19. Open CHILI_DESIGNZ_HighHeelsAlice_hat2. Resize 40%. Mirror. Copy and paste as new layer. Move it down right.

20. Open CHILI_DESIGNZ_HighHeelsAlice_wa. Copy and paste as new layer. Move it up. Add a border with color: #8b1f23. 

21. Open CHILI_DESIGNZ_HighHeelsAlice_flower5. Resize 50%. Copy and paste as new layer. Move it down left. 

22. Open CHILI_DESIGNZ_HighHeelsAlice_rabbit. Resize 50%. Copy and paste as new layer. Move it down left.

--> Resize if wanted. Add your copyright info and license#. Add your name and save as PNG.