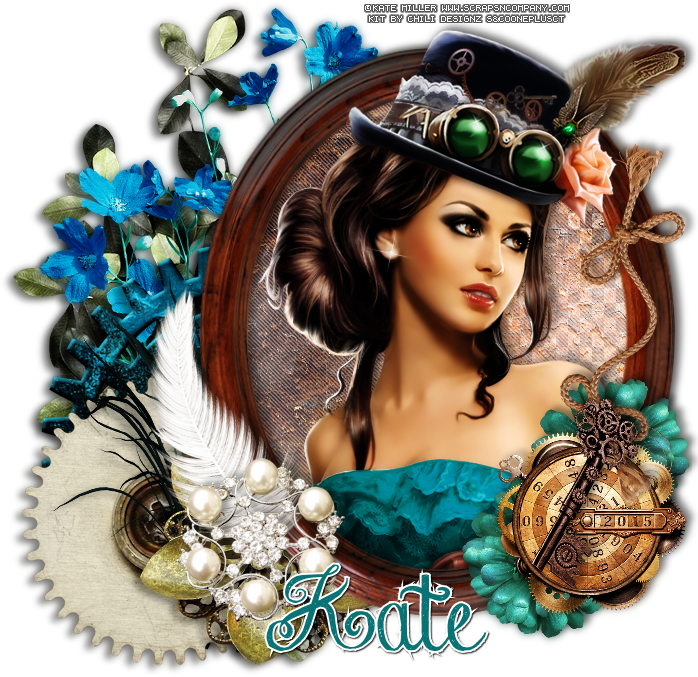
STEAMED TUTORIAL
Tutorial written by Marcia Salgado on August 12th, 2015
for those who have a working knowledge of PSP.
Any resemblance to any other tutorial is coincidental.
Do not copy and paste this tutorial anywhere on the net.
If you want to translate please ask first.
****************************************
Material:
Tube: "Purple Blue Steampunk" by Kate Miller, you can purchase it here
do not use without the proper #license.
PTU Kit "Steampunkd" by Chili Designz, you can purchase it here
Plugin: Penta.com
Font: Chalk-Hand-Lettering
****************************************
--> Remember to save often and use my tag as reference if necessary. Use a suitable Drop Shadow on layers.
1. Create a new image 700x700.
2. Open CHILI_DESIGNZ_Steampunkd_frame3. Free Rotate: Right-90. Copy and paste as new layer. Move it to right.
3. Open CHILI_DESIGNZ_Steampunkd_leaves2. Resize 70%. Free Rotate: Right-90. Copy and paste as new layer. Move this layer below frame layer and move the element to left.
4. Open CHILI_DESIGNZ_Steampunkd_flowers. Resize 70%. Copy and paste as new layer. Move it to left and up.
5. Open CHILI_DESIGNZ_Steampunkd_cog6. Copy and paste s new layer. Move it to left and down.
6. Open CHILI_DESIGNZ_Steampunkd_cog14. Copy and paste as new layer. Move it to bottom left corner.
7. Open CHILI_DESIGNZ_Steampunkd_grass. Resize 60%. Copy and paste as new layer. Move it down left.
8. Open CHILI_DESIGNZ_Steampunkd_flower3. Resize 65%. Copy and paste as new layer. Move it to left and place it over the blue grass base.
9. Click on frame layer, should be the first one. Select inside the frame. Expand > 3. Add a new layer and move it below frame layer. Open CHILI_DESIGNZ_Steampunkd_paper13. Copy and paste into selection. Keep selected and add a new layer. Open CHILI_DESIGNZ_Steampunkd_paper8. Paste into selection. Blend Mode: Screen. Apply Penta.com > Jeans > Default. Keep selected.
10. Open your tube. I'm using the blue version of the tube and no hat. Copy merged. Paste as new layer. Position it inside the frame. Invert selection. Delete. Select all. Selections > Clip to Canvas. Image > Crop to selection.
11. Open CHILI_DESIGNZ_Steampunkd_flower. Resize 50%. Copy and paste as new layer. Place it over the frame's right border at bottom. Duplicate it and move it over the border up.
12. Open CHILI_DESIGNZ_Steampunkd_deco2. Resize 40%. Copy and paste as new layer. Place it over the flowers.
13. Click on frame layer again. Open CHILI_DESIGNZ_Steampunkd_string. Resize 60%. Copy and paste as new layer. Place it over frame's right border.
14. Open CHILI_DESIGNZ_Steampunkd_key2. Resize 50%. Copy and paste as new layer. Place it over the string's bottom knot.
15. My tube has a hat layer. Copy the hat. Paste as new layer. Place it over the tube's head.
16. Open CHILI_DESIGNZ_Steampunkd_feather2. Resize 70%. Free Rotate: Right-100. Copy and paste as new layer. Place it over the frame left border at bottom.
17. Open CHILI_DESIGNZ_Steampunkd_jewelry5. Copy and paste as new layer. Move it to left at bottom. Place it over the feather.
--> Resize if wanted. Add your copyright info and license#. Add your name and save as PNG.

