May 31, 2015

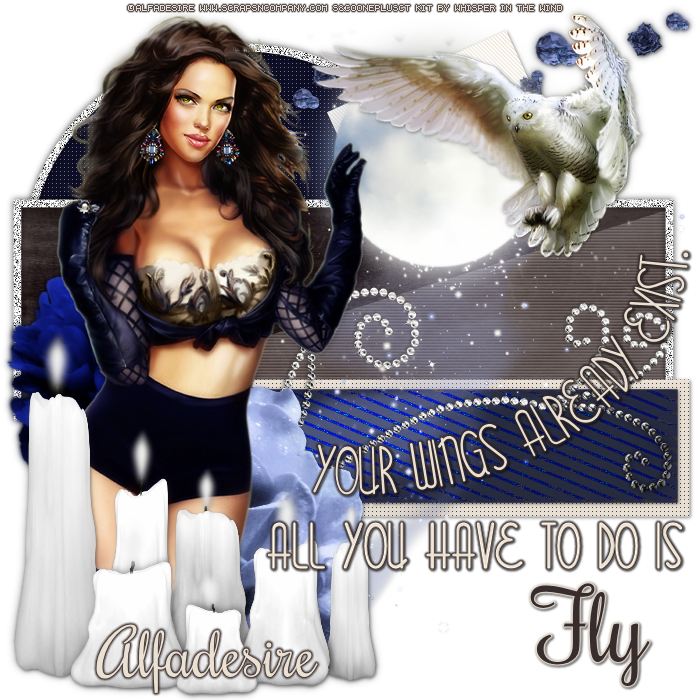
Owl with Angela's Butterfly Dreams

WINGS TO FLY TUTORIAL


Tutorial written by Marcia Salgado on May 31th, 2015
for those who have a working knowledge of PSP.
Any resemblance to any other tutorial is coincidental.
Do not copy and paste this tutorial anywhere on the net.
If you want to translate please ask first. 

****************************************
Material:

Tube: "Owl" by Alfadesire, you can purchase it here
do not use without the proper #license.
PTU Kit "Angela's Butterfly Dreams" by Whisper in the Wind,
you can purchase it here
Template: by me, mar2015_template11 here
Plugin: Penta.com > Jeans
Font: Rochester

****************************************

--> Remember to save often and use my tag as reference if necessary. Used the Drop Shadow: 1-1-50-5 in most layers. 

1. Open my template. Duplicate. Close the original. Delete layers © and Fontes Used. Click on square bottom layer. Merge down. Click on square up layer. Apply Penta.com > Jeans.

2. Open BD El 8. Resize 70% Copy and paste as new layer. Move it upper right.

3. Click on big rectangle layer. Select it. Add a new layer. Open BD Paper 2. Copy and paste into selection. Blend Mode: Luminance (Legacy). 

4. Click on half big rectangle layer. Blend Mode: Exclusion.

5. Click on small rectangle layer. Select it. Add a new layer. Open BD Paper 7. Copy and paste into selection. Blend Mode: Color.

6. OPen BD El 70. Resize 80%. Copy and paste as new layer. Move a little to right.

7. Open BD El 73. Resize 40%. Free Rotate: Right-20. Copy and paste as new layer. Move it left. Place over big rectangle bottom left corner.

8. Open BD El 69. Resize 40%. Copy and paste as new layer. Move it up a little to right.

9. Open BD El 19. Resize 70%. Copy and paste as new layer. Move it a little down. Place its base over the small rectangle.

10.Open BD El 71. Resize 40%. Mirror. Copy and paste as new layer. Move it down left.

11. Open your tube. Resize if needed. Copy and paste as new layer. Move it to left. Add a suitable shadow. Arrange the elements to better fit your tube. My main tube has two owls that came together, I chose one and paste it as new layer. Place it on right top.

12. Open BD El 26. Resize 50%. Copy and paste as new layer. Move it to bottom left. Place it over the tube legs.

13. Add a border of 2px #382D2D to your wings... and all you have... layers.

14. Add a border of 2px #EBE1D3 to fly layer.

--> Resize if wanted. Add your copyright info and license#. Add your name and save as PNG.


Deviant ~ by Joanne Salgado


Tutorial written by Joanne Salgado on May 31th, 2015
for those who have a working knowledge of PSP.
Any resemblance to any other tutorial is coincidental.
Do not copy and paste this tutorial anywhere on the net.
If you want to translate please ask first. 

Tube: Be Deviant by Alfadesire - you can purchase here
Kit Deviant Darkness by Disturbed Scraps - you can purchase here
Font: Zombie Holocaust

Don't forget to save often.
At any point if you have doubts check my tag.

1. Open a new image 700x600.

2. Open element 'DS - DD Element (72)' copy and paste as new layer. Resize 85%.

3. Open element 'DS - DD Element (59)' copy and paste as new layer. Resize 90%. Arrange it to bottom.

4. Open element 'DS - DD Element (14)' copy and paste as new layer. Resize 60%. Arrange it to the bottom right. Move this below the floor layer.

5. Open element 'DS - DD Element (54)' copy and paste as new layer. Resize 70%. Arrange it to the left. Duplicate. Mirror.

6. Open element 'DS - DD Element (36)' copy and paste as new layer. Resize 60%. Move this above the floor layer. Arrange it to the bottom left.

7. Open your tube. Copy and paste as new layer. Resize as you prefer and arrange it to the right.

8. Open element 'DS - DD Element (60)' copy and paste as new layer. Resize 30%. Arrange it to the bottom left. Duplicate. Arrange it to the middle. Duplicate. Arrange it to the right.

9. Open element 'DS - DD Element (52)' copy and paste as new layer. Resize 30%. Arrange it to the face of the necromancer. Change blend mode to screen.

10. Add shadow. I used: 1-1-65-2 black.

11. Add copyright.

12. Add name. I used: Zombie Holocaust / size: 48

Save as PNG.

Gothic Lady ~ by Joanne Salgado


Tutorial written by Joanne Salgado on May 31th, 2015
for those who have a working knowledge of PSP.
Any resemblance to any other tutorial is coincidental.
Do not copy and paste this tutorial anywhere on the net.
If you want to translate please ask first. 

Tube: Gothic Lady by Alehandra Vanhek - you can purchase here
Kit Gothic Lady by Lizquis Scraps - you can purchase here
Font: Sheila

Don't forget to save often.
At any point if you have doubts check my tag.

1. Open a new image 700x600.

2. Open element 'LS_GothicLady_frame1' copy and paste as new layer. Resize 80%. Arrange it to the left.

3. Open element 'LS_GothicLady_vine' copy and paste as new layer. Mirror. Arrange it to the right. Move this below the frame layer. Clean the parts that appears inside the frame.

4. Open paper 'LS_GothicLady_paper9' copy and paste as new layer. Resize 50%. Arrange it inside the frame and clean the parts that appears outside it.

5. Add a new layer. Select the frame layer, select inside it. Select the layer we just added. Eye Candy 5/Glass, use the preset I provided (JSS-Glass). Select None.

6. Open element 'LS_GothicLady_glass1' copy and paste as new layer. Arrange it inside the frame.

7. Open your tube. Copy and paste as new layer. Resize as you prefer and arrange it to the right. Move this above the frame layer.

8. Open element 'LS_GothicLady_rose2' copy and paste as new layer. Resize 70%. Mirror. Arrange it to the bottom left.

9. Open element 'LS_GothicLady_sparkle2' copy and paste as new layer. Arrange it to the left.

10. Open element 'LS_GothicLady_sparkle3' copy and paste as new layer. Resize 80%. Arrange it to the left.

11. Add shadow. I used: 1-1-65-2 black.

12. Add copyright.

13. Add name. I used: Sheila / size: 48

Save as PNG

Latticed Tutorial

LATTICED TUTORIAL


Tutorial written by Marcia Salgado on May 30th, 2015
for those who have a working knowledge of PSP.
Any resemblance to any other tutorial is coincidental.
Do not copy and paste this tutorial anywhere on the net.
If you want to translate please ask first. 

****************************************
Material:

Tube: "Dolly" an Exclusive by Sweet Doll Artist,
you can purchase it at S&Co. here
do not use without the proper #license.
Mask: Narah_Mask_0304 here and my mar2015_latticed mask here
Plugin: Redfield > Lattice Composer 1.02
Simple > Top Left Mirror
Brush: PNG Brush by Cybrea, here (TOU here)
Font: Sofia

****************************************

--> Remember to save often and use my tag as reference if necessary. Used the Drop Shadow: 1-1-50-5 in most layers. My Manual Color Correction tutorial can be found HERE

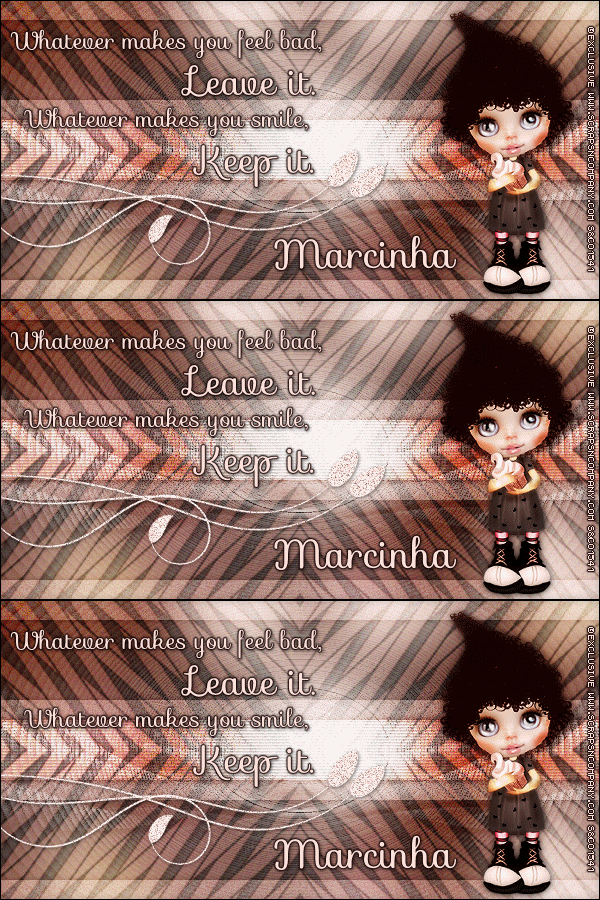
1. Create a new image of 600x300. Copy your tube and paste as new layer. Apply MuRa's Meister > Copies > Wall Paper(rotate) > Default.

2. Select all. Selections > Clip to Canvas. Image > Crop to selection. Gaussian Blur > 30. Add Noise: Uniform > 10 (Monochrome not marked).

3. Add new layer. Fill it with #FEC5BA. Apply Redfield > Lattice Composer 1.02 > Rags Fall > Default OR, if you do not have the filter, use the mask I provide in my materials, called mar2015_latticed, the effect is similar. Apply Simple > Top Left Mirror. Blend Mode: Soft Mirror. --> In case of be using the mask see the blend mode that better fit the color you're using.

4. Add a new layer. Fill it with white. Apply Narah_Mask_0304. Merge Group. 

5. Add a new layer. Custom Selection: Left-0, Top-100, Right-600, Bottom-200. Fill it with #FFE0DB. Deselect. Custom Selection: Left-0, Top-20, Right-600, Bottom-280. Selection > Invert. Fill it with #FFE0DB. Deselect. Add Noise: Uniform-30-Monochrome. Blend Mode: Soft Light. Drop Shadow: 0-0-70-10-Black.

6. Custom Selection: Left-0, Top-120, Right-600, Bottom-180. Delete. Add a new layer. Fill it with white. Blinds: 3-25-Horizontal-Black. Blend Mode: Overlay. Drop Shadow: 0-0-70-10-Black.

7. Used as embellishment a Cybrea PNG Brush. Used #21. Resized and changed the color from Black to #FFE0DB using Manual Color Correction.Free Rotate: Right-90. Move it to left. Duplicate it twice (have a total of three layers with the PNG brush).

8. Rename the layers 1, 2 and 3. Click on layer 3. Add Noise: Gaussian-50-Monochrome. Drop Shadow: 1-1-50-5-Black. Turn this layer invisible. Click on layer 2. Add Noise: Gaussian-50-Monochrome. Drop Shadow: 1-1-50-5-Black. Turn this layer invisible. Click on layer 1. Add Noise: Gaussian-50-Monochrome. Drop Shadow: 1-1-50-5-Black. Let this layer visible.

9. Open your tube. Resize if needed. Copy and paste as new layer. Move it to right. Add a suitable shadow. 

--> Add your copyright info and license#. Add your name. I used Sofia Size: 30 Color: #FFE0DB. Add a border #110100. Drop Shadow: 1-1-50-5-Black.

ANIMATION SHOP

1. On PSP -> Click on Edit. Copy Merged. On Animation Shop -> Click on Edit. Paste > As new animation.

2. On PSP -> Turn layer 1 invisible and layer 2 visible. Click on Edit. Copy Merged. On Animation Shop -> Click on Edit. Paste > After Current Frame.

3. On PSP -> Turn layer 2 invisible and layer 3 visible. Click on Edit. Copy Merged. On Animation Shop -> Click on Edit. Paste > After Current Frame. Save as GIF.


May 30, 2015

Sofia ~ by Joanne Salgado


Tutorial written by Joanne Salgado on May 30th, 2015
for those who have a working knowledge of PSP.
Any resemblance to any other tutorial is coincidental.
Do not copy and paste this tutorial anywhere on the net.
If you want to translate please ask first. 

Tube: Sofia 2 by Carpe Diem - you can purchase here
Kit You're the One by Disturbed Scraps - you can purchase here
Font: PonytailScriptSSK

Don't forget to save often.
At any point if you have doubts check my tag.

1. Open a new image 851x315.

2. Open paper 'DS - YTO Paper 14' copy and paste as new layer. Use Raster Deform Tool and stretch the paper so it fits the canvas.

3. Open element 'DS - YTO Element (79)' copy and paste as new layer. Arrange it to the right. Duplicate. Mirror.

4. Open element 'DS - YTO Element (61)' copy and paste as new layer. Mirror. Arrange it to the left.

5. Open element 'DS - YTO Element (6)' copy and paste as new layer. Resize 70%. Free Rotate right-45. Arrange it to the bottom right.

6. Open element 'DS - YTO Element (12)' copy and paste as new layer. Resize 50%. Mirror. Arrange it to the right.

7. Open element 'DS - YTO Element (51)' copy and paste as new layer. Resize 60%. Free Rotate left-15. Arrange it to the left.

8. Open element 'DS - YTO Element (2)' copy and paste as new layer. Arrange it to the bottom right.

9. Open element 'DS - YTO Element (65)' copy and paste as new layer. Resize 95%. Arrange it to the right.

10. Open your tube. Copy and paste as new layer. Resize as you prefer and arrange it in the middle.

11. Add a new layer. Select all. Fill with black. Contract 2. Fill with white. Add noise uniform-50-monochrome checked. Contract 3. Fill with black. Contract 1. Hit delete on your keyboard. Select None.

12. Add shadow. I used: 1-1-65-2 black.

13. Add copyright.

14. Add name. I used: PonytailScriptSSK / size: 48

Save as PNG

Firefighter ~ by Joanne Salgado


Tutorial written by Joanne Salgado on May 30th, 2015
for those who have a working knowledge of PSP.
Any resemblance to any other tutorial is coincidental.
Do not copy and paste this tutorial anywhere on the net.
If you want to translate please ask first. 

Tube: Firefighter by Danny Lee - you can purchase here
Kit Firefighter by Disturbed Sraps - you can purchase here
Font: Deming EP

Don't forget to save often.
At any point if you have doubts check my tag.

1. Open a new image 700x600.

2. Open element 'DS - Firefighter Element (44)' copy and paste as new layer. Resize 50%. Arrange it to the top left. Duplicate. Flip. Duplicate. Mirror. Duplicate. Flip. Merge All.

3. Open element 'DS - Firefighter Element (21)' copy and paste as new layer. Arrange it likes is coming from inside the frame and clean the back part of it.

4. Open paper 'DS - Firefighter Paper 14' copy and paste as new layer. Resize 70%. Move this below the frame layer. Clean the outside parts.

5. Open paper 'DS - Firefighter Paper 3' copy and paste as new layer. Resize 60%. Change blend mode to overlay. Clean the outside parts.

6. Open your tube. Copy and paste as new layer. Resize as you prefer and arrange it to the left. Move this above the firetruck layer.

7. Open element 'DS - Firefighter Element (63)' copy and paste as new layer. Resize 50%. Mirror. Arrange it to the bottom left.

8. Open element 'DS - Firefighter Element (18)' copy and paste as new layer. Resize 50%. Arrange it to the right.

9. Open element 'DS - Firefighter Element (13)' copy and paste as new layer. Resize 30%. Arrange it to bottom.

10. Open element 'DS - Firefighter Element (72)' copy and paste as new layer. Resize 70%. Arrange it to bottom.

11. Add shadow. I used: 1-1-65-2 black.

12. Add copyright.

13. Add name. I used: Deming EP / size: 26

Save as PNG

May 29, 2015

Queen of Hearts ~ by Joanne Salgado


Tutorial written by Joanne Salgado on May 29th, 2015
for those who have a working knowledge of PSP.
Any resemblance to any other tutorial is coincidental.
Do not copy and paste this tutorial anywhere on the net.
If you want to translate please ask first. 

Tube: Red Heart Queen by Danny Lee - you can purchase here
Kit Queen of Hearts by Bibi's Collection - you can purchase here
Font: BankGothic Lt BT

Don't forget to save often.
At any point if you have doubts check my tag.

1. Open a new image 600x500

2. Open element 'BIBI-QUEEN OF HEARTS ELEMS (96)' copy and paste as new layer. Resize 60%. Arrange it to bottom.

3. Open element 'BIBI-QUEEN OF HEARTS ELEMS (7)' copy and paste as new layer. Resize 85%. Flip. Move this below the heart floor layer. Arrange it to the top.

4. Open element 'BIBI-QUEEN OF HEARTS ELEMS (123)' copy and paste as new layer. Resize 80%.

5. Open element 'BIBI-QUEEN OF HEARTS ELEMS (44)' copy and paste as new layer. Resize 50%. Arrange it to the top left.

6. Open element 'BIBI-QUEEN OF HEARTS ELEMS (100)' copy and paste as new layer. Resize 30%. Move this above the heart flood layer. Arrange it to the right.

7. Open element 'BIBI-QUEEN OF HEARTS ELEMS (86)' copy and paste as new layer. Resize 60%. Arrange it above the chair.

8. Open element 'BIBI-QUEEN OF HEARTS ELEMS (130)' copy and paste as new layer. Resize 35%. Arrange it to the left.

9. Open element 'BIBI-QUEEN OF HEARTS ELEMS (36)' copy and paste as new layer. Resize 35%. Arrange it to the bottom.

10. Open element 'BIBI-QUEEN OF HEARTS ELEMS (37)' copy and paste as new layer. Resize 35%. Arrange it to the left.

11. Open element 'BIBI-QUEEN OF HEARTS ELEMS (39)' copy and paste as new layer. Resize 35%. Arrange it to the right.

12. Open element 'BIBI-QUEEN OF HEARTS ELEMS (38)' copy and paste as new layer. Resize 35%. Arrange it to the top of the heart floor.

13. Open element 'BIBI-QUEEN OF HEARTS ELEMS (91)' copy and paste as new layer. Resize 20%. Free Rotate left-15. Arrange it above the chair.

14. Open element 'BIBI-QUEEN OF HEARTS ELEMS (54)' copy and paste as new layer. Resize 35%. Move this below the chair layer. Arrange it behind the chair.

15. Open your tube. Copy and paste as new layer. Resize as you prefer and arrange it to the left.

16. Add shadow. I used: 1-1-65-2 black.

17. Add copyright.

18. Add name. I used: BankGothic Lt BT / size: 48

Save as PNG

Bear ~ by Joanne Salgado


Tutorial written by Joanne Salgado on May 29th, 2015
for those who have a working knowledge of PSP.
Any resemblance to any other tutorial is coincidental.
Do not copy and paste this tutorial anywhere on the net.
If you want to translate please ask first. 

Tube: Bear 2 by Danny Lee - you can purchase here
Kit Beary Blue by Chili Designz - you can purchase here
Font: AR BONNIE

Don't forget to save often.
At any point if you have doubts check my tag.

1. Open a new image 851x315.

2. Open paper 'CHILI_DESIGNZ_Beary_Blue_paper5' copy and paste as new layer.

3. Open paper 'CHILI_DESIGNZ_Beary_Blue_paper6' copy and paste as new layer. Lower opacity to 50.

4. Open element 'CHILI_DESIGNZ_Beary_Blue_clouds' copy and paste as new layer. Arrange it to the right.

5. Open element 'CHILI_DESIGNZ_Beary_Blue_flower' copy and paste as new layer. Arrange it to the bottom left.

6. Open element 'CHILI_DESIGNZ_Beary_Blue_flower3' copy and paste as new layer. Arrange it to the bottom left.

7. Open element 'CHILI_DESIGNZ_Beary_Blue_flower5' copy and paste as new layer. Arrange it to bottom.

8. Open element 'CHILI_DESIGNZ_Beary_Blue_butterfly2' copy and paste as new layer. Arrange it a little above the dark blue flower.

9. Open element 'CHILI_DESIGNZ_Beary_Blue_moon' copy and paste as new layer. Arrange it to the top left corner.

10. Open your tube. Copy and paste as new layer. Resize as you prefer and arrange it to the right.

11. Add a new layer. Select all. Fill with #233e50. Contract 3. Fill with white. Add noise uniform-50-monochrome checked. Contract 3. Fill with #233e50. Contract 1. Hit delete on your keyboard. Select None.

12. Add shadow. I used: 1-1-65-2 #233e50.

13. Add copyright.

14. Add name. I used: AR BONNIE / size: 36

Save as PNG 

Lined Up Tutorial

LINED UP TUTORIAL


Tutorial written by Marcia Salgado on May 29th, 2015
for those who have a working knowledge of PSP.
Any resemblance to any other tutorial is coincidental.
Do not copy and paste this tutorial anywhere on the net.
If you want to translate please ask first. 

****************************************
Material:

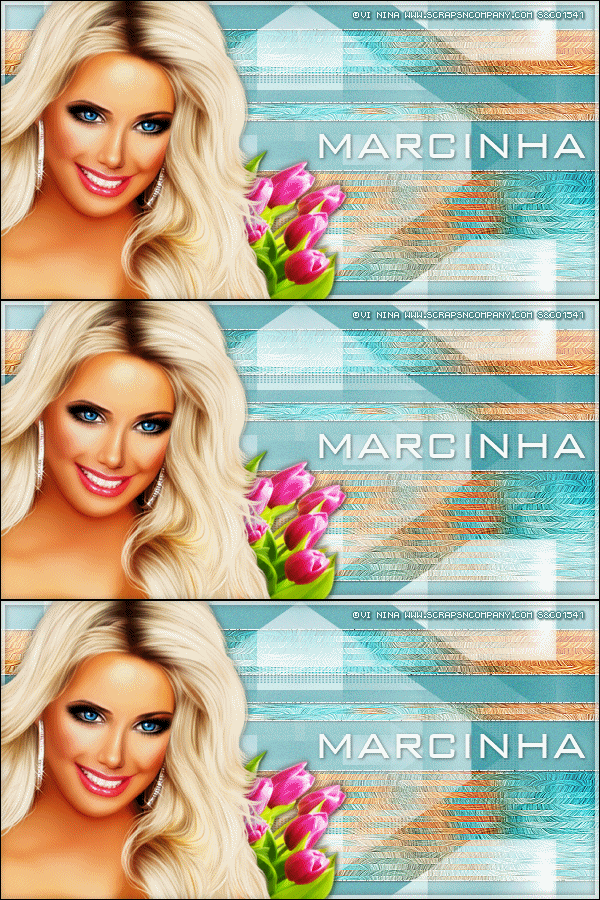
Tube: "Flor" by Vi Nina, you can purchase it at S&Co. here 
do not use without the proper #license.
Plugins: MuRa's Meister > Copies
Alien Skin Eye Candy 6 > Textures > Swirl
VM Extravaganza > Transmission
Simple > Quick Tile
Mask: Narah_mask_0307 -> here 
**Narah's Masks are no longer online 
so I have her mask available on my materials**
Font: BankGothic Lt BT

****************************************

--> Remember to save often and use my tag as reference if necessary. 

1. Create a new image 600x300.

2. Open your tube. Copy and paste as new layer. Apply MuRa's Meister > Copies > Wall Paper(rotate). Select all. Selections > Clip to canvas. Image > Crop to selection.

3. Add Gaussian Blur > 10. Add Noise: Uniform-10 (Monochrome not marked). Apply Eye Candy with the settings I show below:


4. Apply VM Extravaganza > Transmission with settings below:


5. Apply Simple > Quick Tile. Rename this layer BG. Duplicate it. Let the copy invisible. Click on BG layer. Apply Edge Effects > Enhance. 

6. Turn Copy of BG visible and click on it. Gaussian Blur > 4. Blend Mode: Soft Light. Duplicate.

7. Add a new layer. Using Selection Tool create long rectangles of selection. Made them with different heights. As I show here:


8. Fill the selections with #459fA7 or with a color that fits with your tube. Add Noise: Uniform-10 (Monochrome not marked). Keep selected. Add a new layer and fill it with white. Contract > 1. Delete. Deselect. Duplicate this layer twice (in a total of three layers).

9. Rename this layers 1, 2 and 3. Click on layer 3 and add Noise: Gaussian-100-Monochrome. Drop Shadow: 1-1-85-2. Turn this layer invisible. Click on layer 2. Add Noise: Gaussian-100-Monochrome. Drop Shadow: 1-1-85-2. Turn this layer invisible. Click on layer 1. add Noise: Gaussian-100-Monochrome. Drop Shadow: 1-1-85-2-Black. Let this layer visible.

10. Add a new layer. Fill with white. Apply Narah's Mask. Merge group. 

11. Add a new layer. Fill with white. Select all. Contract > 5. Low the opacity layer to 58. Deselect. Drop Shadow: 0-0-70-10-Black.

12. Open your tube. Resize if needed. Copy and paste as new layer. Move it to left. Drop Shadow: 0-0-70-10-Black. Duplicate. Gaussian Blur > 4. Blend Mode: Soft Light. My tube has a layer with flowers. I added it below the main tube.

13. Add a new layer. Select all. Fill with black. Contract > 1. Delete. Deselect. Drop Shadow: 0-0-70-10-Black.

--> Add the copyright info and license#. Add your name using BankGothic Lt BT Size: 42. Drop Shadow: 1-1-85-2-Black.

ANIMATION SHOP

1. On PSP -> Click on Edit. Copy Merged. On Animation Shop -> Click on Edit. Paste > As new animation.

2. On PSP -> Turn layer 1 invisible and layer 2 visible. Click on Edit. Copy Merged. On Animation Shop -> Click on Edit. Paste > After Current Frame.

3. On PSP -> Turn layer 2 invisible and layer 3 visible. Click on Edit. Copy Merged. On Animation Shop -> Click on Edit. Paste > After Current Frame. Save as GIF.


May 28, 2015

Mimi

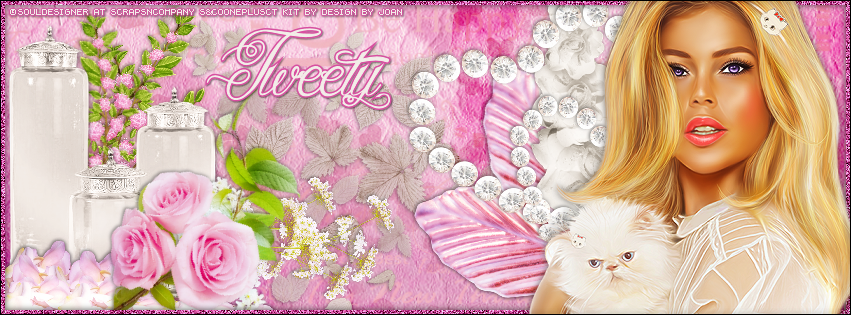
PINKALICIOUS TUTORIAL

**Click to see the original size**

Tutorial written by Marcia Salgado on May 28th, 2015
for those who have a working knowledge of PSP.
Any resemblance to any other tutorial is coincidental.
Do not copy and paste this tutorial anywhere on the net.
If you want to translate please ask first. 

****************************************
Material:

Tube: "Mimi" by Souldesigner, you can purchase it here
do not use without the proper #license.
PTU Kit "Mimi" by Design by Joan,
you can purchase it here or here
Font: Queen of the Moon

****************************************

--> Remember to save often and use my tag as reference if necessary. Used the Drop Shadow: 1-1-50-5 in most layers. 

1. Create a new image 851x315. Add a new layer. Select all. Open MIMI_DBJ-PP (2). Custom Selection: Left-0, Top-490, Right-800, Bottom-800. Copy and paste into selection. Keep selected.

2. Add a new layer. Open MIMI_DBJ-PP (6). Repeat the same Custom Selection. Copy and paste into selection. Blend Mode: Burn. Deselect. 

3. Open MIMI_DBJ (6). Copy and paste as new layer. Move it to left. Blend Mode: Multiply. Low the layer opacity to 60.

4. Open MIMI_DBJ (89). Resize 60%. Mirror. Copy and paste as new layer. Move it to left. 

5. Open MIMI_DBJ (15). Resize 80%. Copy and paste as new layer. Move it to right top. Blend Mode: Burn.

6. Open MIMI_DBJ (48). Resize 50%. Mirror. Copy and paste as new layer. Move it to right. Duplicate. Free Rotate: Right-45. Move it a little up. Merge down.

7. Open MIMI_DBJ (25). Resize 30%. Copy and paste as new layer. Move it to left. Duplicate. Mirror. Move it more to left and a little down. Merge down.

8. Open MIMI_DBJ (9). Resize 30%. Copy and paste as new layer. Move it down and left. Duplicate. Flip. Place it over the first one. Merge down.

9. Open MIMI_DBJ (52). Resize 70%. Copy and paste as new layer. Move it way left.

10. Open MIMI_DBJ (63). Resize 40%. Copy and paste as new layer. Move it down left. Place in front of white bottles.

11. Open MIMI_DBJ (24). Resize 50%. Mirror. Free Rotate: Right-45. Copy and paste as new layer. Place it over the white bottles at the bottom right side.

12. Open MIMI_DBJ (65). Resize 70%. Free Rotate: Right-90. Copy and paste as new layer. Move it to right. 

13. Open MIMI_DBJ (34). Resize 50%. Copy and paste as new layer. Move it to right.

14. Add a new layer. Select all. Fill with #d84fa1. Contract > 5. Delete. Deselect. Noise: Gaussian-100. Monochrome.


--> Add your copyright info (no URL by Facebook TOU) and license#. Add your name. Save as PNG.

--> Sometimes I had to change my Timeline size to 846x313 because when I add it to Facebook the image has extra pixels and do not fit perfectly. So try this size if the same is happening to you.


May 27, 2015

Fairy Jojo ~ by Joanne Salgado


Tutorial written by Joanne Salgado on May 27th, 2015
for those who have a working knowledge of PSP.
Any resemblance to any other tutorial is coincidental.
Do not copy and paste this tutorial anywhere on the net.
If you want to translate please ask first. 

Tube: Fairy Jojo by Ishika Chowdhury - you can purchase here
Kit Jojo Fairy by Ginnibug Designz - you can purchase here
Mask by Dee here
Font: Sprinklescolors

Don't forget to save often.
At any point if you have doubts check my tag.

1. Open a new image 600x500

2. Open element 'GBD_jjfe36' copy and paste as new layer. Resize 80%. Arrange it to bottom.

3. Open element 'GBD_jjfe54' copy and paste as new layer. Resize 40%. Arrange it to the bottom left. Move this below the grass layer.

4. Open element 'GBD_jjfe25' copy and paste as new layer. Resize 30%. Arrange it to the bottom left.

5. Open element 'GBD_jjfe40' copy and paste as new layer. Resize 15%. Arrange it above the three.

6. Open element 'GBD_jjfe103' copy and paste as new layer. Resize 70%. Arrange it to the right.

7. Open your tube. Copy and paste as new layer. Resize as you prefer and arrange it to the right. Move this above the grass layer.

8. Open element 'GBD_jjfe69' copy and paste as new layer. Resize 70%. Arrange it to bottom.

9. Open paper 'GBD_jjfp14' copy and paste as new layer. Move this below all layers. Apply your mask. Merge Group.

10. Add shadow. I used: 1-1-65-2 #3f3416.

11. Add copyright.

12. Add name. I used: Sprinklescolors / size: 36

Save as PNG

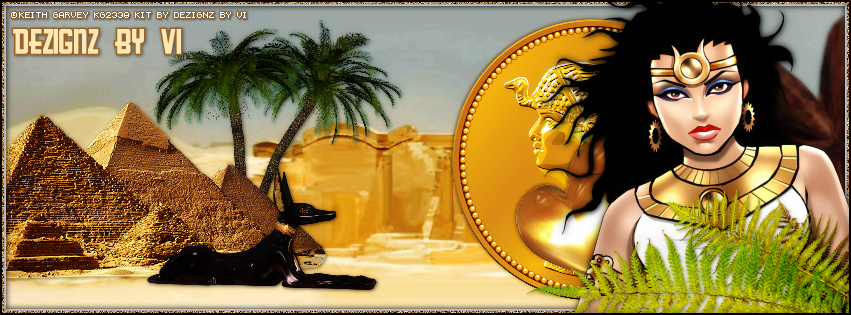
My Egyptian Princess

EGYPT TUTORIAL

**Click to see original size**

Tutorial written by Marcia Salgado on May 27th, 2015
for those who have a working knowledge of PSP.
Any resemblance to any other tutorial is coincidental.
Do not copy and paste this tutorial anywhere on the net.
If you want to translate please ask first. 

****************************************
Material:

Tube: "Isis Toon" by Keith Garvey, you can purchase it here
PTU Kit "My Egyptian Princess" by  Dezignz By Vi,
you can purchase it at: PicsForDesign here
Font: GreasySpoonMenu

****************************************

--> Remember to save often and use my work as reference if necessary. Used the Drop Shadow: 1-1-50-5 in most layers.

1. Create a new image 851x315. Add a new layer. Select all. Open Paper10. Custom Selection: Left-0, Top-150, Right-800, Bottom-500. Copy and paste into selection.

2. Open element 12. Resize 70%. Mirror. Copy and paste as new layer. Move it down left.

3. Open element 4. Resize 30%. Copy and paste as new layer. Arrange it below pyramid layer and move it to left.

4. Open element 3, Resize 30%. Mirror. Copy and paste as new layer. Place it in front of first tree.

5. Click on first layer. Open element 25. Resize 40%. Copy and paste as new layer. Move it down left. Place it in front of the pyramid.

6. Open element 59. Resize 50%. Copy and paste as new layer. Move it to right.

7. Open element 38. Resize 40%. Mirror. Copy and paste asnew layer. Move it to right and place it in front of golden coin.

8. Open element 39. Copy and paste as new layer. Move it way to right.

9. Add a new layer and select all. Fill with white. Contract > 6. Delete. Deselect.

10. Add a new layer. Select all. Fill with #C38742. Contract > 4. Delete. Deselect. Noise: Gaussian-100-Monochrome.

11. Open your tube. Resize if needed. Copy and paste as new layer. Move it to right. Add a suitable shadow.

12. Open element 48. Copy and paste as new layer. Move it to bottom down right corner and place it in front of your tube.

13. Add a new layer. Select all. Fill with black. Contract > 2. Delete. Deselect. 

--> Add your copyright info (no URL by Facebook TOU) and license#. 
Add your name. Save as PNG.

--> Sometimes I had to change my Timeline size to 846x313 because when I add it to Facebook the image has extra pixels and do not fit perfectly. So try this size if the same is happening to you


May 26, 2015

Giraffe ~ by Joanne Salgado


Tutorial written by Joanne Salgado on May 26th, 2015
for those who have a working knowledge of PSP.
Any resemblance to any other tutorial is coincidental.
Do not copy and paste this tutorial anywhere on the net.
If you want to translate please ask first. 

Tube: Giraffe by Danny Lee - you can purchase here
Kit My Baby Giraffe by Mysterfeerie Creation - you can purchase here
Font: Pea Nani's Notebook

Don't forget to save often.
At any point if you have doubts check my tag.

1. Open a new image 600x500

2. Open element 'mcf56' copy and paste as new layer. Resize 80%. Free Rotate right-90. Arrange it to bottom.

3. Open element 'mcf47' copy and paste as new layer. Resize 95%. Free Rotate right-90. Arrange it to the top.

4. Open element 'mcf73' copy and paste as new layer. Resize 99%.

5. Open element 'mcf49' copy and paste as new layer. Resize 20%. Arrange it to the top right. Move this below the clouds layer.

6. Open element 'mcf67' copy and paste as new layer. Move this above the clouds layer.

7. Open element 'mcf60' copy and paste as new layer. Resize 30%. Arrange it to the right.

8. Open element 'mcf71' copy and paste as new layer. Resize 20%. Free Rotate right-15. Arrange it to the left.

9. Open element 'mcf50' copy and paste as new layer. Resize 15%. Free Rotate left-15. Arrange it to the left above the blue butterfly.

10. Open your tube. Copy and paste as new layer. Resize as you prefer.

11. Open element 'mcf69' copy and paste as new layer. Resize 80%.

12. Open element 'mcf33' copy and paste as new layer.

13. Add shadow. I used: 1-1-65-2 #404040.

14. Add copyright.

15. Add name. I used: Pea Nani's Notebook / size: 24

Save as PNG

Unspoken ~ by Joanne Salgado


Tutorial written by Joanne Salgado on May 26th, 2015
for those who have a working knowledge of PSP.
Any resemblance to any other tutorial is coincidental.
Do not copy and paste this tutorial anywhere on the net.
If you want to translate please ask first. 

Tube: The Unspoken by Graphfreaks - you can purchase here
Kit The Unspoken by Devilish Dezines - you can purchase here
Font: BankGothic Lt BT

Don't forget to save often.
At any point if you have doubts check my tag.

1. Open a new image 600x500

2. Open element 'frame2' copy and paste as new layer. Resize 60%.

3. Open element 'element3' copy and paste as new layer. Resize 75%. Move this below the frame layer. Arrange it to the top.

4. Open element 'element22' copy and paste as new layer. Resize 60%. Arrange it to the right. Duplicate. Mirror. Arrange it a little lower to the left and clean the parts that show at the bottom.

5. Open paper 'paper4' copy and paste as new layer. Resize 50%. Clean the parts that appears outside the frame.

6. Open your close up tube. Copy and paste as new layer. Arrange it inside the frame and clean the parts that appears outside it. Hue and Saturation both with 0. Lower opacity to 30.

7. Open element 'element31' copy and paste as new layer. Resize 30%. Arrange it to the bottom right. Duplicate.

8. Open element 'element48' copy and paste as new layer. Resize 60%. Arrange it to the bottom left.

9. Open element 'element41' copy and paste as new layer. Resize 60%. Arrange it to the top right.

10. Open element 'element42' copy and paste as new layer. Resize 60%. Arrange it to the right.

11. Open element 'element49' copy and paste as new layer. Resize 30%. Mirror. Arrange it to the bottom right.

12. Open element 'element30' copy and paste as new layer. Resize 60%. Arrange it to the top left.

13. Open element 'element16' copy and paste as new layer. Resize 30%. Arrange it to the bottom left.

14. Open element 'element32' select the corner right mouse. Copy and paste as new layer. Resize 30%. Mirror. Arrange it to bottom.

15. Open your tube. Copy and paste as new layer. Resize as you prefer and arrange it to the left.

16. Add shadow. I used: 1-1-65-2 black.

17. Add copyright.

18. Add name. I used: BankGothic Lt BT / size: 30

Save as PNG