Showing posts with label The Hunter. Show all posts

May 21, 2017

Aprietame ~ by Joanne Salgado


Tutorial written by Joanne Salgado on May 15th, 2017
for those who have a working knowledge of PSP.
I'm using PSP9 to create my tuts.
Any resemblance to any other tutorial is coincidental.
Do not copy and paste this tutorial anywhere on the net.
If you want to translate please ask first. 

****************************************
Material:

Tube: "Aprietame" by The Hunter, you can purchase it here
do not use without the proper #license.
PTU Kit "Aprietame" by Rieneke Designs, you can purchase it here
Font: AnneBoleynSH

****************************************

--> Remember to save often and use my tag as reference if necessary.

1. Open a new image 650x550

2. Open element 'RD-Aprietame-element (33)' copy and paste as new layer.

3. Open element 'RD-Aprietame-element (5)' copy and paste as new layer. Resize 90%. Move this layer below frame layer. Arrange it to bottom.

4. Open paper 'RD-Aprietame-paper (9)' copoy and paste as new layer. Resize 55%. Arrange it inside the frame and clean outside it.

5. Open element 'RD-Aprietame-element (37)' copy and paste as new layer. Arrange it to the left inside the frame and clean outside it.

6. Open your tube close up. Copy and paste as new layer. Arrange it to the right inside the frame. Clean outside it. Change blend mode to Luminance (L) and opacity to 60.

7. Open element 'RD-Aprietame-element (14)' copy and paste as new layer. Move this layer above the frame layer. Arrange it to top.

8. Open element 'RD-Aprietame-element (21)' copy and paste as new layer. Resize 50%. Arrange it to the bottom left.

9. Open element 'RD-Aprietame-element (9)' copy and paste as new layer. Resize 30%. Arrange it to the bottom left.

10. Open element 'RD-Aprietame-element (32)' copy and paste as new layer. Resize 30%. Arrange it to the bottom left.

11. Open element 'RD-Aprietame-element (39)' copy and paste as new layer. Resize 50%. Arrange it to the bottom right.

12. Open element 'RD-Aprietame-element (47)' copy and paste as new layer. Resize 50%. Arrange it to the top right.

13. Open element 'RD-Aprietame-element (9)' copy and paste as new layer. Resize 30%. Mirror. Arrange it to the top right.

14. Open element 'RD-Aprietame-element (45)' copy and paste as new layer. Resize 30%. Arrange it to the top right.

15. Open element 'RD-Aprietame-element (24)' copy and paste as new layer. Resize 10%. Arrange it to the bottom right.

16. Open element 'RD-Aprietame-element (25)' copy and paste as new layer. Resize 10%. Mirror. Arrange it to the bottom right.

17. Open element 'RD-Aprietame-element (40)' copy and paste as new layer. Resize 20%. Arrange it to the bottom right.

18. Open your tube. Copy and paste as new layer. Resize as needed and arrange it to the left.

19. Add shadow as you prefer.

20. Add copyright. Add name. Save as PNG.

April 6, 2017

SHOW OFF - Red Iron


== NEW PTU TAG S&CO. CT ==
FOR THE HUNTER AND BIBI'S COLLECTION

Featuring "Sexy Red Iron" tube by The Hunter and
"Steampunks" Kit by Bibi's Collection at Scraps N Company - S&Co.

Tube by The Hunter - you can purchase here

Kit by Bibi's Collection - you can purchase here


Mermaid ~ by Joanne Salgado


Tutorial written by Joanne Salgado on April 06th, 2017
for those who have a working knowledge of PSP.
I'm using PSP9 to create my tuts.
Any resemblance to any other tutorial is coincidental.
Do not copy and paste this tutorial anywhere on the net.
If you want to translate please ask first. 

****************************************
Material:

Tube: "Sexy Mermaid" by The Hunter, you can purchase it here
do not use without the proper #license.
PTU Kit "Magical Ocean" by Rieneke Designs, you can purchase it here
Font: Anemone

****************************************

--> Remember to save often and use my tag as reference if necessary.

1. Open a new image 650x550

2. Open element 'RD-MagicalOcean-element (90)' copy and paste as new layer. Arrange it to the bottom left. Duplicate. Mirror.

3. Open element 'RD-MagicalOcean-element (83)' copy and paste as new layer.

4. Open element 'RD-MagicalOcean-element (75)' copy and paste as new layer. Arrange it to bottom.

5. Open element 'RD-MagicalOcean-element (77)' copy and paste as new layer. Resize 50%. Arrange it to the bottom right. Duplicate. Mirror.

6. Open element 'RD-MagicalOcean-element (18)' copy and paste as new layer. Resize 70%. Arrange it to the bottom left.

7. Open element 'RD-MagicalOcean-element (86)' copy and paste as new layer. Resize 70%. Arrange it to the right.

8. Open element 'RD-MagicalOcean-element (63)' copy and paste as new layer. Resize 50%. Arrange it to the bottom left. Duplicate. Mirror.

9. Open element 'RD-MagicalOcean-element (11)' copy and paste as new layer.

10. Open element 'RD-MagicalOcean-element (24)' copy and paste as new layer. Resize 50%. Arrange it to the top left.

11. Open element 'RD-MagicalOcean-element (99)' copy and paste as new layer. Resize 30%. Arrange it to the bottom right.

12. Open your tube. Copy and paste as new layer. Resize as needed and arrange it to the bottom left.

13. Open element 'RD-MagicalOcean-element (55)' copy and paste as new layer. Resize 20%. Arrange it to the bottom right.

14. Open element 'RD-MagicalOcean-element (67)' copy and paste as new layer. Resize 20%. Arrange it to the top left.

15. Open element 'RD-MagicalOcean-element (97)' copy and paste as new layer. Resize 15%. Arrange it to the bottom left.

16. Add shadow as you prefer.

17. Add copyright. Add name. Save as PNG.

August 11, 2016

Vitoriana ~ by Joanne Salgado


Tutorial written by Joanne Salgado on August 11th, 2016
for those who have a working knowledge of PSP.
I'm using PSP9 to create my tuts.
Any resemblance to any other tutorial is coincidental.
Do not copy and paste this tutorial anywhere on the net.
If you want to translate please ask first. 

****************************************
Material:

Tube: "Victoriana" by The Hunter - you can purchase it here
do not use without the proper #license.
PTU Kit "Victorian Collab 1" by  - you can purchase it here
Font: Alex Brush

****************************************

Don't forget to save often.
At any point if you have doubts check my tag.

1. Open a new image 650x650

2. Open element '17' copy and paste as new layer. Resize 35%. Plugins/MuRa's/Copies with settings bellow.

3. Open element '20' copy and paste as new layer. Resize 30%. Same plugin and settings as before.

4. Open element '76' copy and paste as new layer.

5. Open element '40' copy and paste as new layer. Resize 20%. Same plugin and settings as before. Rename this layer frame.

6. Open paper 'PAPER 8' copy and paste as new layer. Move this layer below the frame layer. Clean the outside parts.

7. Open your tube closeup. Arrange it inside the frame, clean the outside parts. Duplicate. Original: Hue and Saturation both 0, change opacity to 42. Copy: Change blend mode to soft light.

8. Open element '58' copy and paste as new layer. Resize 60%. Arrange it to the left inside the frame, clean any parts that appears outside the frame.

9. Open element '25' copy and paste as new layer. Resize 40%. Flip. Move this layer above the frame layer. Arrange it to the left.

10. Open element '99' copy and paste as new layer. Resize 40%. Arrange it to the bottom left.

11. Open element '47' copy and paste as new layer. Resize 70%. Arrange it to the bottom.

12. Open element '36' copy and paste as new layer. Resize 50%. Mirror. Arrange it to bottom.

13. Open element '59' copy and paste as new layer. Resize 60%. Mirror. Arrange it to the bottom right.

14. Open element '62' copy and paste as new layer. Resize 35%. Mirror. Arrange it to the bottom left.

15. Open your tube. Copy and paste as new layer. Resize as needed and arrange it to the bottom right.

16. Open element '42' copy and paste as new layer. Resize 30%. Arrange it to the bottom right.

17. Add shadow as you prefer.

18. Add copyright. Add name. Save as PNG.

January 30, 2016

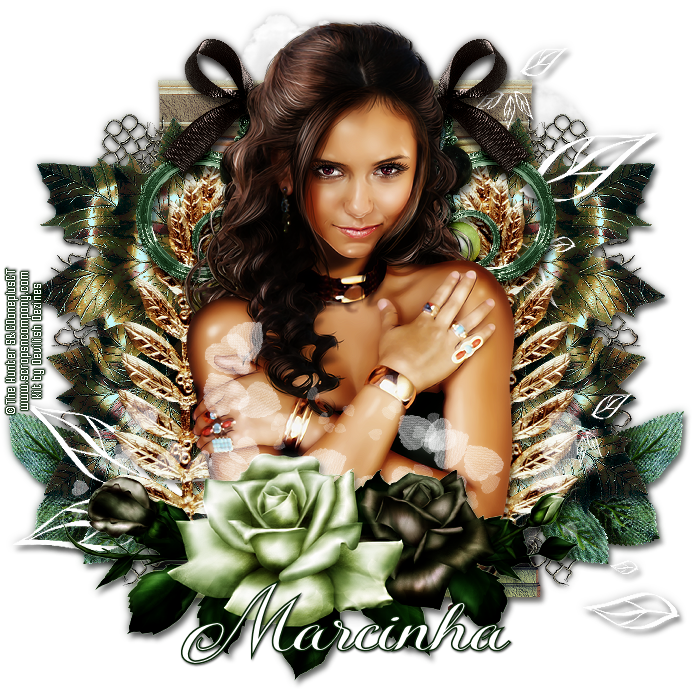
Katherina

MISTERIOSA TUTORIAL


Tutorial written by Marcia Salgado on January 30th, 2016
for those who have a working knowledge of PSP.
I'm using PSP9 to create my tuts.
Any resemblance to any other tutorial is coincidental.
Do not copy and paste this tutorial anywhere on the net.
If you want to translate please ask first. 

****************************************
Material:

Tube: "Katherina" by The Hunter, you can purchase it here
do not use without the proper #license.
PTU Kit "Katherina" by Devilish Dezines, you can purchase it here
Font: Kazincbarcika Script

****************************************

--> Remember to save often and use my tag as reference if necessary. Use a Drop Shadow of your preference on layers. 

1. Create a new image 700x700. 

2. Open element19. Resize 65%. Copy and paste as new layer. Move it up.

3. Open element7. Resize 65%. Copy and paste as new layer. 

4. Open element35. Resize 60%. Copy and paste as new layer. Move it to right and place it over the column. Duplicate. Mirror. Merge down.

5. Open element17. Resize 30%. Copy and paste as new layer. Move it down and to left. Duplicate. Mirror. Merge down.

6. Open element6. Resize 60%. Copy and paste as new layer. Move it to right. Duplicate, Mirror, Merge down.

7. Open element39. Resize 85%. Copy and paste as new layer.

8. Open element15, Resize 65%. Copy and paste as new layer. Move it to left. Duplicate. Mirror. Merge down.

9. Open element23. Resize 50%. Copy and paste as new layer. Move it up and to left. Duplicate. Mirror. Merge down.

10. Open your tube closeup. Resize if needed. Copy and paste as new layer. 

11. Open element9. Resize 65%. Copy and paste as a new layer. Move it down.

12. Open element2. Resize 65%. Copy and paste as new layer. Move it down. Erase the parts showing below tis elements in other layers: tube and white hearts, for example.


--> Add your copyright info and license#. Add your name and save as PNG.


January 26, 2016

Bad Girls ~ by Joanne Salgado


Tutorial written by Joanne Salgado on January 26th, 2016
for those who have a working knowledge of PSP.
Any resemblance to any other tutorial is coincidental.
Do not copy and paste this tutorial anywhere on the net.
If you want to translate please ask first. 

Tube: Bad Girls by The Hunter - you can purchase here
Kit Bad Girls by Design by Joan - you can purchase here
Font: Andover

Don't forget to save often.
At any point if you have doubts check my tag.

1. open a new image 851x315

2. Open element 'BAD GIRL_DBJ-PP (5)' copy and paste as new layer. Use raster deform tool to stretch the background.

3. Open element 'BAD GIRL_DBJ-ELEM (31)' copy and paste as new layer. Arrange it to the left.

4. Open element 'BAD GIRL_DBJ-ELEM (19)' copy and paste as new layer. Arrange it to the left. Duplicate. Mirror.

5. Open element 'BAD GIRL_DBJ-ELEM (20)' copy and paste as new layer. Arrange it to the left. Duplicate. Mirror.

6. Open element 'BAD GIRL_DBJ-ELEM (73)' copy and paste as new layer. Arrange it to the bottom right.

7. Open element 'BAD GIRL_DBJ-ELEM (30)' copy and paste as new layer. Arrange it to the left.

8. Open element 'BAD GIRL_DBJ-ELEM (73)' again, copy and paste as new layer. Mirror. Arrange it to the bottom left.

9. Open element 'BAD GIRL_DBJ-ELEM (56)' copy and paste as new layer. Arrange it to the bottom left.

10. Open element 'BAD GIRL_DBJ-ELEM (71)' copy and paste as new layer. Rotate right 15. Arrange it to the bottom right.

11. Open element 'BAD GIRL_DBJ-ELEM (56)' again, copy and paste as new layer. Arrange it to the bottom right.

12. Open element 'BAD GIRL_DBJ-ELEM (69)' copy and paste as new layer. Arrange it to the bottom.

13. Open your tube. Copy and paste as new layer. Arrange it to the left.

14. Open element 'BAD GIRL_DBJ-ELEM (25)' copy and paste as new layer. Arrange it to the bottom right. Duplicate. Mirror/Flip.

15. Add new layer. Select all, fill with black, contract 2, fill with white, add noise 50 monochrome checked, contract 2, fill with black, contract 2, hit delete on your keyboard. Select none.

16. Add shadow as you prefer.

17. Add copyright. Add name. Save as PNG.

January 25, 2016

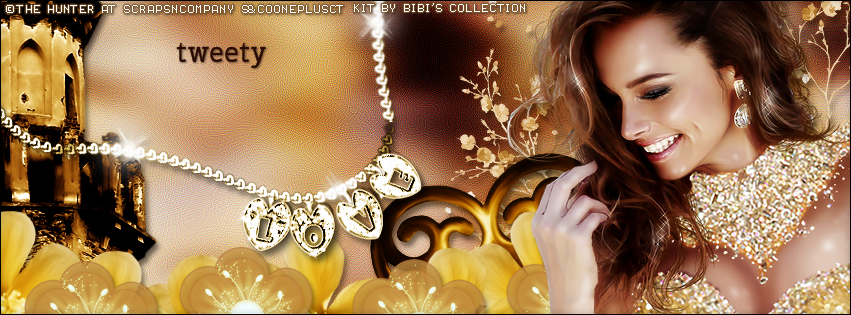
Golden Babe with Golden Dreams

GLITTERING TUTORIAL

**Click to see original size**

Tutorial written by Marcia Salgado on January 26th, 2016
for those who have a working knowledge of PSP.
I'm using PSP9 to create my tuts.
Any resemblance to any other tutorial is coincidental.
Do not copy and paste this tutorial anywhere on the net.
If you want to translate please ask first. 

****************************************
Material:

Tube: "Golden Babe" by The Hunter, you can purchase it here
do not use without the proper #license.
PTU Kit "Golden Dreams" by Bibi's Collection, you can purchase it here
Plugin: MuRa's Meister
Font: Cherry Swash

****************************************

--> Remember to save often and use my tag as reference if necessary. Use a Drop Shadow of your preference on layers. 

1. Create a new image 851x315.

2. Open your tube closeup. Copy and paste as new layer. Apply MuRa's Meister > Copies > Wall Paper (rotate) > Default. Gaussian Blur > 10. Select all. Clip to Canvas. Crop to selection. Motion Blur: Angle-90 Strength-100. Repeat. Diuplicate. Mirror. Blend Mode: Soft Light. Merge down. Enhance More and then Enhance. Duplicate. Blend Mode: Soft Light.

3. Open BIBI-GOLDEN DREAMS ELEM (49). Resize 65%. Mirror. Copy and paste as new layer. Move it way right.

4. Open BIBI-GOLDEN DREAMS ELEM (107). Resize 75%. Copy and paste as new layer. Move it down and way to left, show only half of the element.

5. Open BIBI-GOLDEN DREAMS ELEM (118). Resize 55%. Copy and paste as a new layer. Move it down and a little to left.

6. Open BIBI-GOLDEN DREAMS ELEM (98). Copy and paste as new layer. Move it way back and to left. Duplicate it and create a line of flowers at the bottom, some a little up others a little down. Use mirror too if you want. After finished merge these flowers in a single layer.

7. Open BIBI-GOLDEN DREAMS ELEM (101). Copy and paste as new layer. Move it down and to left. Do the same as before, this time keep the flowers a little away from each other.
 Merge them in a sinle layer too.


8. Open BIBI-GOLDEN DREAMS ELEM (105). Copy and paste as new layer. Move it up and to left.

9. open your tube closeup. Resize if needed. Copy and paste as new layer. Move itway to right.

10. Add a new layer, Select all. Fill it with black. Contract > 1. Delete.


--> Add your copyright info (no URL by Facebook TOU) and license#. Add your name. Save as PNG.

--> Sometimes I had to change my Timeline size to 846x313 because when I add it to Facebook the image has extra pixels and do not fit perfectly. So try this size if the same is happening to you.


Sweet Girl ~ by Joanne Salgado


Tutorial written by Joanne Salgado on January 25th, 2016
for those who have a working knowledge of PSP.
Any resemblance to any other tutorial is coincidental.
Do not copy and paste this tutorial anywhere on the net.
If you want to translate please ask first. 

Tube: Sweet Girl by The Hunter - you can purchase here
Kit Monroe Pink by Design by Joan - you can purchase here
Font: Courier New

Don't forget to save often.
At any point if you have doubts check my tag.

1. Open new image 650x550

2. Open element 'MONROE PINK_DBJ-ELEM (17)' copy and paste as new layer. Resize 60%.

3. Open element 'MONROE PINK_DBJ-ELEM (10)' copy and paste as new layer. Resize 70%. Move this layer below the frame layer. Arrange it to the left. Duplicate. Mirror.

4. Open element 'MONROE PINK_DBJ-ELEM (12)' copy and paste as new layer. Resize 70%. Arrange it to the bottom.

5. Open paper 'MONROE PINK_DBJ-PP (8)' copy and paste as new layer. Resize 40%.

6. Open element 'MONROE PINK_DBJ-ELEM (67)' copy and paste as new layer. Resize 65%. Move this layer above the frame layer. Arrange it to the top left.

7. Open your tube. Copy and paste as new layer. Resize as you prefer. Arrange it above the frame.

8. Open element 'MONROE PINK_DBJ-ELEM (30)' copy and paste as new layer. Resize 65%. Arrange it to the right.

9. Open element 'MONROE PINK_DBJ-ELEM (22)' copy and paste as new layer. Resize 50%. Arrange it to the right. Duplicate. Change blend mode to screen. Select the original butterfly layer and change opacity to 54%.

10. Open element 'MONROE PINK_DBJ-ELEM (78)' copy and paste as new layer. Resize 30%. Arrange it to the bottom right.

11. Add shadow as you prefer.

12. Add copyright. Add name. Save as PNG.


January 17, 2016

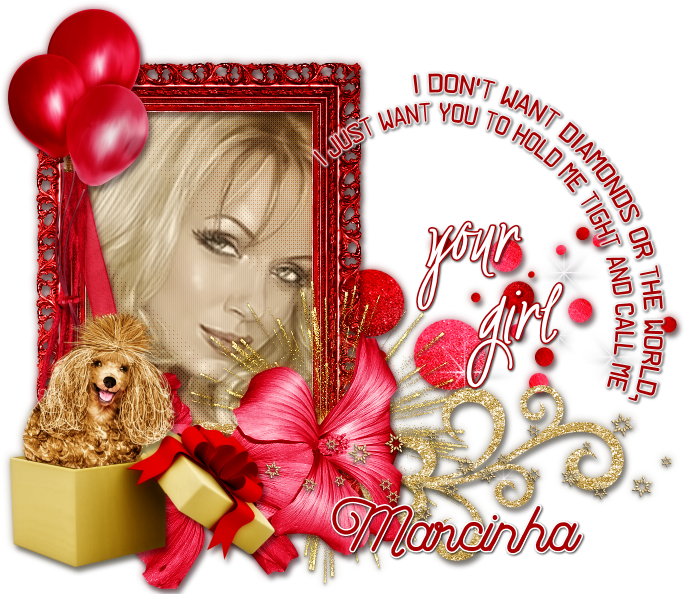
Lady In Red - CT Tutorial

CHARM TUTORIAL


Tutorial written by Marcia Salgado on January 17th, 2016
for those who have a working knowledge of PSP.
I'm using PSP9 to create my tuts.
Any resemblance to any other tutorial is coincidental.
Do not copy and paste this tutorial anywhere on the net.
If you want to translate please ask first. 

****************************************
Material:

Tube: "Lady In Red" by The Hunter, you can purchase it here
do not use without the proper #license.
PTU Kit "Lady In Red" by FwTags Creations, you can purchase it here
Material: 2 wordarts by me, just click and save:


Font: Fabulous

****************************************

--> Remember to save often and use my tag as reference if necessary. Use a Drop Shadow of your preference on layers.

1. Create a new image 700x600.

2. Open FwTagsLadyInRedELEMENT (10). Resize 85%. Copy and paste as new layer. Move it down and a little to right.

3. Open FwTagsLadyInRedFRAME (1). Resize 50%. Copy and paste as new layer. Move to left. Select inside the frame. Expand > 5. Add a new layer and moveit below frame layer. Fill with color #e2b9a3. Apply Blinds as I show below. Keep selected.


4. Add a new layer. Create a gradient Linear, Angle: 45 and Repeat: 1. Using #808080 as Foreground Color and White as Background Color and fill the layer. Blend Mode: Burn. Low the opacity layer to 70. Keep selected. Apply ECWS Halftone > Dither 4x4 with the following settings:


5.Open your Closeup tube, Resize if needed. Copy and paste as new layer. Position it inside the frame. Invert selection. Delete. Select all. Clip to canvas. Crop to selection. Duplicate. On Copy apply Gaussian Blur > 4. Blend Mode > Soft Color. Low the opacity layer to 70. On original tube layer, change the Blend Mode to Luminance. Low the opacity layer to 70.

6. Open FwTagsLadyInRedELEMENT (12). Resize 70%. Free Rotate: Right-90. Copy and paste as new layer. Move it down and to right.

7. open FwTagsLadyInRedELEMENT (15). Resize 40%. Copy and paste as new layer. Place it over the frame bottom right corner.

8. Open FwTagsLadyInRedELEMENT (2). Resize 45%. Copy and paste as new layer. Move it down and to left. Place it over the frame bottom border.

9. Open FwTagsLadyInRedELEMENT (11). Rezize 75%. Mirror. Copy and paste as new layer. Place it over the previous flowers. 

10. Open FwTagsLadyInRedELEMENT (49). Resize 45%. Copy and paste as new layer. Place it over the frame top left corner.

11. Open FwTagsLadyInRedELEMENT (56). Resize 50% Mirror. Copy and paste as new layer. Place it over the frame left border.

12. Open FwTagsLadyInRedELEMENT (37). Resize 35%. Copy and paste as new layer. Move it down and way to left.

13. Open FwTagsLadyInRedELEMENT (36). Resize 30%. Mirror. Copy and paste as new layer. Place it over the present box and after applied a suitable shadow erase the bottom part of the element to look like it is inside the box. Like I show below:


14. Open both wordarts I made. Copy mar2016_charmwordart1 and paste as new layer. Move it up and to right. Add a white border. Copy mar2016_charmwordart2 and paste as new layer. Move it to right. Add a border with the color #a70003.

--> Add your copyright info and license#. Add your name and save as PNG.


April 6, 2015

Spring Fever ~ by Joanne Salgado


Tutorial written by Joanne Salgado on April 06th, 2015
for those who have a working knowledge of PSP.
Any resemblance to any other tutorial is coincidental.
Do not copy and paste this tutorial anywhere on the net.
If you want to translate please ask first. 

Tube: New Year Fairy by The Hunter - you can purchase here 
Kit Spring Fever by Jojo Creations - you can purchase here 
Font: SendFlowers

Don't forget to save often.
At any point if you have doubts check my tag.

1. Open a new image 500x500

2. Open element 'jojo_spring_fever_element_75' copy and paste as new layer. Arrange it to the top right.

3. Open element 'jojo_spring_fever_element_126' copy and paste as new layer. Resize 80%. Arrange it to the left.

4. Open paper 'jojo_spring_fever_paper_06' copy and paste as new layer. Move this layer below the window layer and arrange it with a little grass from the paper showing. Clean all the paper that appears outside the window.

5. Open element 'jojo_spring_fever_element_89' copy and paste as new layer. Resize 80%. Move this layer above the window layer. Arrange it to bottom.

6. Open element 'jojo_spring_fever_element_109' copy and paste as new layer. Resize 80%. Arrange it to bottom.

7. Open element 'jojo_spring_fever_element_72' copy and paste as new layer. Resize 80%. 

8. Open your tube. Copy and paste as new layer. Resize as you prefer and arrange it to the right.

9. Open element 'jojo_spring_fever_element_77' copy and paste as new layer. Resize 80%. Arrange it to bottom.

10. Add shadow as you prefer. I didn't use any.

11. Add copyright.

12. Add name. I used: SendFlowers / size: 48.

Save as PNG.

March 29, 2015

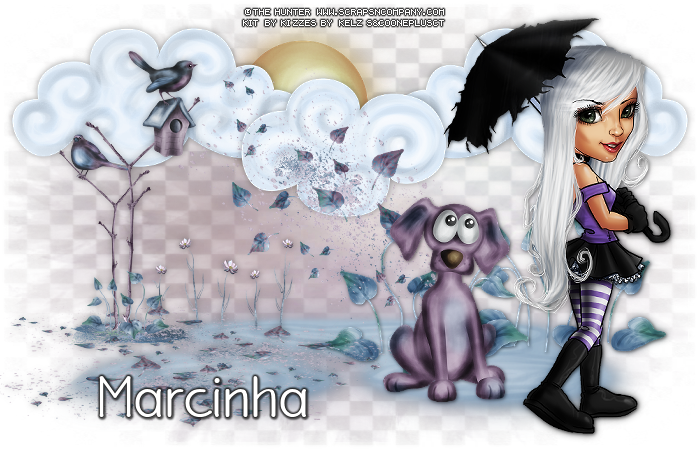
In The Rain

IN THE RAIN TUTORIAL


Tutorial written by Marcia Salgado on March 29th, 2015
for those who have a working knowledge of PSP.
Any resemblance to any other tutorial is coincidental.
Do not copy and paste this tutorial anywhere on the net.
If you want to translate please ask first. 

****************************************
Material:

Tube: The Hunter, you can purchase it at C&Co., here
do not use without the proper #license.
PTU Kit "In The Rain" by Kizzed By Kelz Kits,
you can purchase it at C&Co., here
Masks: Yarrow's Checkered Mask (7), here
Tonya's Mask9byTonya mask, here
Font: P22 Eaglefeather

****************************************

--> Remember to save often and use my tag as reference if necessary. Used the Drop Shadow: 1-1-50-5 in most layers. 

1. Create a new image 700x450. Add a new layer. Select all. Open paper KBK_InTheRain (1). Copy and paste into selection. Apply Yarrow's mask. Merge Group. Duplicate. Change Blend Mode to Soft Light. Add a new layer. Open paper KBK_InTheRain (8). Apply Tonya's mask. Merge group.

2. Open KBK_InTheRain (35). Copy and paste as new layer. Move it bottom. Open KBK_InTheRain (101). Resize 34%. Copy and paste as new layer and move it to far right. Duplicate and drag a little to left. Merge down. 

3. Open KBK_InTheRain (29). Resize 49%. Copy and paste as new layer. Move it upper far left. Duplicate. Mirror (drag it to far right in PSP newer versions). Open KBK_InTheRain (87). Resize 34%. Copy and paste as new layer. Move it up, between the bigger clouds. Open Resize 34%. Copy and paste as new layer. Arrange this layers below all clouds layers.

4. Open KBK_InTheRain (17). Resize 47%. Copy and paste as new layer. Move it a little left and up. Open KBK_InTheRain (66). Resize 70%. Copy and paste as new layer and move it far left. Open KBK_InTheRain (23). Resize 34%. Copy and paste as new layer. Move it to right.

5. Open your tube. Resize if needed. Copy and paste as new layer and move it far right. Add a suitable shadow.

--> Add your copyright info and proper license#. Add your name and save as PNG.


March 15, 2015

Rayas ~ by Joanne Salgado


Tutorial written by Joanne Salgado on February 18th, 2015
for those who have a working knowledge of PSP.
Any resemblance to any other tutorial is coincidental.
Do not copy and paste this tutorial anywhere on the net.
If you want to translate please ask first. 

Tube: Rayas by The Hunter - you can purchase here 
Kit Rayas by Bibi's Collection - you can purchase here 
Or get the pack: tube+kit here 
Template here 
Font: Allura

Plugins
Eye Candy 5 / Chrome
Eye Candy 5 / Perspective Shadow

Don't forget to save often.
At any point if you have doubts check my tag.

1. Open the template. Duplicate. Close original. Delete the layers: INFO, small heart, medium heart and background.

2. Open paper 'BIBIRAYAS PAPERS (11)' copy and paste as new layer. Layers/Arrange/Send to bottom. Arrange so the upper part of the paper is at show.

3. Open element 'BIBIRAYAS ELEMS (99)' copy and paste as new layer. Resize 70%. Arrange it to the top center of the heart.

4. Open element 'BIBIRAYAS ELEMS (21)' copy and paste as new layer. Resize 70%. Free Rotate right-15. Arrange it to the right.

5. Open element 'BIBIRAYAS ELEMS (31)' copy and paste as new layer. Resize 70%. Arrange it to the top next the white flower.

6. Open element 'BIBIRAYAS ELEMS (45)' copy and paste as new layer. Resize 60%. Arrange it to the far upper left.

7. Open element 'BIBIRAYAS ELEMS (64)' copy and paste as new layer. Resize 70%. Free Rotate left-15. Arrange it to the left bellow the star.

8. Open paper 'BIBIRAYAS PAPERS (2)' copy and paste as new layer. Resize 70%. Arrange it to the left near the star.

9. Select the frame layer. Plugins/Eye Candy 5/Chrome with factory settings: City. Plugins/Eye Candy 5/Perspective Shadow with factory settings: Drop Shadow, Blurry.

10. Open element 'BIBIRAYAS ELEMS (6)' copy and paste as new layer. Arrange it to the bottom right.

11. Open element 'BIBIRAYAS ELEMS (43)' copy and paste as new layer. Arrange it to the top right. Duplicate. Arrange it to the left. Duplicate. Arrange it to the center next the center of the heart. Duplicate. Arrange it to the bottom right.

12. Open element 'BIBIRAYAS ELEMS (4)' copy and paste as new layer. Resize 20%. Free Rotate right-15. Arrange it to the right above the heart curve.

13. Open element 'BIBIRAYAS ELEMS (34) copy and paste as new layer. Resize 70%. Arrange it to the top left beside the star.

14. Open your tube. I'm using Rayas from The Hunter. Copy and paste as new layer. Arrange it to the left in front of the heart curve (beside the picture info). Use the same perspective shadow.

15. Open element 'BIBIRAYAS ELEMS (47)' copy and paste as new layer. Move this layer bellow the tube layer and arrange it behind the tube.

16. Open element 'BIBIRAYAS ELEMS (8)' copy and paste as new layer. Move this layer above the tube layer. Arrange it to the far left. Duplicate. Mirror.

17. Select the border layer. With magic wand select inside the gap from the border. Now go down the layers we added and one by one hit delete on your keyboard. When you get to the paper layer don't hit delete. Add noise with uniform/100/monochrome checked. Selection None.

18. Add copyright.

19. Add name. I used: Allura / size: 48.

20. Hide the 'photo' layer.

Save as PNG.

March 12, 2015

Yellow Kiss ~ by Joanne Salgado


Tutorial written by Joanne Salgado on February 18th, 2015
for those who have a working knowledge of PSP.
Any resemblance to any other tutorial is coincidental.
Do not copy and paste this tutorial anywhere on the net.
If you want to translate please ask first. 

Tube: Sexy Beauty by The Hunter - you can purchase here
Template here
Font: AR BONNIE

Don't forget to save often.

1. Open the template. Duplicate. Close Original. Delete Info layer.

2. Open your tube. Copy and paste as new layer. Plugins/MuRa's Meister/ Copies - wallpaper rotate. Blur/Motion Blur - angle: 62 / strength: 100%. Repeat. Edge Effects/Enhance. Plugins/Filter Factory Gallery N/X Exchange. Texture Effects/Weave - 1/5/1/black/black/fill gaps checked. Move this layer above the bottom layer. 

3. Select the upper layer. Color Balance/Manual Color Correction with source: #808080 and target: #f6e569. (you may want to choose a color that match your tube). Plugins/AP [Lines/SilverLining with line options: vertical and change the three color[R] to 255. With the magic wand (tolerance: 20 | feather: 0 | anti-alias unchecked. select the lines we just made. Selections/Promote Selection to Layer. Selections None. Rename LINES. We'll back on this later.

4. Select the curve layer. Color Balance/Manual Color Correction with source: #000000 and target: #ffffff.

5. Open your tube. Resize as you like and arrange it to the left. Add shadow as you like. I used 1-1-65-2 black.

6. Add your copyright.

7. Add your name. I used: AR BONNIE / size: 72.

For Animation.

1. Select the LINES layer. Duplicate two times. You will have a total of three layers. Select the first. Plugins/Xenofex 2/Constellation with this settins: 


Hide this layer, select the second. Repeat the constellation. Don't forget to hit random. Hide this layer. Select the third. Repeat.

2. Select the curve layer. Duplicate two times. You will have a total of three layers. Select the first. Add Noise with uniform/20/monochrome checked. Add shadow 1-1-65-2 black. Hide this layer. Select the second, repeat. Hide this layer. Select the third, repeat.

3. Select the border 2 layer. Duplicate two times. You will have a total of three layers. Select the first. Add Noise with uniform/20/monochrome checked. Add shadow 0-0-65-2 black. Hide this layer. Select the second, repeat. Hide this layer. Select the third, repeat.

4. Copy Merged. Go to Animation Shop and paste as new animation. Back to PSP hide all the third layers and open the second. Copy merged. Go to Animation, paste after current. Back to PSP hide all the second layers and open the first. Copy merged. Go to Animation and paste after current.

Save as gif.


March 7, 2015

Sweet Steam ~ by Joanne Salgado


Tutorial written by Joanne Salgado on February 18th, 2015
for those who have a working knowledge of PSP.
Any resemblance to any other tutorial is coincidental.
Do not copy and paste this tutorial anywhere on the net.
If you want to translate please ask first. 

Tube: Sweet Steam by The Hunter - you can purchase here
Kit Sweet Steam by Bibi's Collection - you can purchase here 
Font: Interdimensional

Don't forget to save often.

1. Open a new image 600x600

2. Open element 'BIBISWEETSTEAM ELEMS (97)' copy and paste as new layer. Resize 75%.

3. Open element 'BIBISWEETSTEAM ELEMS (93)' copy and paste as new layer. Resize 77%.

4. Open element 'BIBISWEETSTEAM ELEMS (15)' copy and paste as new layer. Resize 90%. Duplicate. On duplicated change the blend mode to screen.

5. Open element 'BIBISWEETSTEAM ELEMS (92)' copy and paste as new layer. Move this layer below the heart we just added. Arrange the flower to the upper left so it appears just a little of it behind the heart. (see my tag at any point if you have doubts).

6. Open element 'BIBISWEETSTEAM ELEMS (81)' copy and paste as new layer. Resize 80%. Arrange it at the upper right behind the heart.

7. Open element 'BIBISWEETSTEAM ELEMS (87)' copy and paste as new layer. Resize 80%. Mirror. Free Rotate (left/45). Arrange it at the bottom left of the heart so just two leafs appears. Duplicate. Mirror.

8. Open element 'BIBISWEETSTEAM ELEMS (105)' copy and paste as new layer. Resize 80%. Move this layer above the heart layer (and the duplicated heart layer too). Arrange it to the right.

9. Open element 'BIBISWEETSTEAM ELEMS (104)' copy and paste as new layer. Resize 90%. Mirror.

10. Open element 'BIBISWEETSTEAM ELEMS (88)' copy and paste as new layer. Resize 20%. Arrange it to the left upper part of the heart.

11. Open element 'BIBISWEETSTEAM ELEMS (79)' copy and paste as new layer. Resize 40%. Arrange it to the left upper part of the heart. Above the bow.

12. Open your tube. I'm using Sweet Steam by The Hunter. Resize as you like and arrange it to the right.

13. Add shadow as you like. I used 1-1-65-2 black.

14. Add your copyright.

15. Add your name. I used Interdimensional/size: 48.

Save.

February 25, 2015

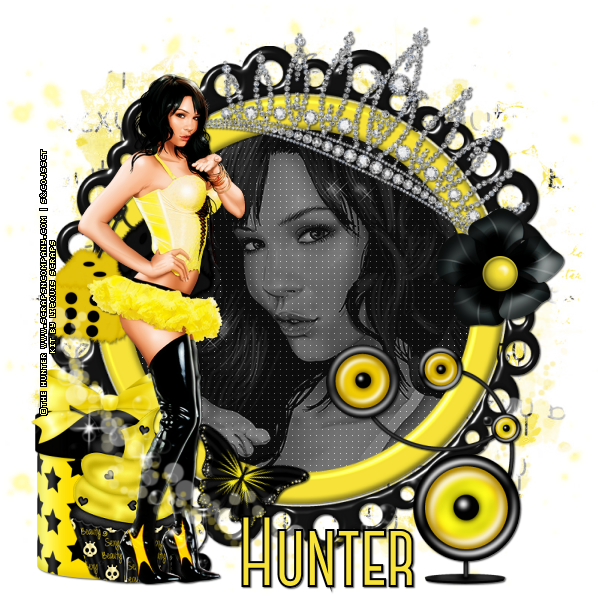
Sexy Beauty ~ by Joanne Salgado


Tutorial written by Joanne Salgado on February 18th, 2015
Any resemblance to any other tutorial is coincidental.
Do not copy and paste this tutorial anywhere on the net.
If you want to translate please ask first. 

Tube: The Hunter - you can purchase here 
Kit Sexy Beauty by Lizquis Scraps - you can purchase here 
Mask by Dee here (the first one).
Font: Canter Bold

Don't forget to save often.

1. Open a new image 600x600.

2. Open element 'LizquisScraps_SexyBeauty_frame3' copy and paste as new image. resize 80%. Rename as FRAME.

3. Open your closeup tube. I'm using The Hunter's Sexy Beauty. Copy and paste as new image. Image/Mirror. Move this layer below FRAME layer. Arrange it to be inside the frame. Change opacity to 50 and change blend mode to Luminance (L).

4. Open paper 'LizquisScraps_SexyBeauty_paper4' copy and paste as new image. Move blow the closeup tube. Effects/Texture Effects/Weave - 1/5/1 color #c0c0c0 fill gaps checked.

5. Select the FRAME layer. With magic wand select inside it. Selections/Modify/Expand 5. Selections/Invert. Select the closeup tube layer and hit delete on your keyboard. Select the paper layer and hit delete on your keyboard. Selections/Select None.

6. Open element 'LizquisScraps_SexyBeauty_crown' copy and paste as new image. Image/Rotate/Free Rotate - 25 right. Move this layer above FRAME layer. Arrange it at the top of the frame. (see my tag).

7. Open element 'LizquisScraps_SexyBeauty_box' copy and paste as new layer. resize 60%. Arrange it to the bottom left.

8. Open element 'LizquisScraps_SexyBeauty_cupcake' copy and paste as new layer. resize 50%. Arrange it a little above the box.

9. Open element 'LizquisScraps_SexyBeauty_flower' copy and paste as new layer. resize 40%. Arrange it at the bottom corner of the crown.

10. Open element 'LizquisScraps_SexyBeauty_dice' copy and paste as new layer. resize 50%. Arrange it to the left above the box. (It will be behind the tube, you can change its location later).

11. Open your tube. Resize 60%. Arrange it to the left (see my tag).

12. Open element 'LizquisScraps_SexyBeauty_butterfly' copy and paste as new layer. resize 35%. Image/Rotate/Free Rotate - 25 right. Arrange it to the bottom of the frame.

13. Open element 'LizquisScraps_SexyBeauty_light3' copy and paste as new layer. resize 80%. Image/Mirror. Arrange it to the bottom of the tag.

14. Open element 'LizquisScraps_SexyBeauty_speakers' copy and paste as new layer. resize 60%. Arrange it to the bottom right.

15. Open element 'LizquisScraps_SexyBeauty_light1' copy and paste as new layer. Layers/Arrange/Send to Bottom. Duplicate. Image/Mirror.

16. Open paper 'LizquisScraps_SexyBeauty_paper6' copy and paste as new layer. Open your mask. Layers/New Mask Layer/From Image. Select the mask (I used DD_NGM1_2015_1). Source Luminance/Invert mask data unchecked. Layers/Merge/Merge Group.

Now you can add shadow. I used 1-1-65-2 black.
Add your copyright info.
Add your name. I used Canter Bold 72 #f6e238 and added black border.

Save.