Showing posts with label PFD Exclusive Tube. Show all posts

May 3, 2016

Aphrodite's Garden

MY MUSE TUTORIAL


Tutorial written by Marcia Salgado on May 1st, 2016
for those who have a working knowledge of PSP.
Any resemblance to any other tutorial is coincidental.
Do not copy and paste this tutorial anywhere on the net.
If you want to translate please ask first. 

****************************************
Material:

Tube: "Aphrodite" by Zlata_M (Exclusive Tube), you can purchase it here 
do not use without the proper #license.
PTU Kit "Aphrodite's Garden" by Carita Creationz, you can purchase it here 
Mask: Dee's mask, DD_NGM1_2015_1, here 
Plugin: MuRa's Meister
Material: Silver Sparkle, just click and save.
Font: Monday

****************************************

--> Remember to save often and use my tag as reference if necessary. Use a Drop Shadow of your choice. 


1. Create a new image 650x650.

2. Open 'element' 22. Resize 70%. Copy and paste as new layer. Use MuRa's Meister > Copies > Encircle with the settings below:


3. Add a new layer. Select all. Open pp9. Copy and paste into selection. Apply Dee's mask. Merge group.

4. Open opc_silversparkle. Resize 50%. Copy and paste as new layer. Place it over the tree border. Duplicate it until cover all border.

5. Open 'element' 10. Resize 60%. Copy and paste as new layer. Use MuRa's Meister > Copies > Encircle with the settings below:


6. Open 'element' 3. Resize 75%, Copy and paste as new layer.

7. Select inside the frame. Expand > 4. Add a new layer and move it below the frame layer. Open 'paper' pp8. Copy and paste into selection. Add a new layer. Open 'paper' pp5. Copy and paste into selection. Deselect. Blend Mode: Color (L).

8. Click on first layer. Open pp6. Custom selection as shown below:


9. Copy and paste as new image. Canvas size with the follow settings:


10. Apply Polar Coordinates as shown below:


11. Resize 80%. Copy and paste as new layer on your tag.

12. Open 'element' 21. Resize 60%. Copy and paste as new layer. Move it down and to right. Place it over the frame border. Duplicate. Resize 60%. Free Rotate: Left-25. And place it a little up and a little more to right.

13. Open 'element' 11. Resize 70%. Copy and paste as new layer. Move it a little to right and place it over the frame border.

14. Open 'element' 28. Resize 40%. Copy and paste as new layer. Move it down and to left. 

15, Open 'element' 15. Resize 30%. Mirror. Copy and paste as new layer. Move it up and left. Place it over the column but move the layer below the column layer. Hide the bust base behind the column.

16. Click on first layer. Open your tube and resize it. Place it around the middle of the tag and frame. You may want rearrange some elements to better fit your tube.

17. Open 'element' 23. Resize 60%. Mirror. Copy and paste as new layer. Move it down and a little to left,

18. Open 'element' 27. Resize 50%, Free Rotate: Right-55,  Copy and paste as new layer. Move it down and to left.

19. Open 'element' 12. Resize 35%. Copy and paste as new layer. Move it down and a little to left. Place it over the harp's bottom right side Duplicate. Resize 60%. Move it a little to left and a little more down.


--> Add yout copyright info and license#. Add your name and save as PNG.


----------------------------------------------------------

Some FREE SNAGS I made for you, just click and save.


February 15, 2016

The Black Pearl

AHOY MATE! TUTORIAL


Tutorial written by Marcia Salgado on February 15th, 2016
for those who have a working knowledge of PSP.
Any resemblance to any other tutorial is coincidental.
Do not copy and paste this tutorial anywhere on the net.
If you want to translate please ask first. 

****************************************
Material:

Tube: "My Treasure" an PFD Exclusive Tube by OrkusArt, you can purchase it here 
do not use without the proper #license.
PTU Kit "The Black Pearl" by Carita Creationz, you can purchase it here  
Font: TradeWind

****************************************

--> Remember to save often and use my tag as reference if necessary. Use a Drop Shadow of your choice. 

1. Create a new image 700x700.

2. Open 'element' 50. Resize 85%. Copy and paste as new layer. Move it way right. Duplicate. Mirror (Newer PSP versions may need to move it way left). Merge down.

3. Open 'element' 11. Copy and paste as new layer. Free Rotate: Right-15.

4. Open 'element' 19. Resize 75%. Copy and paste as new layer. Move it way down.

5. Open 'element' 14. Resize 30%. Copy and paste as new layer. Move it down and to right. Place it on ocean somewhere on right side of the map.

6. Open 'element' 1. Resize 75%. Copy and paste as new layer. Place it in the middle of the map.

7. Open 'element' 37. Copy and paste as new layer. Move it to left. Duplicate and move it down and a little to right.

8. Open 'element' 22. Copy and paste as new layer. Move it down and a little to left.

9. Open 'element' 5. Resize 85%. Copy and paste as new layer. Move it down and to left.

10. Open 'element' 12. Resize 65%. Copy and paste as new layer. Move it way down.

11. Open 'element' 13. Resize 50%. Copy and paste as new layer. Move it down and a little to right. Place it over the gold coins on right side.

12. Open 'element' 8. Resize 45%. Copy and paste as new layer. Move it down and way to right.

13. Open 'element' 15. Resize 65%. Copy and paste as new layer. Move it up and a little to right.

14. Open 'element' 18. Resize 30%. Copy and paste as new layer. Place it over the map border on the right side.

15. Open your tube and resize if needed. Mine is a seated pirate woman so I mirrored it and placed over the chest.


--> Add your copyright info and license#. Add your name and save as PNG.


--------------------------------------------------------------------

Some Extras I made for you


February 11, 2016

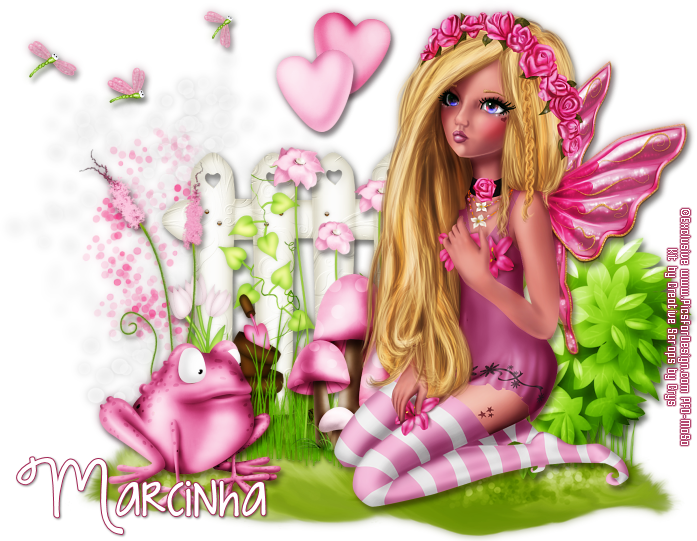
Frog-A-Licious

FAIRY IN LOVE TUTORIAL


Tutorial written by Marcia Salgado on February 11th, 2016
for those who have a working knowledge of PSP.
Any resemblance to any other tutorial is coincidental.
Do not copy and paste this tutorial anywhere on the net.
If you want to translate please ask first. 

****************************************
Material:

Tube: "Lis" a PFD Exclusive Tube, you can purchase it here 
do not use without the proper #license.
PTU Kit "Frog-A-Licious" by Creative Scraps by Crys, you can purchase it here 
Font: KG Strawberry Limeade

****************************************

--> Remember to save often and use my tag as reference if necessary. Use a Drop Shadow of your choice. 

1. Create a new image 700x550.

2. Open FAL_Element_37. Resize 75%. Mirror. Copy and paste as new layer. Move it to left.

3. Open FAL_Element_32. Copy and paste as new layer. Move it down and to right.

4. Open FAL_Element_47. Resize 50%. Copy and paste as new layer. Move it a loittle down. Place it over the mound of grass, in the middle, more or less.

5. OPen FAL_Element_8. Resize 65%. Copy and paste as new layer. Move it down and to right. Place it over the right side of the mound of grass, Duplicate and move it to left to cover it all.

6. OPen FAL_Element_45. Resize 65%. Copy and paste as new layer. Place it over the fence middle.

7. Open FAL_Element_30. Resize 40%. Copy and paste as new layer. Place it in front of the previous flowers.

8. Open FAL_Element_42. Resize 65%. Copy and paste as new layer. Move it to left and place it over the mound of grass left border.

9. Open FAL_Element_21. Resize 65%. Copy and paste as new layer. Move it to right. Place it over the mound of grass right border.

10. Open FAL_Element_29. Resize 40%. Copy and paste as new layer. Move it down and to left. 

11. Open FAL_Element_18. Resize 50%. Mirror. Copy and paste as new layer. Move it up and to left.

12. Open your tube, resize it if needed. Copy and paste as new layer. Move it to right.

13. Open FAL_Element_22 and FAL_Element_23. Resize 50% on both. Copy and paste them as new layer. Place them on middle at the top of your tag, the dark one a little up than the other and the light pink over the dark one.

14. Using Crop Merged Opaque remove the tag extra space.


--> Add your copyright info and license#. Add your name and save as PNG.


June 8, 2015

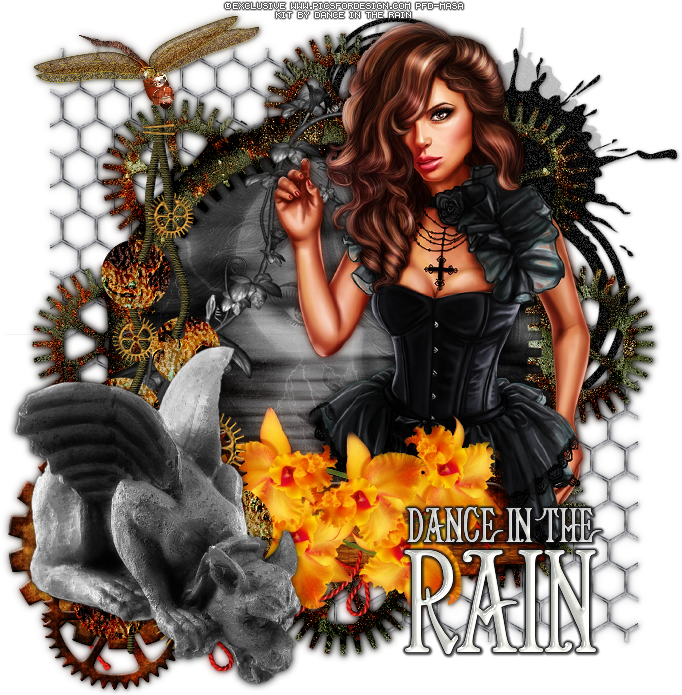
Steampunk Goth

GOTHIKA TUTORIAL


Tutorial written by Marcia Salgado on June 8th, 2015
for those who have a working knowledge of PSP.
Any resemblance to any other tutorial is coincidental.
Do not copy and paste this tutorial anywhere on the net.
If you want to translate please ask first. 

****************************************
Material:

Tube: "Kelsey" an Exclusive PFD Tube, you can purchase it here
do not use without the proper #license.
PTU Kit "Steampunk Goth" by Dance in the Rain,
you can purchase it here or here
Font: Helena 

****************************************

--> Remember to save often and use my tag as reference if necessary. Used the Drop Shadow: 1-1-50-5 16 or 1-1-65-2 #404040 in most layers.

1. Create a new image 700x700. 

2. Open 'element' 86. Resize 50%. Copy and paste as new layer. Move it to left top. Duplicate. Mirror. Flip. Merge down.

3. Open 'element' 118. Resize 80%. Move it to top right. Add Noise: Uniform-50-Monochrome.

4. Open 'element' 52. Resize 80%. Copy and paste as new layer. Select inside the frame. Expand > 4. Add a new layer. Move this new layer below the frame layer.

5. Open 'paper' 17. Copy and paste into selection. Keep selected. 

6. Open your tube closeup. Copy and paste as new layer. Place it as you wish. Invert selection. Delete. Select all. Selections > Clip to canvas. Image > Crop to selection. Deselect. Blend Mode: Soft Light. Low the opacity layer to 50.

7. Open your tube. Resize if needed. Copy and paste as new layer. Move it to right. Rename it TUBE.

8. Open 'element' 55, Resize 70%. Copy and paste as new layer. Move it bottom left.

9. Click on tube layer and erase the bottom part of your tube that shows below previous flower element.

10. Open 'element' 111. Resize 80%. Copy and paste as new layer. Move it to left.

11. Open 'element' 49. Resize 70%. Copy and paste as new layer. Move it to left. Place it over the frame.

12. Open 'element' 29. Resize 30%. Copy and paste as new layer. Move it to top left.

13. Open 'element' 127. Resize 60%. Mirror. Copy and paste as new layer. Move it to bottom left.

--> Resize it if wanted. Add your copyright info and license#. Add your name and save as PNG.


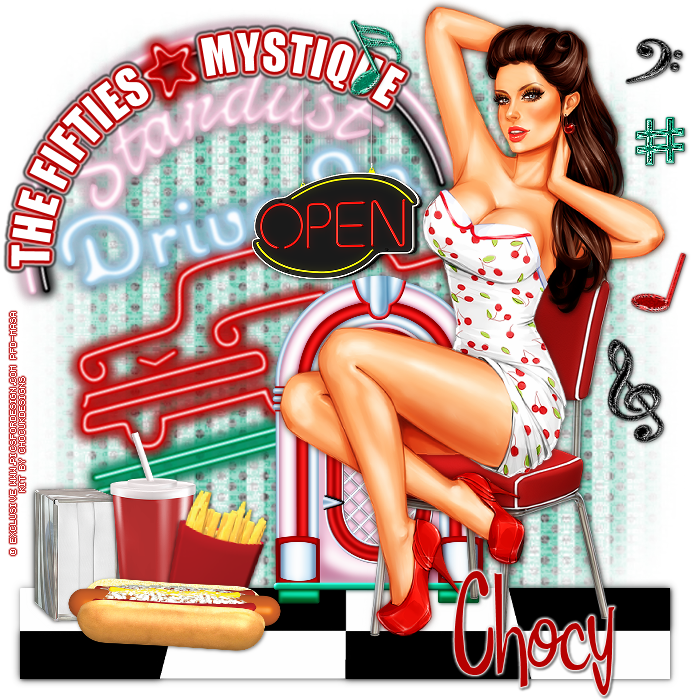
Rockin Rockabilly

FIFTIES TUTORIAL


Tutorial written by Marcia Salgado on June 8th, 2015
for those who have a working knowledge of PSP.
Any resemblance to any other tutorial is coincidental.
Do not copy and paste this tutorial anywhere on the net.
If you want to translate please ask first. 

****************************************
Material:

Tube: "Gwendolyn" a PFD Exclusive tube, you can purchase it here
PTU Kit "Rockin Rockabilly" by ChocUKDesigns, you can purchase it at:
Smiley Creations Shop here and Mystical Scraps here
Mask: Insatiable Dreams (Cat) - 67InsatiableDreams (Mask 4), here
Wordart: by me - mar2015_fiftieswordart (optional) - just click and save,
it's in white color:

Font: Fabulous 50s

****************************************

--> Remember to save often and use my tag as reference if necessary. Used the Drop Shadow: 1-1-50-5 in most layers.

1. Create a new image 700x700. Add a new layer. Select all. Open 'Paper' 10. Copy and paste into selection. Deselect. Apply Cat's Mask. Merge Group. With Deforme Tool (or Pick Tool) enlarge it a little on its sides. Low the opacity layer to 75.

2. Open 'element' 71. Resize 65%. Copy and paste as new layer. Move it to bottom.

3. Open 'element' 8. Free Rotate: Left-15. Copy and paste as new layer. Move it to left top.

4. Open 'element' 49. Resize 50%. Copy and paste as new layer. Move it up. Place its strings over the neon half circle.

5. Open 'element' 39. Resize 50%. Copy and paste as new layer. Move it down right.

6. Open 'element' 52. Mirror. Copy and paste as new layer. Move it to right.

7. Open 'element' 57. Resize 50%. Copy and paste as new layer. Move it left bottom.

8. Open 'element' 54. Resize 60%. Copy and paste as new layer. Move it left bottom. Place it on napkings right side.

9. Open 'element' 67. Resize 40%. Fre Rotate: Right-15. Copy and paste as new layer. Move it down and place it over soda drink right side.

10. Open 'element' 63. Resize 50%. Copy and paste as new layer. Move it left bottom. Place it in front of napkins, drink and fried potatoes.

11. This step is optional - Open the wordart. Copy and paste as new layer. Place it over the neon half circle. Add a 3px #b50101 border, a 2px white border and a 2px black border.

12. Open 'elements' 103, 104, 106, 107 and 110. Resize 30%. Copy and paste as new layer each one and with the Deform Tool (or Pick Tool) rotate the elements a little and place them around the tag.

13. Open your tube and resize if needed. Copy and paste as new layer. Move it to right and if it's possible use it seated on chair. Arrange elements to better fit your tube.

--> Resize if needed. Add your copyright and #license. Add your name. Save as PNG.


May 17, 2015

Reverie ~ by Joanne Salgado


Tutorial written by Joanne Salgado on May 17th, 2015
for those who have a working knowledge of PSP.
Any resemblance to any other tutorial is coincidental.
Do not copy and paste this tutorial anywhere on the net.
If you want to translate please ask first. 

Tube: Exclusive by PFD - you can purchase here
Kit Reverie by Mellie Beans - you can purchase here and here
Font: AR BERKLEY

Don't forget to save often.
At any point if you have doubts check my tag.

1. Open a new image 600x500

2. Open element 'e31' copy and paste as new layer. Resize 70%.

3. Open element 'e07' copy and paste as new layer. Resize 60%. Move this layer below the frame layer. Arrange it to the top left.

4. Open element 'e36' copy and paste as new layer. Resize 60%. Arrange it to the top. Duplicate. Arrange it to the left.

5. Open paper 'pp12' copy and paste as new layer. Resize 50%. Clean the parts that appears outside the frame.

6. Open element 'e06' copy and paste as new layer. Resize 45% Mirror. Flip. Arrange it to the top corner left.

7. Open element 'e13' copy and paste as new layer. Resize 70%. Move this layer above the frame layer. Arrange it to the right.

8. Open element 'e16' copy and paste as new layer. Mirror. Flip. Arrange it to the top left.

9. Open element 'e46' copy and paste as new layer. Resize 70%. Mirror. Arrange it to bottom.

10. Open your tube. Copy and paste as new layer. Resize as you prefer and arrange it inside the frame. Clean the parts that appears outside the frame so it looks like the tube is coming from inside it.

11. Add shadow. I used: 1-1-65-2 black.

12. Add copyright.

13. Add name. I used: AR BERKLEY / size: 48

Save as PNG

May 13, 2015

Spring Passion

GARDEN TUTORIAL


Tutorial written by Marcia Salgado on May 5th, 2015
for those who have a working knowledge of PSP.
Any resemblance to any other tutorial is coincidental.
Do not copy and paste this tutorial anywhere on the net.
If you want to translate please ask first. 

****************************************
Material:

Tube: PFD Exclusive, you can purchase it here
do not use without the proper #license.
PTU Kit "Spring Passion" by Dance in the Rain, you can purchase it at:
Font: Nexa Rust Script L0

****************************************

--> Remember to save often and use my tag as reference if necessary. Used the Drop Shadow: 1-1-50-5 16 or 1-1-65-2 #404040 in most layers.


1. Open a new image 700x700

2. Open element '49' copy and paste as new layer. Arrange it to the top left.

3. Open element '103' copy and paste as new layer. Resize 70%. Arrange it to the top right.

4. Open element '123' copy and paste as new layer. Move this layer below the house layer. Arrange it in front of the house. Duplicate. Arrange it a little below the original grass.

5. Open element '25' copy and paste as new layer. Resize 70%. Arrange it in front of the house. Clean the parts that appears in the back of it.

6. Open element '152' copy and paste as new layer. Resize 70%. Arrange it behind the house to the top right.

7. Open element '153' copy and paste as new layer. Resize 30%. Move this layer above the house layer. Arrange it to the bottom right of the house.

8. Open element '72' copy and paste as new layer. Resize 70%. Arrange it to the left.

9. Open element '17' copy and paste as new layer. Arrange it a little to the front of the house and the bush.

10. Open your tube. Copy and paste as new layer. Resize as you prefer and arrange it by the left of the bench.

11. Open element '71' copy and paste as new layer. Resize 20%. Arrange it to the top right of the bench.

12. Open element '105' copy and paste as new layer. Resize 40%. Arrange it to the bottom right of the bench.

13. Open element '7' copy and paste as new layer. Resize 40%. Arrange it to the bottom left of the bench.

14. Open element '119' copy and paste as new layer. Resize 30%. Mirror. Arrange it to the bottom left of the bench.

15. Open element '112' copy and paste as new layer. Resize 50%. Arrange it to the bottom right.


--> Resize it if wanted. Add your copyright info and license#. Add your name and save as PNG.

March 20, 2015

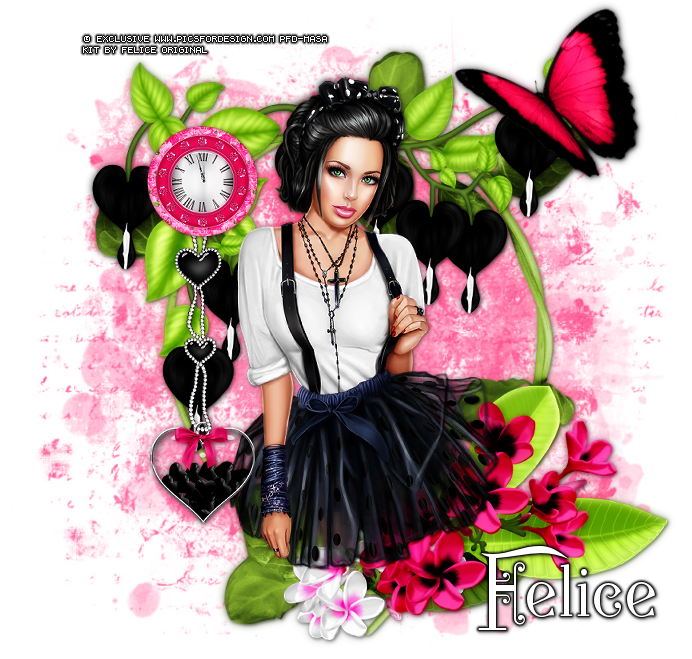
Rita Dear


== NEW CT FELICE ORIGINAL PTU TAG ==

Featuring "Rita Dear" Kit by Felice Original at Exquisite Scraps

It has 14 papers and 60 elements and is a girly girl kit. The kit is made in 300 dpi and the papers measure 800x800 pixels

Kit can be found at following store:

-> Exquisite Scraps, here


March 11, 2015

Have An Eggsellent Easter

EGGSELLENT EASTER TUTORIAL


Tutorial written by Marcia Salgado on March 11th, 2015
for those who have a working knowledge of PSP.
Any resemblance to any other tutorial is coincidental.
Do not copy and paste this tutorial anywhere on the net.
If you want to translate please ask first. 

****************************************
Material:

Tube: Misticheskaya Exclusive, you can purchase it at PFD, here 
PTU Kit "Have An Eggsellent Easter" by ChocUKDesigns, 
you can purchase it at 3 stores:
My template, here
Plugin: Eye Candy 6 > Gradient Glow
Font: Bazar

****************************************

--> Remember to save often and use my tag as reference if necessary. Used the Drop Shadow: 1-1-50-5 in most layers -> apply only after finished all tag.

1. Open my template, duplicate and close the original. Click on right circle layer and select the circle. Open paper 17. Copy and paste as new layer. Invert selection. Delete. Delete right circle layer. Apply Eye Candy > Gradient Glow. Settings below. Twice.

2. Click on round rectangle layer. Select the shape. Open paper 19. Copy and paste as new layer. Invert selection. Delete. Delete round rectangle layer. Apply Eye Candy > Gradient Glow same settings. Also twice. Open element 68. Resize 70%. Mirror. Flip. Copy and paste as new layer. Move it over the round rectangle shape. Open element 96. Resize 75%. Copy and paste as new layer. Move it over the round rectangle too, but a little to left.

3. Click on left circle layer. Select the circle. Open paper 16. Copy and paste as new layer. Invert selection. Delete. Delete left circle layer. Apply Eye Candy > Gradient Glow same settings. Also twice. Open element 65. Flip. Copy and paste as new layer. Move it a little to right. Open element 64. Resize 80%. Copy and paste as mew layer. Move it to left.

4. Click on big rectangle layer. Select the rectangle. Open paper 7. Copy and paste as new layer. Invert selection. Delete. Deselect. Delete big rectangle layer. Apply Eye Candy > Gradient Glow same settings. Same way before. Open element 90. Resize 53%. Copy and paste as new layer. Move it a little to left and to bottom. Open element 53. Resize 82%. Copy and paste as new layer. Move it to right and down a little. Open element 102. Resize 57%. Copy and paste as new layer. Move it between the pink flower and first chocolate egg.

5. Open your tube. Resize if needed. Copy and paste as new layer. Move where it suits you better.  Open element 107. Resize 47%. Copy and paste as new layer. Move it to bottom left. Open element 93. Resize 40%. Flip. Free Rotate: Left-15. Copy and paste as new layer. Copy to bottom left, in front of the basket.Open element 1. Resize 41%. 

6. Click on wordart layer. Apply Same Eye Candy > Gradient Glow using the color black but only once this time. Select All. Selections > Clip to Canvas. Image > Crop to selection. Now you can apply drop shadow on all layers.

--> Resize if needed. Add your copyright and #license. Add your name, I'm using Bazar, size: 30. Salve as PNG.


February 26, 2015

Cute Helen


== NEW PTU DANCE IN THE RAIN CT TAG ==

Featuring "Cute Helen" Kit by Dance In The Rain at PicsForDesign - PFD

Dance In The Rain's beautiful kit with 121 elements and 25 papers match for the tube by Stan Dudin. This kit will also work with many other tubes, as you can see for my tags.

Dance In The Rain kit can be found at:

-> PicsForDesign - PFD,  here


February 11, 2015

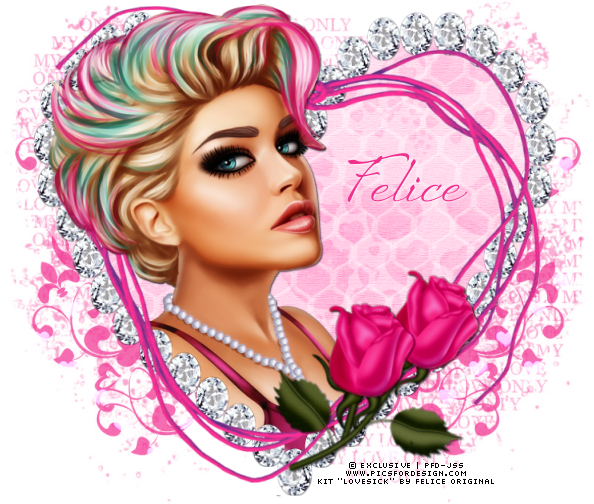
Show-off ~ Kit Lovesick


Another tag created with this wonderful kit from Felice Original

By her TOU you can colorize the elements. So here's what you can end up with.


=== SHOW-OFF FELICE ORIGINAL TAG ==

Featuring "Lovesick Kit" by Felice Original at Exquisite Scraps and PicsForDesign

This is a taggersize kit with a valentine theme.
It has 12 papers and 40 elements so you can play with it.
The papers measure 1000x1000 and the whole kit is created at 300 dpi.

Kit can be found in two stores:

-> Exquisite Scraps here

-> PicsForDesign here


February 10, 2015

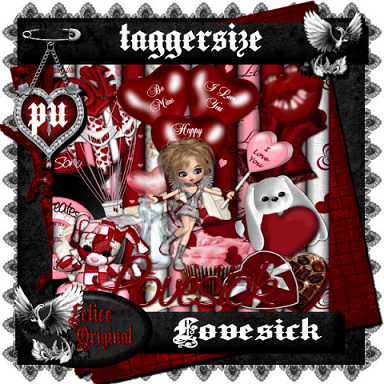
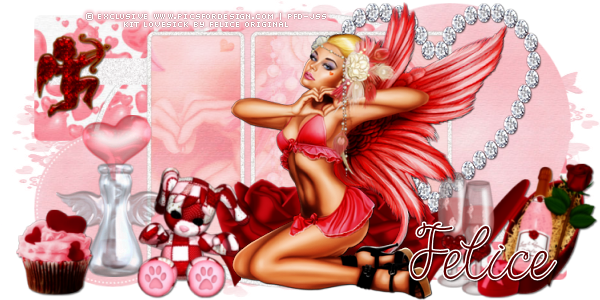
Lovesick


=== NEW CT FELICE ORIGINAL TAG ==

Featuring "Lovesick Kit" by Felice Original at Exquisite Scraps and PicsForDesign

This is a taggersize kit with a valentine theme.
It has 12 papers and 40 elements so you can play with it.
The papers measure 1000x1000 and the whole kit is created at 300 dpi.

Kit can be found in two stores:

-> Exquisite Scraps here

-> PicsForDesign here