MEMORIES TUTORIAL
WITH WORDART

**Click to see original size**
WITHOUT WORDART

**Click to see original size**
Tutorial written by Marcia Salgado on April 29th, 2016
for those who have a working knowledge of PSP.
I'm using PSP9 to create my tuts.
Any resemblance to any other tutorial is coincidental.
Do not copy and paste this tutorial anywhere on the net.
If you want to translate please ask first.
****************************************
Material:
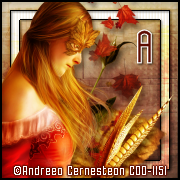
Tube: "Individual Tube 2-3" by Andreea Cernestean, you can purchase it here,
do not use without the proper #license.
PTU Kit "Love Lingers" by Hungry Hill,
you can purchase it here
Plugin: Eye Candy 6 (OPTIONAL)
Font: Wytherness
****************************************
--> Remember to save often and use my tag as reference if necessary. Use a drop shadow of your preference on layers.
1. Create a new image 851x315.
2. Open paper-3. Copy and paste as new layer. Move it around the background to place it as you like.
3. Add a new layer. Select all. Contract > 10. Fill it with white. Contract > 25. Delete. Deselect. Blend Mode: Overlay. Apply Blinds as shown below:

4. Select all. Float. Defloat. Add a new layer. Fill it with Black. Contract > 1. Deselect.
5. Open green-branch. Resize 30%. Mirror. Copy and paste as new layer. Move it a little down and to left.
6. Open envelopes. Resize 30%. Copy and paste as new layer. Move it down.
7. Open doodle-2. Resize 65%. Mirror. Copy and paste as new layer. Move it a little to left. Stop before the green brach.
8. Open fabric-leaf-1. Resize 45%. Copy and paste as new layer. Move it down and to left. Duplicate. Free Rotate: Left-25. Move it a litle up and a little to right.
Move this layer below the first golden leaf layer.
9. Click on first layer. Open oak-leaves. Resize 45%. Flip. Copy and paste as new layer. Move it down and a little to left.
10. Open scarf. Resize 65%. Copy and paste as new layer. Move it way to left.
11. Open heart. Resize 70%. Copy and paste as new layer. Move it way to right.
12. Open time. Resize 40%. Copy and paste as new layer.Move it way to right.
13. Open leaf-scatter. Resize 50%. Mirror. Copy and paste as new layer. Move it to left.
14. Open your tube closeup. I mirrored mine. Copy and paste as new layer. Move it way to right.
15. OPTIONAL - Open WordArt. Resize 80%. Copy and paste as new layer. Move it down and to right. Add a border using Eye Candy 6 > Gradient Glow (color #5c0b00) with the settings below:

16. Add a new layer. Select all. Fill it with Black. Contract > 2. Deselect.
--> Add your copyright info and license#. Add your name or initials. Save as PNG.
--> Sometimes I had to change my Timeline size to 846x313 because when I add it to Facebook the image has extra pixels and do not fit perfectly. So try this size if the same is happening to you.
-----------------------------------------------------------
Idea for Profile Picture: