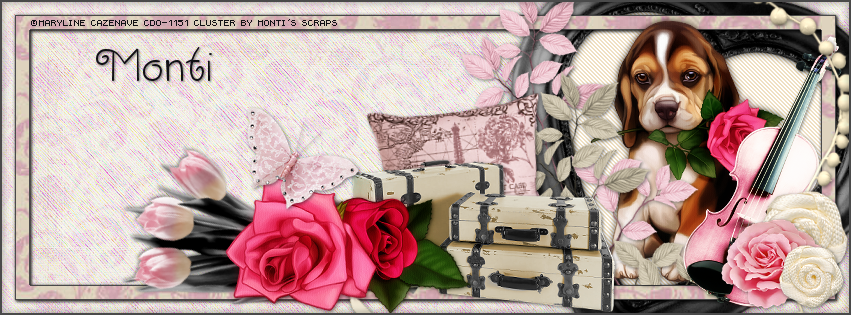
PINK PUPPY TUTORIAL
**Click to see original size**
Tutorial written by Marcia Salgado on June 10th, 2015
for those who have a working knowledge of PSP.
Any resemblance to any other tutorial is coincidental.
Do not copy and paste this tutorial anywhere on the net.
If you want to translate please ask first.
****************************************
Material:
Tube: "Rose Puppy" by Maryline Cazenave, you can purchase it here
do not use without the proper #license.
PTU Cluster "Cluster Pack 3" by Monti's Scraps,
you can purchase it here
Plugin: Penta.com > Jeans
Font: CK Curly
****************************************
--> Remember to save often and use my tag as reference if necessary. Used the Drop Shadow: 1-1-50-5 in most layers.
1. Open ScrapMonti_ClusterPack-3-Frame2 and ScrapMonti_ClusterPack-3-Paper. You will get the elements directly from the cluster PSD.
2. Create a new image 851x315. Fill it with the paper. Rename the layer to PAPER.
3. Add a new layer. Rename the layer to MOTION. Select all. Fill it with white. Contract > 15. Delete. Click on PAPER layer. Promote it to a layer. Rename the layer to BORDER. Duplicate. Blend Mode: Multiply. Contract > 15. Delete. Click on MOTION layer. Fill with white. Deselect. Add Noise: Uniform-50. Motion Blur: 318-100. Edge Effects > Enhance More. Repeat Enhance. Blend Mode: Soft Light. Duplicate. Mirror. Flip. Blend Mode: Soft Light. Move BORDER layer over MOTION layer. Add a Drop Shadow.
3. Click on MOTION layer. Copy Frame and paste as new layer. Resize 60%. Free Rotate: Right-20. Move it way right. Click inside the frame. Expand > 4. Add a new layer. Fill it with #f0e0c2. Apply Penta.com > Jeans > Default.
4. Click on BORDER layer. Add a new layer. Select all. Contract > 15. Fill with #111115. Contract > 1. Delete. Contract > 13. Fill with #111115. Contract > 1. Delete. Deselect.
5. Open your tube. Resize if needed. Copy and paste as new layer. Move it to right and place it over the frame. Erase all parts at frame bottom. Add a suitable shadow.
6. Copy Leaves-Pink. Paste as new layer. Resize 70%. Place it over the left side of the frame. Erase the bottom part that is over the large border.
7. Copy Leaves-Cream. Paste as new layer. Resize 70%. Mirror. Place over the left side of the frame a little more down and to right than the pink.
8. Copy Cushion. Paste as new layer. Move it to right. Leave it near the frame left side.
9. Copy Violin. Paste as new layer. Resize 60%. Move it way right and place it over the right side of the frame.
10. Copy Buds-Cream. Paste as new layer. Move it way right.
11. Copy Flower-Cream. Paste as new layer. Resize 70%. Move it way down right. Place it just a little up of right bottom corner. Duplicate. Resize 70%. Mirror, And place it over the corner.
12. Click on the layer of the bigger cream flower. Copy Flower-Pink. Paste as new layer. Resize 70%. Move it over the left side of the bigger cream flower.
13. Click on first layer. Copy Tulips. Paste as new layer. Resize 70%. Free Rotate: Left-55. Move it down left.
14. Copy SuitCases. Paste as new layer. Resize 70%. Move it down a little to right. Place it over the cushion. With my tube I have an extra layer with roses, just resized it and place it between the tulips and the suitcases.
15. Copy Butterfly. Paste as new layer. Resize 70%. Mirror. Place it over the tulips, or if you are using the same tube I am, place it over the roses. Add a border #111115 of 2px
--> Add your copyright info (no URL by Facebook TOU) and license#. Add your name. Save as PNG.
--> Sometimes I had to change my Timeline size to 846x313 because when I add it to Facebook the image has extra pixels and do not fit perfectly. So try this size if the same is happening to you.

