
ALL BLUE TUTORIAL
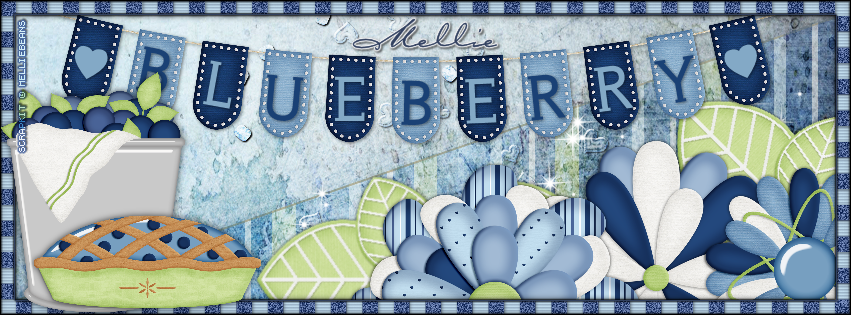
**Click to see original size**
Tutorial written by Marcia Salgado on June 9th, 2015
for those who have a working knowledge of PSP.
Any resemblance to any other tutorial is coincidental.
Do not copy and paste this tutorial anywhere on the net.
If you want to translate please ask first.
****************************************
Material:
PTU Kit "Sweet Blueberry" FS by Mellie Beans, you can purchase it at:
Mystical Scraps Store - TAGGER SIZE
Heartbeatz Creationz - TAGGER SIZE
My Memories - DESIGNER PACK PAPERS and DESIGNER PACK ELEMENTS
Mystical Scraps Store - TAGGER SIZE
Heartbeatz Creationz - TAGGER SIZE
My Memories - DESIGNER PACK PAPERS and DESIGNER PACK ELEMENTS
Wordart: by me, mar2015_blueberrywordart, just click and save:

Font: Carpenter Script
****************************************
--> Remember to save often and use my tag as reference if necessary. Used the Drop Shadow: 1-1-50-5. If you use the Tagger Size Kit the resize percentage is not applicable.
1. Create a new image 851x315. Add a new layer. Select all. Open 'paper' Blue Grunge. Copy and paste into selection. Deselect.
2. Add a new layer. With the Freehand Selection Tool > Point to Point. Create a selection from left bottom corner to top right corner and down. Open 'paper' green striped. Copy and paste into selection. Keep selected. Blend Mode: Soft Light. Add a new layer. Fill it with #324160. Contract > 2. Delete. Deselect. Blend Mode: Exclusion.
3. Open 'element' Bead Heart Scatter. Resize 30%. Copy and paste as new layer. Move it up and right. Drop Ahadow: 1-1-85-2-Black. Blend Mode: Hard Light.
4. Open 'element' sparkles. Resize 80%. Free Rotate: Right-90. Copy and paste as new layer. Move it to bottom right. Place it over the striped paper. Blend Mode: Hard Light.
5. Open 'element' Leaf. Resize 20%. Free Rotate: Left-45. Copy and paste as new layer. Move it way bottom right. Duplicate. Free Rotate: Left-45. Move it bottom left. Merge down.
6. Open 'element' Flower 1. Resize 20%. Copy and paste as new layer. Move it to bottom right. Stop before the corner.
7. Open 'element' Flower 2. Resize 20%. Copy and paste as new layer. Move it to bottom right. Place it over left side of previous flower.
8. Open 'element' Flower 3. Resize 20%. Copy and paste as new layer. Move it way to bottom corner right.
9. Open 'element' Banner. Resize 22%. Copy and paste as new layer. Move it to top. Open my wordart mar2015_blueberrywordart, copy and paste as new layer and place it over the banner.
10. Add new layer. Select all. Contract selection > 15. Invert selection. Open 'paper' checks. Resize 50%. Use it as patter on your foreground with Angle:0 Size:21. Deselect. Select one dark blue square. Selections > Modify > Select Color Range > Tolerance-20, Softness-20, Add color range marked and Reference color: #455b8c. That will select all dark blue squares. Add Noise: Uniform-50-Monochrome. Drop Shadow: 1-1-50-5-Black. Invert the selection. Blinds > Width-3, Opacity-25, Color-#455b8c and only Horizontal marked. Deselect.
11. Open 'element' Pail. Resize 12%. Copy and paste as new layer. Move it way to left.
12. Open 'element' Pie. Resize 12%. Copy and paste as new layer. Move it to left. Place it in front of Pail, at its right side.
--> Add your copyright info (no URL by Facebook TOU) and license#. Add your name. Save as PNG.
--> Sometimes I had to change my Timeline size to 846x313 because when I add it to Facebook the image has extra pixels and do not fit perfectly. So try this size if the same is happening to you.