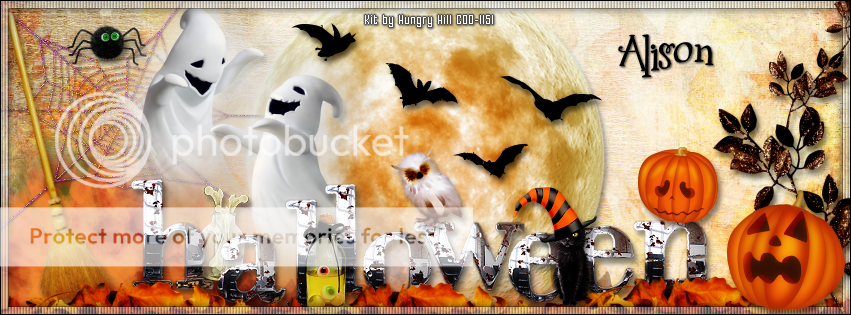
HAPPY SPOOK! TUTORIAL
**Click to see original size**
Tutorial written by Marcia Salgado on September 18th, 2016
for those who have a working knowledge of PSP.
I'm using PSP9 to create my tuts.
Any resemblance to any other tutorial is coincidental.
Do not copy and paste this tutorial anywhere on the net.
If you want to translate please ask first.
****************************************
Material:
CDO 2016 HALLOWEEN STORE COLLAB
PTU Kit "Halloween Collab Kit - 2016" by Hungry Hill,
you can found the STORE COLLAB here
Don't miss out, as it goes away forever at 10pm PST 30th September 2016.
Font: Vampyr Bats (Dingbat Font) and 2Peas Mister Giggles
****************************************
--> Remember to save often and use my tag as reference if necessary. Use a drop shadow of your preference on layers.
1. Create a new image 851x315.
2. Open paper-3. Copy and paste as new layer.
2. Open paper-3. Copy and paste as new layer.
3. Open moon. Resize 45%. Copy and paste as new layer.
4. Open leaf-mist. Copy and paste as new layer. Move it way down and to left.
5. Open web. Resize 35%. Copy and paste as new layer. Move it up and way to left.
6. Open broom. Resize 40%. Free Rotate: Left-15. Copy and paste as new layer. Move it way to left.
7. Open spider. Resize 10%. Mirror. Copy and paste as new layer. Move it up and place it over the web.
8. Open ghostie-1. Resize 40%. Copy and paste as new layer. Move it up and to left. Place it on the left side of the web.
9. Open ghostie-2. Resize 40%. Copy and paste as new layer. Move it a little down and move to left. Place it on left side of first ghost.
10. Open bone-jar. Resize 15%. Copy and paste as new layer. Move it down and place between the ghosts.
11. Open WordArt. Resize 75%. Copy and paste as new layer. Move it down.
12. Open dry-leaves. Resize 40%. Copy and paste as new layer. Move it way left and way down. Duplicate it twice and create a bottom line with it. Merge the 3 layers together.
13. Open eyeballs. Resize 13%. Copy and paste as new layer. Move it down and place it between the two "L" letters of the wordart.
14. Open kitty. Resize 15%. Copy and paste as new layer. Move it down and place it between the two "E" letter of the wordart.
15. Select all. Add a new layer. Fill it with white. Contract > 8. Delete. Keep selected. Fill with black. Contract > 1. Delete. Deselect. Low the layer opacity to 50. Use blinds as shown below:
15. Open branch-2. Resize 45%. Free Rotate: Left-90. Copy and paste asnew layer and move it way to right.
16. Open jack-o-lantern-1. Resize 15%. Mirror. Copy and paste as new layer. Move it down and way to right.
17. Open jack-o-lantern-2. Resize 10%. Copy and paste as new layer. Place it over the "N" letter of the wordart.
18. Open owl. Resize 10%. Copy and place as new layer. Place it over the "W" letter of the wordart on left.
19. Use the following letters of the dingbat font "d" (size 28), "E" (size 36), "c" (size 36) and "r" (size 30) and place them over the moon.
20. Select all. Add a new layer. Fill with black. Contract > 1. Delete. Deselect.
--> Add your copyright info (no URL by Facebook TOU) and license#.
Add your name or initials. Save as PNG.
--> Sometimes I had to change my Timeline size to 846x313 because when I add it to Facebook the image has extra pixels and do not fit perfectly. So try this size if the same is happening to you.


