FLY TO THE MOON TUTORIAL
Tutorial written by Marcia Salgado on October 2nd, 2015
for those who have a working knowledge of PSP.
Any resemblance to any other tutorial is coincidental.
Do not copy and paste this tutorial anywhere on the net.
If you want to translate please ask first.
****************************************
Material:
Tube: "Helena" by Toriya, you can purchase it here
do not use without the proper #license.
PTU Kit "Helena's Pumpkin" by Bibi's Collection, you can purchase it here
Font: Trend Sans One
****************************************
--> Remember to save often and use my tag as reference if necessary. Use a Drop Shadow of your preference on layers.
1. Create a new image 700x700.
2. Open BIBI-HELENAS PUMPKIN-ELEM (77). Resize 65%. Copy and paste as new layer. Move it up and to right. Duplicate. Mirror. Flip. Merge down.
3. Open BIBI-HELENAS PUMPKIN-ELEM (13). Resize 80%. Copy and paste as new layer.
4. Open BIBI-HELENAS PUMPKIN-ELEM (28). Resize 68%. Copy and paste as new layer. Move it up and to right. Duplicate. Mirror. Flip. Merge down.
5. Open BIBI-HELENAS PUMPKIN-ELEM (142). Resize 80%. Copy and paste as new layer.
6. Open BIBI-HELENAS PUMPKIN-ELEM (96). Resize 85%. Copy and paste as new layer. Move it below the white frame. Duplicate. Mirror. Merge down.
7. Open BIBI-HELENAS PUMPKIN-ELEM (116). Resize 60%. Copy and paste as new layer. Move it a little up to fix the place exactly below the white frame. You can adjust it later if needed.
8. Open BIBI-HELENAS PUMPKIN-ELEM (157). Resize 60%. Copy and paste as new layer.
9. Click on white frame's layer and select it inside. Expand > 10. Add a new layer. Move it below the frame layer. Open BIBI-HELENAS PUMPKIN PAPER (2). Copy and paste into selection. Deselect.
10. Open BIBI-HELENAS PUMPKIN-ELEM (149). Resize 35%. Copy and paste as new layer. I added a thin border of #812307 and another using white. Blend Mode: Soft Light.
11. Click on white frame's layer again. Open BIBI-HELENAS PUMPKIN-ELEM (65). Resize 75%. Copy and paste as new layer. Move it to left.
12. Open BIBI-HELENAS PUMPKIN-ELEM (114). Resize 45%. Mirror. Copy and paste as new layer. Move it to left. Place it over the previous element.
13. Open BIBI-HELENAS PUMPKIN-ELEM (11). Resize 25%. Copy and paste as new layer. Move it down and to left. Place it over the leaf's base.
14. Open BIBI-HELENAS PUMPKIN-ELEM (83). Resize 35%. Mirror. Copy and paste as new layer. Move it to left.
15. Open BIBI-HELENAS PUMPKIN-ELEM (134). Resize 30%. Copy and paste as new layer. Move it down and left. Place it over the scarecrow base.
16. Open BIBI-HELENAS PUMPKIN-ELEM (136). Resize 40%. Copy and paste as new layer. Move it down and far left. Place it on previous pumpkin's left side.
17. Open your tube. Resize if needed. Copy and paste as new layer. Move it down and to right.
--> Resize if wanted. Add your copyright info and license#. Add your name and save as PNG.
---------------------------------------------------------------------
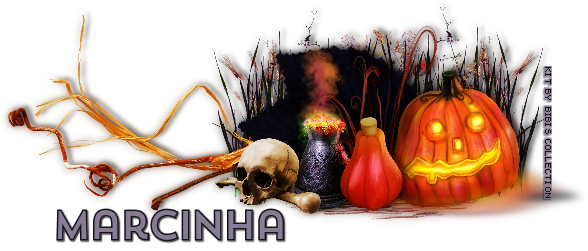
I created an avatar and a line tag to go with my tag tutorial.
Here's what they came out, so you can have an idea on what elements I used.


