
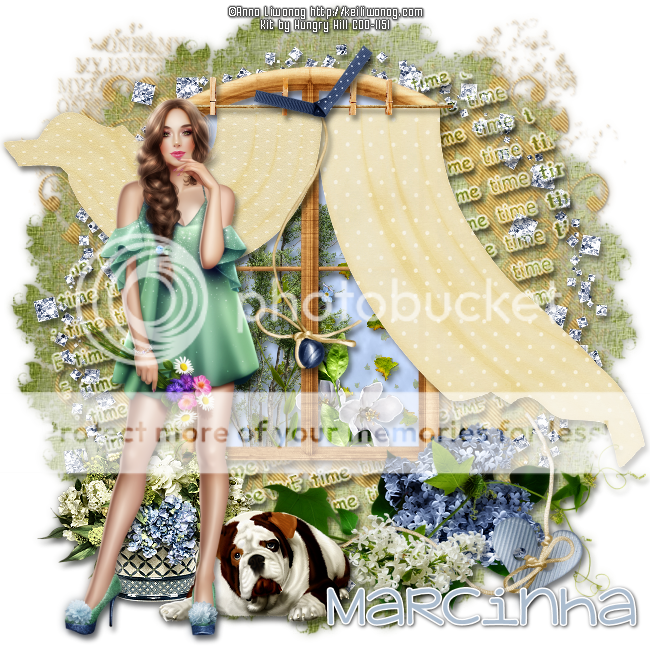
FRESH AIR TUTORIAL
Tutorial written by Marcia Salgado on October 7th, 2016
for those who have a working knowledge of PSP.
I'm using PSP9 to create my tuts.
Any resemblance to any other tutorial is coincidental.
Do not copy and paste this tutorial anywhere on the net.
If you want to translate please ask first.
****************************************
Material:
Tube: "Individual Tube 73-1" by Anna Liwanag, you can purchase it here,
do not use without the proper #license.
PTU Kit "Lilac and Linen" by Hungry Hill,
you can purchase it here
Mask: Dee's mask, DD_VMask_6 HERE and DD_NFM_2015_1 HERE (it's missing and already sent a message to Dee about it, until it is fixed you can click and save below)

Plugin: MuRa's Meister and Penta.com
Font: KG Adipose Unicase
****************************************
--> Remember to save often and use my tag as reference if necessary. Use a drop shadow of your preference on layers.
1. Add a new layer. Select all. Open paper-12. Copy and paste into selection. Deselect. Appply the mask DD_NFM_2015_1. Merge group.
2. Add a new layer. Select all. Open paper-8. Copy and paste into selection. Deselect. Appply the mask DD_VMask_6. Merge group.
3. Open glitter-circle. Copy and paste as new layer.
4. Open WA-4. Resize 85%. Free Rotate: Left-15. Copy and paste as new layer. Move it a little up. Blend Mode: Hard Light.
5. Open window. Resize 50%. Copy and paste as new layer. Move it a little up and a very little to left.
6. Select inside the window. Use the Lasso selection to select over the external border only. See below:

7. Add a new layer and move it below the window layer. Open paper-10. Copy and paste into selection. Keep selected.
8. Add a new layer. Use as foreground color: #dedbdc and background color: white. Apply MuRa's Meister > Cloud as shown below. Blend Mode Luminance (L). Low the layer opacity to 66.
Invert selection. The next elements will be placed inside the window.

9. Open leaf-scatter. Resize 35%. Copy and paste as new layer. Move it to left and down. (You can use the directional arrows to move the element if needed). Delete. Keep selected.
10. Open greenery. Resize 55%. Copy and paste as new layer. Move it to left and a little down. Delete. Keep selected.
11. Open forget-me-nots. Resize 40%. Move it down and a little to left. Copy and paste as new layer. Delete. keep selected.
12. Open stem-2. Resize 30%. Copy and paste as new layer. Move it down and to right. Delete. Deselected. Now on the scenary inside de window is ready.
13. Click on window layer. Open curtain-2. Resize 45%. Mirror. Copy and paste as new layer. Move it up and place on right side of the window.
14. Open curtain-1. Resize 40%. Mirror. Copy and paste as new layer. Move it up and place over the left side of the window.
15. Open clothesline. Resize 35%. Copy and paste as new layer. Move it up and place it over the curtains as it is holding them.
16. Open ball-string. Resize 45%. Copy and paste as new layer. Move it up and place it between the curtains.
17. Open dotty-bow-2. Resize 20%. Copy and paste as new layer. Move it up and place on the top end of the ball-string.
18. Open lilac. Resize 55%. Mirror. Flip. Copy and paste as new layer. Move it down and to right.
19. Open vine. Resize 65%. Copy and paste as new layer. Move it down and to right.
20. Open heart-string. Resize 50%. Mirror. Copy and paste as new layer. Move it down and to right.
21. Open lilac-2. Resize 50%. Mirror. Copy and paste as new layer. Move itdown and a little to right.
22. Open bouquet. Resize 35%. Copy and paste as new layer. Move it down and to left.
23. Open Arabella. Resize 25%. Copy and paste as new layer. Move it down and a little to left.
24. Open your tube and copy and paste as new layer. Move it to left.
25. Use Crop > Merged Opaque to get rid of any extra space,
--> Resize it if wanted. Add your copyright info and license#. Add your name and save as PNG.