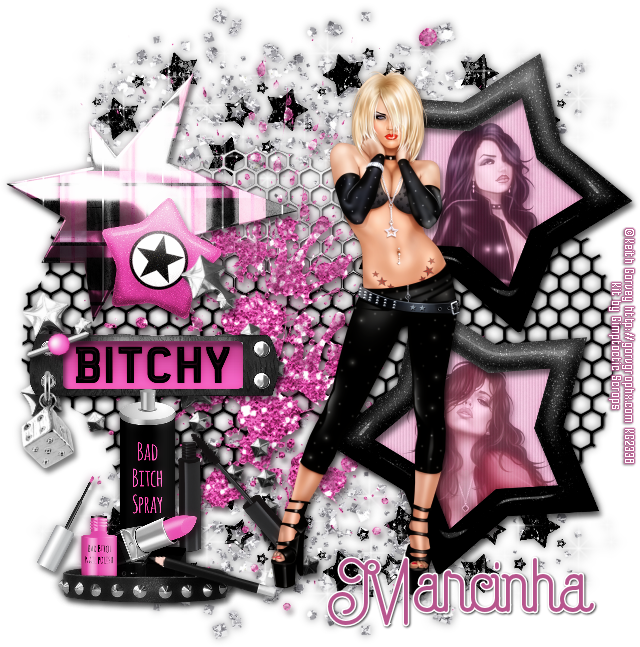
IN THE MOOD TUTORIAL
Tutorial written by Marcia Salgado on May 6th, 2016
for those who have a working knowledge of PSP.
I'm using PSP9 to create my tuts.
Any resemblance to any other tutorial is coincidental.
Do not copy and paste this tutorial anywhere on the net.
If you want to translate please ask first.
****************************************
Material:
Tube: "Star 2" by Keith Garvey, you can purchase it here,
do not use without the proper #license.
I'm using 3 tubes from Keith Garvey, you can use only one if you prefer,
PTU Kit "Bad Bitch" by Gimptastic Scraps,
you can purchase it here
Font: Capella
****************************************
--> Remember to save often and use my tag as reference if necessary. Use a drop shadow of your preference on layers.
1. Create a mew image 650x650.
2. Open GS-Bad_Bitch_ele43. Copy and paste as new layer. Move it up. Duplicate. Flip. Merge down.
3. Open GS-Bad_Bitch_ele23. Copy and paste as new layer.
4. Open GS-Bad_Bitch_ele5. Copy and paste as new layer. Move it a little to left.
5. Open GS-Bad_Bitch_ele25. Resize 70%. Copy and paste as new layer. Move it up and to left.
6. Open GS-Bad_Bitch_ele40. Resize 60%. Copy and paste as new layer. Move it up and to left.
7. Open GS-Bad_Bitch_frame3. Resize 50%. Copy and paste as new layer. Move it up and to right. Duplicate. Mirror. Move it down and place it under the first one. Merge down.
8. Select inside the frames. Expand > 5. Add a new layer and move it under the frame layer. Open GS-Bad_Bitch_paper7. Copy and paste into selection. Keep selected. Add a new layer. Fill with white and low the opacity to 52. Blinds using the settings below, invert the selection.
9. I'm using 3 tubes from Keith Garvey, chose 2 of them and place them inside the frames. Blend Mode: Luminance (L) and low the layer opacity to 52. Dulicate. Gaussian Blur: 4. Blend Mode: Soft Light and increase the layer opacity to 100.
10. Click on first layer. Open GS-Bad_Bitch_ele32. Copy and paste as new layer. Move it down and to left.
11. Open GS-Bad_Bitch_ele8. Resize 50%. Copy and paste as new layer. Move it to left. Duplicate. Turn the copy invisibe for now. Click on original layer.
12. Open GS-Bad_Bitch_ele13. Resize 50%. Copy and paste as new layer. Place it over the previous element over the middle. Select all. Float. Defloat. Contract > 1. Turn visible the copy you reserved before. Delete. Deselect.
13. Open GS-Bad_Bitch_ele17. Resize 40%. Copy and paste as new layer. Place it hanging from rhe bottom eyelet of the previous layer.
14. Open GS-Bad_Bitch_ele7. Resize 30%. Free Rotate: Left-20. Copy and paste as new layer. Place it over the upper eyelet.
15. Open GS-Bad_Bitch_ele11. Resize 50%. Copy and paste as new layer. Move it down and to left. Duplicate and turn copy invisible. Click back on original layer.
16. Open GS-Bad_Bitch_ele49. Resize 40%. Copy and paste as new layer. Move it down and to left. Place it over the previous collar.
17. Open GS-Bad_Bitch_ele34. Resize 40%. Copy and paste as new layer. Place it near the previous element.
18. Open GS-Bad_Bitch_ele39. Resize 30%. Copy and paste as new layer. Place it near the spray can.
19. Open GS-Bad_Bitch_ele53. Resize 30%. Copy and paste as new layer. Place it near the lipstick.
20. Turn the collar copy visible again and clean the parts that are over the previous elements to look as they are inside of it.
21. Open GS-Bad_Bitch_ele48. Resize 40%. Free Rotate: Right-75. Copy and paste as new layer. Move it down and to left. Place it over the collar on its right side as if the pencil is leaning on collar element.
--> Resize it if wanted. Add your copyright info and license#. Add your name and save as PNG.
-------------------------------------------------
This is an animation I created


