
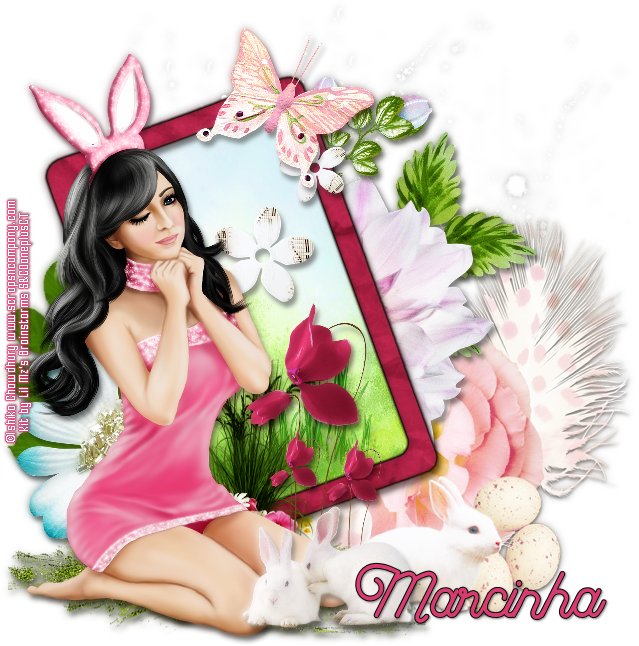
CUTE BUNNY TUTORIAL
Tutorial written by Marcia Salgado on March 11th, 2016
for those who have a working knowledge of PSP.
I'm using PSP9 to create my tuts.
Any resemblance to any other tutorial is coincidental.
Do not copy and paste this tutorial anywhere on the net.
If you want to translate please ask first.
****************************************
Material:
Tube: "Coco Sugar Kiss" by Ishika Chowdhury, you can purchase it here
do not use without the proper #license.
PTU Kit "Coco Sugar Kiss" by Blissful Designs, you can purchase it here
Plugin: Eye Candy 6: Text & Selection
Font: Fabulous
****************************************
--> Remember to save often and use my tag as reference if necessary. Use a Drop Shadow of your preference on layers.
1. Open BD_CocosugarkissElement (78). Resize 75%. Free Rotate: Left-20. Copy and paste as new layer. Move it to left.
2. Select inside the frame. Expand > 10. Add a new layer and move it below the frame layer. Open BD_CocosugarkissPaper (4). Copy and paste into selection. Deselect.
3. Click on Raster 1 layer (the bottom layer). Open BD_CocosugarkissElement (83). Resize 85%. Copy and paste as new layer. Move it down and to right.
4. Open BD_CocosugarkissElement (6). Copy and paste as new layer. Move it up and to right.
5. Open BD_CocosugarkissElement (54). Resize 55%. Mirror. Copy and paste as new layer. Move it to right.
6. Open BD_CocosugarkissElement (49). Resize 60%. Copy and paste as new layer.
7. Open BD_CocosugarkissElement (56). Resize 45%. Copy and paste as new layer. Move it a little up.
8. Open BD_CocosugarkissElement (1). Resize 50%. Mirror. Copy and paste as new layer. Move it down and to left.
9. Open BD_CocosugarkissElement (51). Resize 40%. Copy and paste as new layer. Move it down and to left, place it behind the left bottom corner border of the frame.
10. Click on frames layer. Apply Eye Candy 6: Text & Selection > Gradient Glow with the following settings:

11. Open BD_CocosugarkissElement (24). Resize 50. Copy and paste as new layer. Move it up and a little to left. Place it over the frame on top.
12. Open BD_CocosugarkissElement (33). Resize 70%. Copy and paste as new layer. Move it way down and way to left.
13. Open BD_CocosugarkissElement (12). Resize 50%. Copy and paste as new layer. Move it down.
14. Open BD_CocosugarkissElement (44). Resize 35%. Copy and paste as new layer. Place it over the top right corner of the frame.
15. Open your tube. Resize if needed. Copy and paste as new layer. Move it down and to left.
16. Open BD_CocosugarkissElement (68). Resize 30%. Place it in front of Coco's tube knees.
--> Add your copyright info and license#. Add your name and save as PNG.