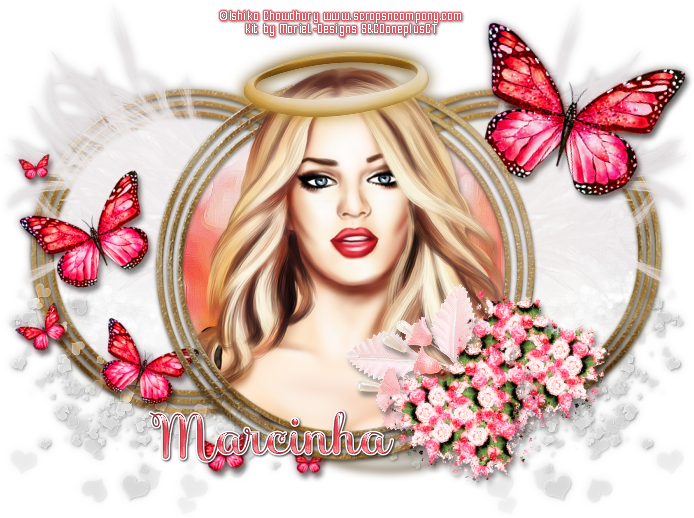
LOVE QUEEN TUTORIAL
Tutorial written by Marcia Salgado on February 21th, 2016
for those who have a working knowledge of PSP.
I'm using PSP9 to create my tuts.
Any resemblance to any other tutorial is coincidental.
Do not copy and paste this tutorial anywhere on the net.
If you want to translate please ask first.
****************************************
Material:
Tube: "Cupido Ruby" by Ishika Chowdhury,
You can add this tube to your cart to get it as a free gift
or you can purchase it here
do not use without the proper #license.
PTU Kit "Cupido" by MarieL Design, this kit belongs to the gorgeous
and romantic Cupid Collab wich has awesome products inside, tubes,
alphas and more kits among them and as the tube you can add this
product to your cart to get it as a free gift or you can purchase it here
Font: SaboresScript-Bold
****************************************
--> Remember to save often and use my tag as reference if necessary. Use a Drop Shadow of your preference on layers.
1. Create a new image 700x550.
2. Open FRAME 3. Resize 75%. Copy and paste as new layer. Duplicate. Turn bigger frame invisible now, we'll work on copy now. Resize 85%. Select inside the frame. Expand > 3. Add a new layer and move it below the frame. Open PAPER 5. Select all. Contract > 30. Copy. Paste into selection. Deselect. Add a drop shadow on the frame layer. Merge visible. Move it to left and a little up. Duplcate. Mirror. Merge down. Move this layer to bottom.
3. Open 'element' 48. Resize 60%. Copy and paste sa new layer. Move it down and way to left. Duplicate. Mirror. Merge down. Move this layer to bottom.
4. Click on double frame layer. Open 'element' 55. Resize 65%. Copy and paste as new layer. Move it to left and up. Duplicate. Mirror. Merge down.
5. Open 'element' 37. Resize 70%. Copy and paste as new layer. Move to left.
6. Open 'element' 38. Resize 40%. Free Rotate: Right-15. Copy and paste as new layer. Move it to right and up.
7. Turn the bigger frame layer visible again and select inside the frame. Add a new layer. Expand > 3. Move this layer below the frame layer. Open PAPER 4. Copy and paste into selection. Invert selection. Open your tube. Resize if needed. Copy and paste as new layer. Place it inside the frame. Duplicate and turn the copy invisible. Click on tube original layer and delete. Deselect. Turn the copy visible and move it above the frame layer. Select the top of the head, see below, invert the selection and delete. Deselect.
8. Open 'element' 44. Resize 45%. Copy and paste as new layer. Place it on the tube's head.
9. Open 'element' 27. Resize 40%. Mirror. Copy and paste as new layer. Place it over the big frame right bottom corner.
10. Open 'element' 26. Resize 40%. Mirror. Copy and paste as new layer. Place it over the big frame right bottom corner over the previous leaves. Merge down. Erase the bottom part of the stem.
11. Open 'element' 14. Resize 25%. Free Rotate: Right-15. Copy and paste as new layer. Place it over the big frame bottom right border, over the previous flower stem.
--> Add your copyright info and license#. Add your name and save as PNG.


