SADNESS TUTORIAL
Tutorial written by Marcia Salgado on October 4th, 2015
for those who have a working knowledge of PSP.
Any resemblance to any other tutorial is coincidental.
Do not copy and paste this tutorial anywhere on the net.
If you want to translate please ask first.
****************************************
Material:
Tube: "Miss Frankie" by Danny Lee, you can purchase it here
do not use without the proper #license.
PTU Kit "Miss Frankie" by Disturbed Scraps, you can purchase it here
Mask: Dee's mask, halftone-mask-5, HERE
Font: Wolf in the City
****************************************
--> Remember to save often and use my tag as reference if necessary. Use a Drop Shadow of your preference on layers.
1. Create a new image 750x500. Select all. Add a new layer.
2. Open DS - MF - Paper 14. Copy and paste into selection. Deselect. Use Dee's mask. Merge group.
3. Open DS - MF - Element (57). Resize 70%. Mirror. Copy and paste as new layer. Move it to right.
4. Open DS - MF - Element (67). Resize 70%. Copy and paste as new layer. Move it to right.
5. Open DS - MF - Element (84). Resize 50%. Copy and paste as new layer. Move it to left.
6. Open DS - MF - Element (39). Resize 50%. Copy and paste as new layer. Move it up and to right. Duplicate. Flip. Merge down. I'll add flowers and the leaf can be adjusted after doing that moving it far to right or left.
7. Open DS - MF - Element (24). Resize 40%. Free Rotate - Right-90. Copy and paste as new layer. Place it below frame layer. Move it up and a little to right, below frame border, show only half flower.
Duplicate it twice and place them around the frame's right border.
8. Open DS - MF - Element (65). Resize 40%. Mirror. Flip. Copy and paste as new layer. Move it up and far left.
9. Click on layer frame and select inside it. Expand > 5. Add a new layer. Move it below frame layer. Open DS - MF - Paper 2. Copy and paste into selection. Keep selected.
10. Open your close up tube. Copy and paste as new layer. Place it inside the frame. Invert selection. Delete, Select all. Clip to canvas. Crop to selection. Colorize it to black and white (Colorize > 0,0). Blend Mode: Hard Light.
11. Open DS - MF - Element (48). Resize 50%. Copy and paste as new layer. Move it down and to right. Place it on frame's bottom right side.
12. Click on frame layer again. Open DS - MF - Element (58). Resize 40%. Copy and paste as new layer. Move it down and to right. Place it next the light.
13. Open DS - MF - Element (9). Resize 40%. Copy and paste as new layer. Move it down and to right. Place it in front of the light.
14. Open DS - MF - Element (31). Resize 30%. Copy and paste as new layer. Move it up and to right. Place it over the frame border.
15. Open your tube. Resize if needed. Copy and paste as new layer. Move it to left.
16. Open DS - MF - Element (47). Resize 40%. Mirror. Copy and paste as new layer. Move it to bottom and place it near the tube's feet. Mirror and face each other.
--> Add your copyright info and license#. Add your name and save as PNG.
-------------------------------------------------------------
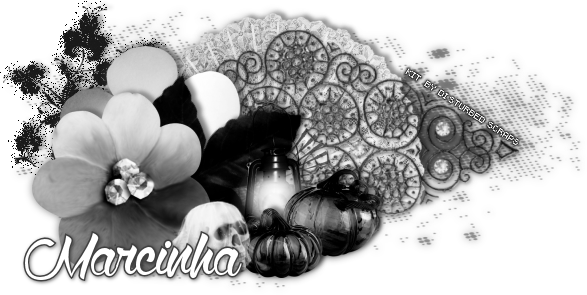
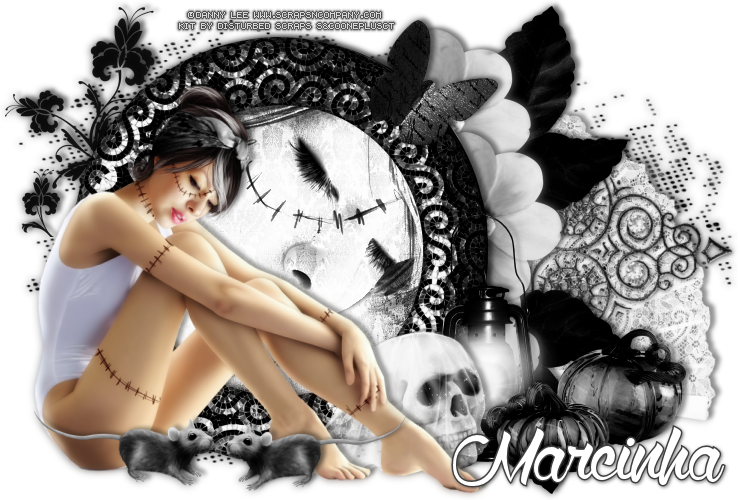
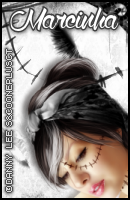
I created a 3 set tag.
Here is what it came out.
-------------------------------------------------------------
I created a 3 set tag.
Here is what it came out.