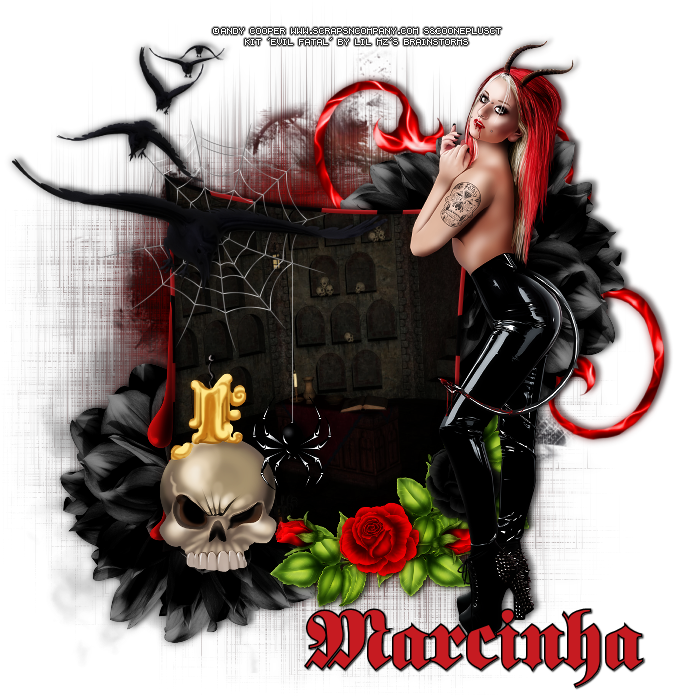
EVILDEAD TUTORIAL
Tutorial written by Marcia Salgado on October 25th, 2015
for those who have a working knowledge of PSP.
Any resemblance to any other tutorial is coincidental.
Do not copy and paste this tutorial anywhere on the net.
If you want to translate please ask first.
****************************************
Material:
Tube: "Evil Fatal" by Andy Cooper, you can purchase it here
do not use without the proper #license.
PTU Kit "Evil Fatal" by Lil Mz's Brainstorms Kits, you can purchase it here
Mask: Staci's Mask, MB and SW Mask 79, here
Plugin: DSB Flux - Blast
Optional: Flame animation
Font: Fette classic UNZ Fraktur
****************************************
--> Remember to save often and use my tag as reference if necessary. Use a Drop Shadow of your preference on layers.
1. Create a new image 700x700.
2. Open LMB_EvilFatal_Element (76). Copy and paste as new layer. Using the lasso tool select inside the frame. Expand > 2. Add a new layer and move it below frame layer. Open LMB_EvilFatal_Paper (7). Copy and paste into selection.
3. Click on frame layer. Open LMB_EvilFatal_Element. Resize 40%. Copy and paste as new layer. Place it over the frame's border on left.
4. Open LMB_EvilFatal_Element (23). Resize 80%. Copy and paste as new layer. Move it up and to left.
5. Open LMB_EvilFatal_Element (95). Resize 40%. Mirror. Copy and paste as new layer. Place it on bottom left frame's border.
6. Open LMB_EvilFatal_Element (69). Resize 75%. Copy and paste as new layer. Low the layer opacity to 75. Apply the plugin DSB Flux > Blast - Settings > Left-Percentage%: 23. Repeat using all Directions > Downwards, Right and Upwards. Send this layer to bottom.
7. Open LMB_EvilFatal_Element (55). Copy and paste as new layer. Move it down and to left.
8. Open LMB_EvilFatal_Element (91). Resize 60%. Copy and paste as new layer. Move it up and to right.
9. Open LMB_EvilFatal_Element (45). Resize 50%. Copy and paste as new layer. Move it up and to right. Duplicate and move it down and to left.
10. Click on first layer. Open LMB_EvilFatal_Element (61). Resize 50%. Copy and paste as new layer. Move it down and to left. Place it over the frame's bottom left corner.
11. Open your tube, resize if needed. Copy and paste as new layer. Move it to right.
12. Open LMB_EvilFatal_Element (64). Resize 40%. Using the rectangle selection tool, select the web thread and change the color to white (using the tut Manual Color Correction). Deselect. Copy and paste as new layer. Place it falling from the frame's web.
13. Apply a shadow on layers and crop de extra space. Add a new layer. Select all. Open LMB_EvilFatal_Paper (12). Copy and paste into selection. Apply Staci's mask and deselect. Send this layer to bottom.
--> Add your copyright info and license#. Add your name and save as PNG.
--> OPTIONAL -> After finished all, copy merged and open it on Animation Shop. Open your flame animation. See the number of frames and duplicate the tag frame to same number. Select all. Click on flame animation. Select all. Copy. Back to your tag. Activate Propagate Paste. Paste into selected frames. Add a white background or another color from your preference. Save as GIF.


