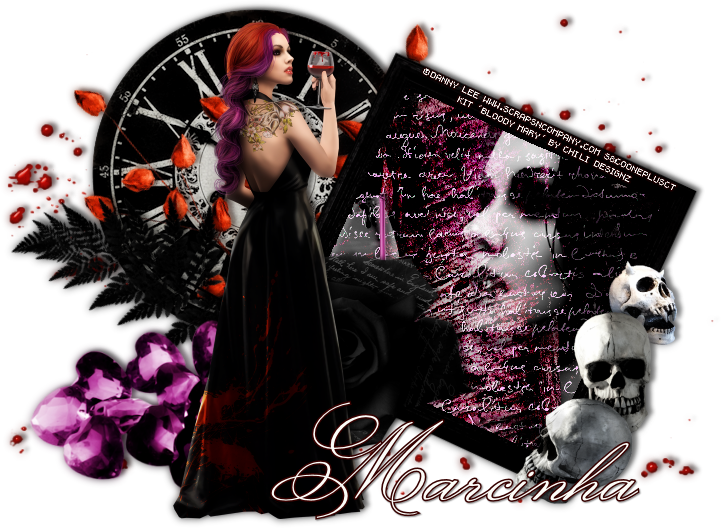
BLOODLUST TUTORIAL
Tutorial written by Marcia Salgado on October 29th, 2015
for those who have a working knowledge of PSP.
Any resemblance to any other tutorial is coincidental.
Do not copy and paste this tutorial anywhere on the net.
If you want to translate please ask first.
****************************************
Material:
Tube: "Bloody Mary" by Danny Lee, you can purchase it here
do not use without the proper #license.
PTU Kit "Bloody Mary" by Chili Designz, you can purchase it here
Font: Monsieur La Doulaise
****************************************
--> Remember to save often and use my tag as reference if necessary. Use a Drop Shadow of your preference on layers.
1. Create a new image 750x550.
2. Open CHILI_DESIGNZ_BloodyMary_frame8. Resize 40%. Free Rotate: Right-25. Copy and paste as new layer. Move it to right.
3. Open CHILI_DESIGNZ_BloodyMary_blood4. Resize 90%. Copy and past as new layer. Send this layer to bottom.
4. Open CHILI_DESIGNZ_BloodyMary_clock. Copy and paste as new layer. Move it up and left.
5. Open CHILI_DESIGNZ_BloodyMary_deco3. Resize 50%. Free Rotate: Left-25. Copy and paste as new layer. Move it up and left.Select and delete the bottom part of the stem showing below the frame.
6. Open CHILI_DESIGNZ_BloodyMary_greenery4. Resize 40%. Free Rotate: Left-30. Copy and paste as new layer. Move it up and left.
7. Click on frame layer. Select inside the frame. Expand > 5. Add a new layer. Arrange it below frame layer. Open CHILI_DESIGNZ_BloodyMary_paper13. Copy and paste into selection. Keep selected. Add anew layer. Open CHILI_DESIGNZ_BloodyMary_paper. Copy and paste as new layer. Blend Mode: Overlay. Keep Selected. Add a new layer. Open CHILI_DESIGNZ_BloodyMary_overlay. Using Manual Color Correction (Tut HERE) change the color #240013 to #d4cdcf. Copy and paste into selection. Blend Mode: Hard Light. Keep selected. Open your tube close up. Resize if needed. Copy and paste as new layer. Place it inside the frame. Invert selection. Delete. Deselect. Select all. Clip to canvas. Crop to selection. Colorize: 0-0. Blend Mode: Hard Light.
8. If you used the same tube and position inside the frame, open CHILI_DESIGNZ_BloodyMary_drop. Resize 30%. Copy and paste as new layer. Place it on glass right border.
9. Open CHILI_DESIGNZ_BloodyMary_gems. Resize 85%. Copy and paste as new layer. Move it down and left.
10. Open CHILI_DESIGNZ_BloodyMary_rose2. Resize 50%. Copy and paste as new layer. Move it to bottom. Place in on frame's left bottom corner.
11. Open CHILI_DESIGNZ_BloodyMary_skull, CHILI_DESIGNZ_BloodyMary_skull2 and CHILI_DESIGNZ_BloodyMary_skull3. Resize all 40%. Copy and paste each one as new layer. Pile all skuls on frame's right border.
12. Open your tube. Resize if needed. Copy and paste as new layer. Move it to the left. Now you can re-arrange all elements to better fit your tube. After add a shadow on all layers crop the extra space.
--> Add your copyright info and license#. Add your name and save as PNG.

