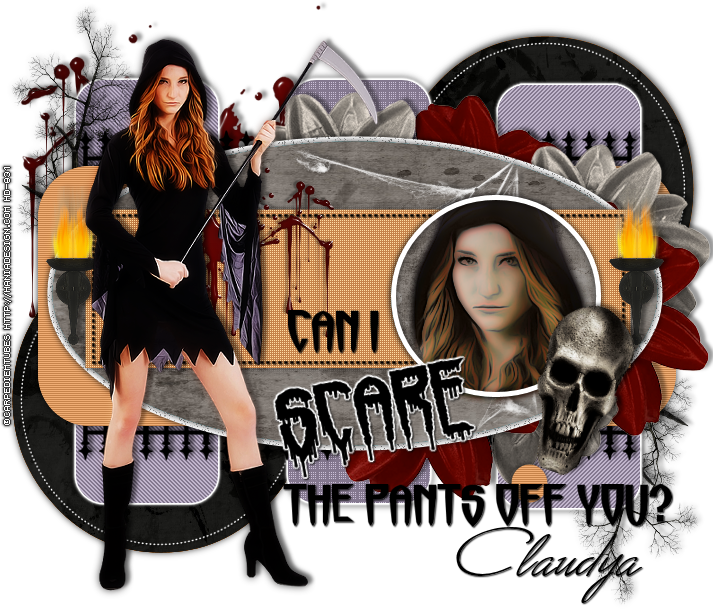
SCARING YOU TUTORIAL
Tutorial written by Marcia Salgado on September 2nd, 2015
for those who have a working knowledge of PSP.
Any resemblance to any other tutorial is coincidental.
Do not copy and paste this tutorial anywhere on the net.
If you want to translate please ask first.
****************************************
Material:
Tube: "Reaper" by Carpe Diem, you can purchase it here
do not use without the proper #license.
FTU Kit "Thriller" by A Taggers Scrap, you can get it here
Template: Dee's Template - 2013KandeeHalloweenCollabs_1, here
Plugin: Penta.com
Font: Monika
****************************************
--> Remember to save often and use my tag as reference if necessary. Use a Drop Shadow of your choice. Manual Color Correction Tut --> HERE
1 Open the template. Delete the first layer and turn bg layer invisible.
2. Click on left orange circle layer. Select it. Add a new layer. Open paper11. Copy and paste into selection. Delete orange circle layer.
3. Click on right orange circle layer and do the same.
4. Click on left green strip layer. Using Manual Color Correction Tool Change the green color to #84788f. Repeat the same on layers: right green strip and middle green strip. On middle green strip layer apply Penta.com > Dot and Cross. On left green layer strip apply Penta.com > Jeans. Click on right green strip layer and select it then apply Penta.com > Jeans. Mirror. Deselect.
5. Click on dotted circles layer and change the color to white.
6. Click on purple rectangle layer. Change the color to #c6834a. Repeat the same on layers: orange rectangle, top small orange circle and bottom small orange circle. On layers orange rectangle, top small orange circle and bottom small orange circle apply Penta.com > VTR2. On orange rectangle layer apply Penta.com > Color Dot.
7. Click on blue oval layer and select it. Add a new layer. Open paper13. Paste into selection. Do the same with blue circle layer.
8. Click on bg layer and open blood. Copy and paste as new layer. Move it up and left.
9. Click on left green strip layer. Open tree. Resize 60%. Copy and paste as new layer. Move it up and left. Duplicate. Mirror. Flip. Merge down.
10. Click on purple rectangle layer. Open flower2 and flower3. Copy and paste them as new layer. Place them around the left side of the oval layer as a border. Duplicate it as many times you need and alternate the colors too.
11. Click on blue oval layer. Open cobweb. Resize 50%. Change the color to white. Copy and paste as new layer. Move it a little to right.
12. Click on layer and select it. Open your tube (or tube close up if you have) and paste as new layer. Place the face inside the circle. Invert selection. Delete. Select all. Selections > Clip to canvas. Image > Crop to selection. Blend Mode > Luminance Legacy. Duplicate. Gaussian Blur > 4. Blend Mode > Darken.
13. Rearrange the words to a better place to fit your tube better.
14. Click on Can I layer. Open wallsconce. Resize 60%. Copy and paste as new layer. Move it to left and place it over the oval shape left side. Duplicate. Mirror. Merge down.
15. Open skull. Resize 60%. Free Rotate: Right-18. Copy and paste as new layer. Move it to right and place it over the oval shape on bottom.
16. Open your tube. Resize if needed. Copy and paste as new layer. Mirror and move it to left.
17. As a final touch I clicked on blood stain layer, duplicate it, mirror, and move it over the dotted rectangle layer below the tube.
--> Resize if needed. Add your copyright info and license#. Add your name and save as PNG.

