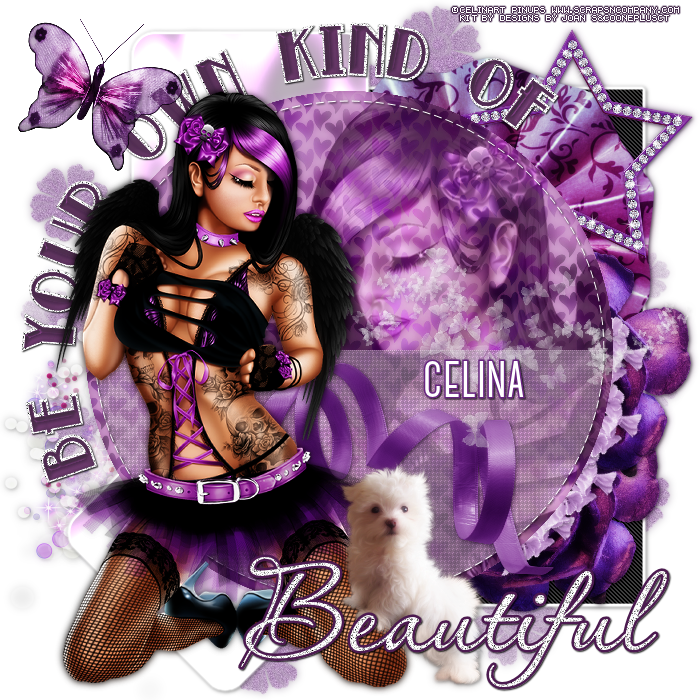
BEAUTIFUL TUTORIAL
Tutorial written by Marcia Salgado on April 30th, 2015
for those who have a working knowledge of PSP.
Any resemblance to any other tutorial is coincidental.
Do not copy and paste this tutorial anywhere on the net.
If you want to translate please ask first.
****************************************
Material:
do not use without the proper #license.
PTU Kit "Joline" by Designs By Joan,
you can purchase it here
Plugin: Penta.com - Super Blade Pro (optional)
Template: by me, mar2015_template09, here
Font: Canter Bold
****************************************
--> Remember to save often and use my tag as reference if necessary. Used the Drop Shadow: 1-1-50-5 in most layers.
1. Open my template. Duplicate. Close the original. Delete the © layer. Open M&M SCRAPKIT JOLINE ELEMS (60). Resize 70%. Copy and paste as new layer. Move ot to the top. Duplicate. Mirror. Flip. Merge down. Add Noise: Gaussian-25-Monochrome.
2. Open M&M SCRAPKIT JOLINE ELEMS (52). Copy and paste as new layer. Move it to bottom left. Click on rectangle layer. Apply Penta.com > Jeans > default. Add a white border of 4px.
3. Open M&M SCRAPKIT JOLINE ELEMS (39). Copy and paste as new layer. Move it top right. Open M&M SCRAPKIT JOLINE ELEMS (64). Resize 50%. Copy and paste as new layer. Move it down right. Duplicate. Move it up a little.
4. Open M&M SCRAPKIT JOLINE ELEMS (88). Resize 35%. Free Totate: Left-45. Copy and paste as new layer. Move it to bottom right. Duplicate three times (a total of four layers) and place them around the big circle over the purple rose.
5. Open M&M SCRAPKIT JOLINE ELEMS (30). Resize 50%. Copy and paste as new layer. Move it up right. Click on square bottom layer. Merge down. Click on square top layer change the white color to #efc4f3. Apply Filter Factory Gallery A > Pool Shadow > Default (settings bellow). Add a white border of 4px.
6. Click on circle layer and change the color #c0c0c0 to #ad6cab. Select it. Add a new layer. Open M&M SCRAPKIT JOLINE PAPERS (4). Copy and paste into selection. Blend Mode: Multiply. Duplicate. Gaussian Blur > 4. Blend Mode: Soft Light. Keep selected.
7. Open your tube close up. Copy and paste as new layer. Place as you like it. Invert selection. Delete. Blend Mode: Luminance )Legacy) Low the opacity to 50. Click on half circle and change the color #808080 to #ffdeff. Click on half circle hole dot layer and change the blend mode to Hard Light.
8. Click on circle dashed. Open M&M SCRAPKIT JOLINE ELEMS (59). Resize 50%. Copy and paste as new layer. Move it to bottom of the circle. Open M&M SCRAPKIT JOLINE ELEMS (62). Resize 40%. Copy and paste as new layer. Move it to middle right.
9. Click on be your... white layer and apply Noise: Gaussian-100-Monochrome. Click on be your... black layer and change the black color to #4c1a50 (used Super Blade Pro > M_coconutice on letters).
10. Open your tube. Resize it if needed. Copy and paste as new layer. Move it to left. Open M&M SCRAPKIT JOLINE ELEMS (32). Resize 40%. Mirror. Copy and paste as new layer. Place it on your tube's right side.
11. Open M&M SCRAPKIT JOLINE ELEMS (44). Resize 35% .Mirror. Copy and paste as new layer. Move it to upper left corner. Click on beautiful black layer and change the black color to #4c1a50. Click on beautiful white layer and apply Noise: Gaussian-100-Monochrome.
--> Resize it if wanted. Add your copyright info and license#. Add your name and save as PNG.


