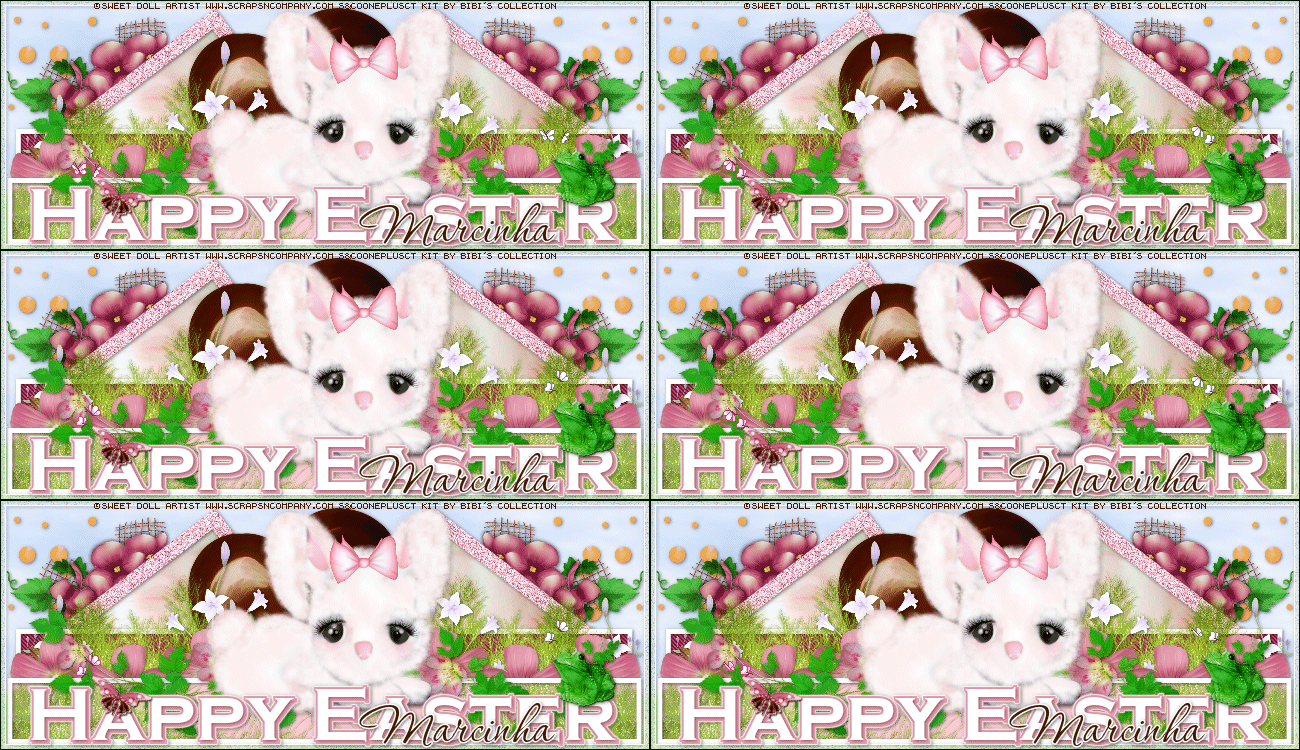
HAPPY EASTER TUTORIAL
Tutorial written by Marcia Salgado on March 10th, 2015
for those who have a working knowledge of PSP.
Any resemblance to any other tutorial is coincidental.
Do not copy and paste this tutorial anywhere on the net.
If you want to translate please ask first.
****************************************
Material:
Tube: "Easter Collab Bunny", by Sweet Doll Artist
you can purchase it at S&Co., here
do not use without the proper #license.
PTU Kit "Easter Bunny Collab" by Bibi's Collection Scraps,
you can purchase it at S&Co., here
Template: by me, mar2015_template05, here
Plugin: MuRa's Meister - Penta.com
Font: Corinthia
****************************************
--> Remember to save often and use my tag as reference if necessary. Used the Drop Shadow: 1-1-50-5 in most layers.
1. Open my template. Duplicate. Close the original. Delete © layer. Click on bg layer. Add #b6cef6 as your foreground color and white as your background color. Use MuRa's Meister > Clouds > Default.
2. Open BIBI-EASTERBUNNY COLLAB ELEMS (26). Resize 50%. Copy and paste as new layer. Move it far top left. Duplicate. Mirror. Merge down. Open BIBI-EASTERBUNNY COLLAB ELEMS (37). Resize 70%. Copy and paste as new layer. Move it far right. Duplicate. Mirror. Merge down. Open BIBI-EASTERBUNNY COLLAB ELEMS (29). Resize 50%. Copy and paste as new layer. Move it far left. Duplicate. Mirror. Merge down. Open BIBI-EASTERBUNNY COLLAB ELEMS (6). Resize 40%. Copy and paste as new layer. Move it far right. Duplicate. Mirror. Merge down.
3. Click on right bg square layer. Select it. Open BIBI-EASTERBUNNY COLLAB PAPERS (1). Copy and paste into selection. Deselect. Click on right frame layer. Change color to #ffc3d3. Apply Noise: Gaussian-60-Monochrome. Click on left bg square layer. Select it and paste the same paper used before. Deselect. Click on left frame, change color to #ffc3d3. Apply the same noise.
4. Open BIBI-EASTERBUNNY COLLAB ELEMS (8). Resize 50%. Copy and paste as new layer. Move it a little up and left. Click on center bg layer. Change color to #820d40. Apply Penta.com > Jeans > Default (62,4).
5. Open BIBI-EASTERBUNNY COLLAB ELEMS (39). Resize 50%. Copy and paste as new layer. Move it down and far right. Duplicate. Mirror. Duplicate again, move it back to right a little down. Duplicate and mirror. Merge down three times, keep only one bush layer. Duplicate. Rename to GRASS and let this layer invisible for now.
6. Open BIBI-EASTERBUNNY COLLAB ELEMS (34). Resize 30%. Copy and paste as new layer. Copy and paste as new layer. Move it far left. Duplicate and move it to far right. Merge down. Open BIBI-EASTERBUNNY COLLAB ELEMS (15). Resize 50% Copy and paste as new layer. Move it way down. Open BIBI-EASTERBUNNY COLLAB ELEMS (49). Resize 30%. Copy and paste as new layer. Move it far down left. Show only half of the flower. Duplicate. Move it a little to right a little more down. Duplicate. Move a little more to right and a little up. Merge down twice, keep only one pink flower layer. Duplicate. Mirror. Merge down.
7. Click on bottom bg layer and change the color to #f9ccd4. Move GRASS layer above bottom bg layer. Turn it visible now. Click on bottom frame and select inside. Expand > 3. Invert selection. Click on GRASS layer and delete.
8. Open BIBI-EASTERBUNNY COLLAB ELEMS (31). Image > Rotate > Rotate Clockwise 90. Resize 50%. Copy and paste as new layer. Move it down. Click on border with transp layer and add the same noise used before. Open your tube. Resize if needed. Copy and paste as new layer and move it a little down but keep it in center.
9. Click on black wordart layer and change the color to #f0a2b3. Add a white border of 1px. Open BIBI-EASTERBUNNY COLLAB ELEMS (60). Resize 10%. Free Rotate: Right-20. Copy and paste as new layer. Place it over letter A. Open BIBI-EASTERBUNNY COLLAB ELEMS (47). Resize 40%. Mirror. Copy and paste as new layer. Place it over letter R.
--> Add your copyright info and license#. Add your name and save as PNG.
--> To make it animated as mine, merge visible, copy and take it to Animation Shop. Open the animation you want to use and see how many frames it has. Duplicate the frames on yout tag until you have the same number of chosen animation. Select al frames. Select all frames of animation and copy. Paste into selected frames on your tag, chose a place and click to add it and save as GIF.

