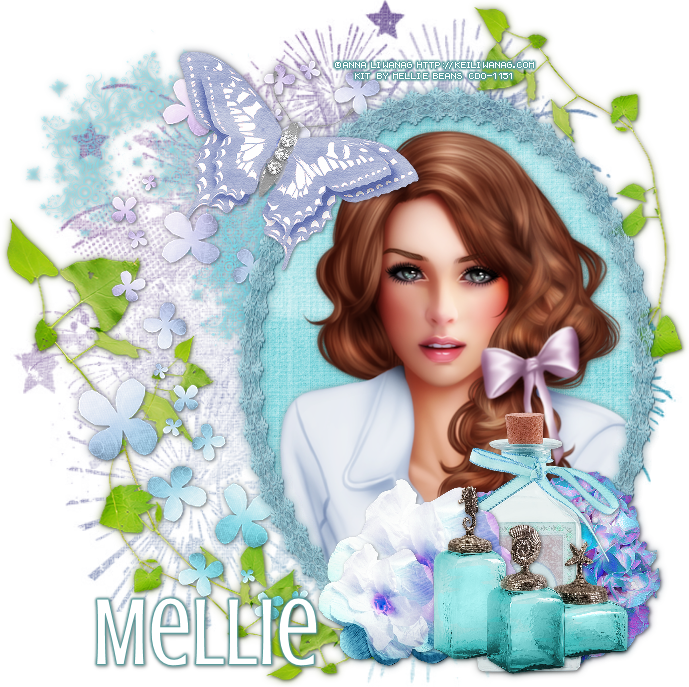
SUMMER'S LAST SONG TUTORIAL
Tutorial written by Marcia Salgado on March 27th, 2015
for those who have a working knowledge of PSP.
Any resemblance to any other tutorial is coincidental.
Do not copy and paste this tutorial anywhere on the net.
If you want to translate please ask first.
****************************************
Material:
Tube: Anna Liwanag, you can purchase it at CDO, here
do not use without the proper #license.
PTU Kit "Summer's Last Song" by Mellie Beans,
you can purchase it at Mystical Scraps, here
or at Heartbeatz Creationz, here
Font: Crushed
****************************************
--> Remember to save often and use my tag as reference if necessary. Used the Drop Shadow: 1-1-50-5 in most layers.
1. Open element e02. Resize 50%. Copy and paste as new image. Canvas size 1200x82 - Center. Duplicate twice. First copy. Offset: H=-400 V=0. Second copy. Offset: H=400 V=0. Merge all visible. Canvas size 1200x1200 - Center. Distortion Effects > Polar Coordinates: Rectangle to Polar - Transparent. Resize the frame 85%. With Deform Tool (or Pick) give an oval shape to the round frame. Reserve.
2. Create a new image 700x700. Select All. Open paper pp02. Mirror. Flip. Copy. Paste into selection. Apply Dee's mask. Copy the reserved frame. Paste as new layer. Move it far bottom right. Open element e34. Resize 70%. Copy and paste as new layer. Move it upper left. Open element e25. Resize 98%. Copy and paste as new layer. Open element e38. Resize 80%. Copy and paste as new layer. Move it far left.
3. Click on frame layer. Select inside frame. Add new layer. Open paper pp10. Copy. Paste into selection. Move this layer below the frame layer. Keep selected. Copy the close up of your tube and paste as new layer. Invert selection. Delete. Deselect.
4. Click on frame layer. Duplicate twice. On first copy use: Blur > Gaussian Blur: 4 and change Blend Mode to Multiply. On second copy use the same Blur but change the Blend Mode to Soft Light. Click on original frame layer. Add a Drop Shadow: 1-1-85-2-#163548.
5. Click on first layer. Open element e03. Resize 40%. Mirror. Copy and paste as new layer. Move it fat bottom right, in front of the frame. Open element e12. Resize 40%. Place it in front of the flower. Open element e01. Resize 30%. Copy and paste as new layer. Move it bottom middle. Duplicate. Resize 67%. Move it a little to left.
6. Open element e11. Resize 30%. Copy and paste as new layer. Move it to bottom, in front of previous elements. Open element e28. Resize 40%. Move it up and place it on top left side of the frame.
--> Resize is needed. Add your copyright and license#. Add your name and save as PNG.

