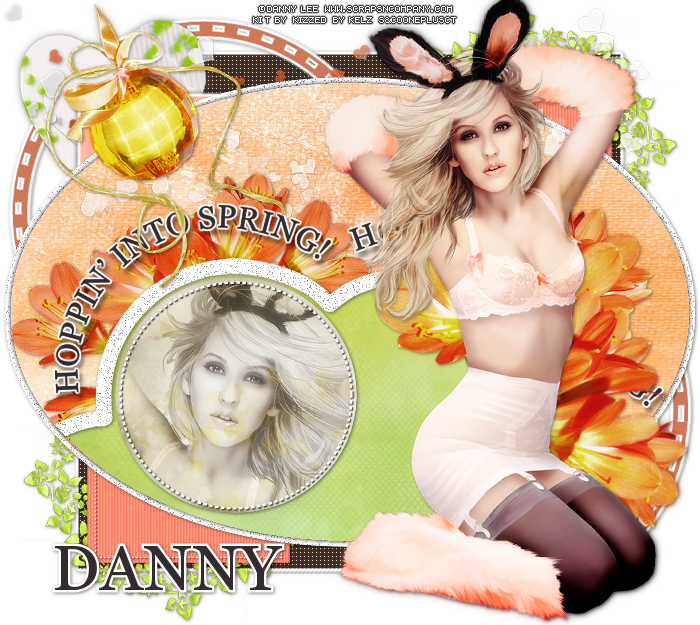
ORANGE RABBIT TUTORIAL
Tutorial written by Marcia Salgado on March 29th, 2015
for those who have a working knowledge of PSP.
Any resemblance to any other tutorial is coincidental.
Do not copy and paste this tutorial anywhere on the net.
If you want to translate please ask first.
****************************************
Material:
Tube: Danny Lee, you can purchase it at S&Co., here
do not use without the proper #license.
PTU Kit "Orange Rabbit" by Kizzed By Kelz,
you can purchase it at S&Co., here
Font: Georgia
****************************************
--> Remember to save often and use my tag as reference if necessary. Used the Drop Shadow: 1-1-50-5 in most layers.
1. Open Dee's Template. Duplicate and close the original. Delete info and Raster 1 layers. Click on top dark green rectangle layer. Merge down. Click on bottom dark green rectangle layer and change the color to #342b2e. Apply Texture Effects > Weave > 1-3-10-Color:#f3d1a9 in both color squares and Fil gaps marked. Add a white border of 2px.
2. Open KBK_OrangeRabbit (22). Resize 51%. Move it bottom left corner. Duplicate. Mirror. Flip. Merge down. Click on bottom ring layer. Merge down. Click on top ring and change the color to #cf7859. Add a white border of 2px.
3. Open KBK_OrangeRabbit (100). Resize 80%. Copy and paste as new layer. Move it to upper left corner. Open KBK_OrangeRabbit (88). Copy and paste as new layer. Move it far up.
4. Click on top creme square layer. Merge down. Click on bottom creme square layer and change the color to #feb89e. Add a white border of 2px.
5. Click on top plum square layer. Change the color to #ff7c5f. Apply Texture Effects > Blinds > 3-25-Color:White-Light from left/top marked. Click on bottom plum square layer and do the same.
6. Click on pink oval layer. Select the shape. Open paper KBK_OrangeRabbit (2). Copy and paste into selection. Open KBK_OrangeRabbit (89). Copy and paste as new layer. Move it to upper part of oval shape. With Free Hand Selection Tool > Point to Point select the lower part of the oval shape as showed on image below.
7. Open KBK_OrangeRabbit (18). Resize 51%. Copy and paste as new layer. Move it to left and place it around the left curve. Duplicate. Mirror. Arrange it a liitle to right still around the left curve.
8. Open paper KBK_OrangeRabbit (8). Copy and paste as new layer and move the paper over untill you're satisfied with the green showing on selected part. Invert selection. Delete. Select all. Selections > Clip to canvas. Image > Crop to selection. Clean all green paper outside of oval shape.
9. Click on light green circle. Select it. Open paper KBK_OrangeRabbit (16). Select all. Contract > 15. Crop to selection. Copy. Paste into selection. Keep selected. Copy your tube and position a part over the circle. Invert selection. Delete. Change Blend Mode to Luminance (Legacy). Low opacity to 60.
10. Click on font plum layer. Change the color to #342b2e.
--> You can use Manual Color Correction to do it as I tech HERE
11. Open your tube, resize if needed. Copy and paste as new layer and move it to right. Add a suitable shadow. Open KBK_OrangeRabbit (8). Resize 51%. Copy and paste as new layer. Arrange this layer below your tube layer and place the flower around your tube. Duplicate. Free Rotate: Right-60. Place this flower around the tube again. Merge down. Erase any green steam that shows.
12. Open KBK_OrangeRabbit (104). Resize 50%. Copy and paste as new layer. Move it to upper left corner.
--> Add your copyright info and proper license#. Add your name and save as PNG.


