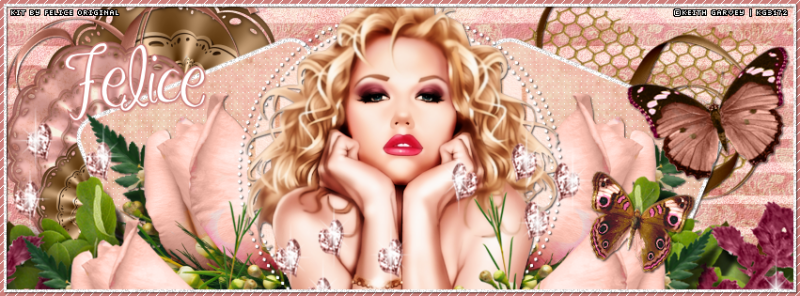
Tutorial written by Joanne Salgado on February 18th, 2015
Any resemblance to any other tutorial is coincidental.
Do not copy and paste this tutorial anywhere on the net.
If you want to translate please ask first.
Tube: Keith Garvey - you can purchase here
Kit Damask Rose by Felice Original - you can purchase here
Template by Allison here
Font: MA Sexy
Plugins:
AP[Lines] - SilverLining
Don't forget to save often.
1. Open template. Duplicate. Close original. Delete layers 10, 9, 8 and 1.
2. Open paper 'FO_damask'. Copy and paste as new image. Move the layer above the 'background layer'. Resize 70%. Rename BG. Delete background layer.
3. Select the stripes layer. Adjust/Color Balance/Manual Color Correction - Source #ff4040 and target #cc7e7a. Adjust/Add-Remove Noise/Add Noise (uniform/50/monochrome checked). Change blend mode to screen.
4. Open element 'FO_flower-thingy-brown' copy and paste as new layer. Resize 20%. Arrange it to the upper left (if you have any doubts please check my tag)
5. Open element 'FO_ribboncurl-pink' copy and paste as new layer. Resize 50%. Image/Mirror. Image/Flip. Arrange it to the upper left. Add shadow 1-1-65-2 black.
6. Open element 'FO_flower-thingy' copy and paste as new layer. Resize 10%. Arrange to the left showing the upper part of brown flower.
7. Open element 'FO_flower-thingy-brown' again. copy and paste as new layer. Resize 10%. Arrange to the left a little bellow the pink flower.
8. Open element 'FO_wire-heart' copy and paste as new layer. Resize 20%. Image/Rotate/Free Rotate (right/15). Arrange it to the right.
9. Open element 'FO_ribboncurl-brown' copy and paste as new layer. Resize 50%. Image/Mirror. Arrange it to the right.
10. Select the layer "copy of raster 7" Adjust/Color Balance/Manual Color Correction - Source #808080 and target #ffffff. Adjust/Add-Remove Noise/Add Noise (uniform/50/monochrome checked). Add shadow 1-1-65-2 black.
11. Open paper 'FO_vintage-grunge'. With the flood fill change it to pattern. Select the paper - angle 0 scale 50. Colorize layer "raster 3". Effects/Texture Effects/Weave (1/5/1/white/white/fill gaps checked).
12. Select the layer "raster 7" and repeat step 10.
13. Select the layer "copy of raster 3" and repeat step 11.
14. Open element 'FO_rose-bouqet' copy and paste as new layer. Resize 30%. Arrange it to the left above the shape. Image/Mirror. Add shadow 1-1-65-2 black on both layers.
15. Open paper 'FO_stripe' With the flood fill change it to pattern. Select the paper - angle 0 scale 50. Colorize layer "raster 2". Duplicate. On duplicated layer change the blend mode to screen.
16. Open element 'FO_butterfly2' copy and paste as new layer. Resize 25%. Image/Rotate/Free Rotate (left-15). Arrange it to the right at the corner of the shape. Add shadow 1-1-65-2 black.
17. Select layer "raster 5". Adjust/Color Balance/Manual Color Correction - Source #c00000 and target #ffffff. Add same shadow as before.
18. Select layer "raster 6". Adjust/Color Balance/Manual Color Correction - Source #c00000 and target #ffffff. Add same shadow as before.
19. Open your tube. I used Keith Garvey. Arrange it in the middle of the template as you prefer. Add same shadow as before.
20. Open element 'FO_cluster' copy and paste as new layer. Arrange it down so it only shows the upper part of it. (see my tag).
21. Open element 'FO_butterfly' copy and paste as new layer. Resize 15%. Image/Rotate/Free Rotate (right-20).
22. Select "border" layer. Adjust/Color Balance/Manual Color Correction - Source #c00000 and target #cc7e7a. Effects/Plugins/AP [Lines]/Lines - SilverLining (breaks/change the three color to 255).
23. With the magic wand tool select inside the border. Add a new layer. Flood fill with white. Selections/Modify/Contract-2 hit delete on your keyboard. Selections/Select None. Adjust/Add-Remove Noise/Add Noise (uniform/50/monochrome checked). Add same border as before.
Add your copyright.
Add your name - I used 'MA Sexy' 48 with border #cc7e7a and shadow 1-1-65-2 #cc7e7a.
Save.

