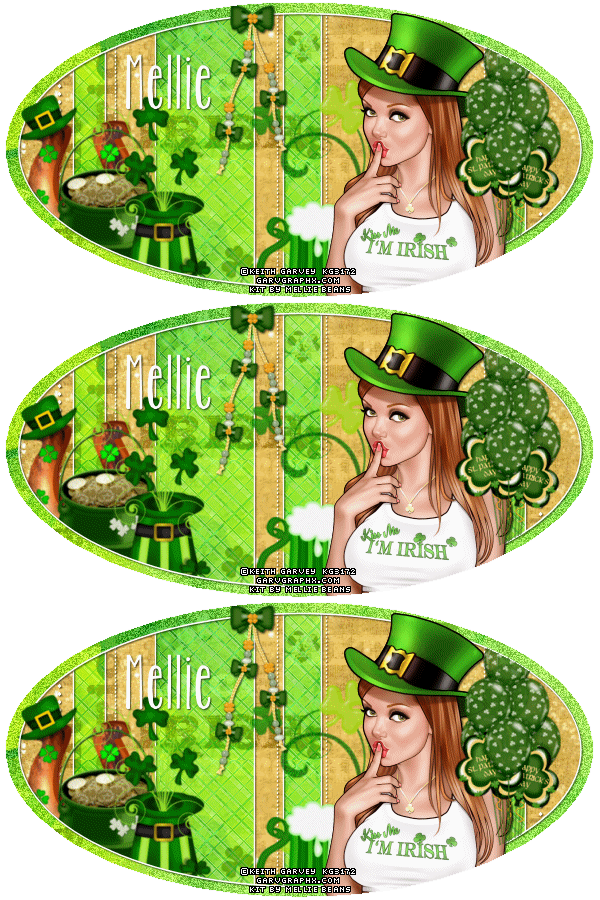
Tutorial written by Joanne Salgado on February 18th, 2015
Any resemblance to any other tutorial is coincidental.
Do not copy and paste this tutorial anywhere on the net.
If you want to translate please ask first.
Tube: Keith Garvey - you can purchase here
Kit Erin Go Braugh by Mellie Beans - you can purchase here
Material by me here
Font: KG Two is Better Than One
Don't forget to save often.
1. Open the template. Duplicate. Close the original. Delete the INFO layer.
2. Open paper 6, copy and paste as new layer. Layers/Arrange/Send to Bottom.
3. Open paper 2, copy and paste as new layer. Rename this layer as LINESBG Duplicate (hide this one for now). Select the LINES layer. With magic wand select inside the four spaces between the deco (see my tag). Selections/Modify/Expand 1. Selections/Invert. Select the layer with the paper 2 again. Duplicate. Hit delete on your keyboard. Selections/Select None.
4. Open the duplicated layer. Rename it "border". Select the INSIDE FRAME layer. With magic wand select inside of the frame. Selections/Modify/Expand 1. Select the BORDER layer and hit delete on your keyboard. We will clean the rest later.
5. Open paper 7, copy and paste as new layer. Move this layer bellow the BORDER layer. Select the LINESBG layer. Selections/Select all. Selections/Float. Selections/Defloat. Selections/Invert. Select the layer we just added. Hit delete your on keyboard. Selections/Select None. Change the blend mode to Soft Light and the opacity to 70. Effects/Edge Effects/Enhance.
6. Open "clover scatter" element. Copy and paste as new layer. Resize with 55%. Arrange it to the left. Duplicate. Image/Mirror. Layers/Merge/Merge Down. Change the blend mode to Luminance (L) and opacity to 50. Move this layer above the BORDER layer.
7. Open "wordart 2" element. Copy and paste as new layer. Change the blend mode to Luminance (L).
8. Open "horseshoe" element. Copy and paste as new layer. Resize with 25%. Arrange it to the left of the frame. (see my tag). Move this layer above the DECO layer.
9. Open "pot o gold" element. Copy and paste as new layer. Resize with 35%. Arrange it to the left. It will be a little above the horseshoe element. (see my tag).
10. Open "lucky cluster 2" element. Copy and paste as new layer. Resize with 35%. Arrange it to the left. It will be a little above the pot o gold element. (see my tag).
11. Open your yube. Copy and paste as new layer. Resize as you like. Arrange it to the right. Move this layer above the INSIDE FRAME layer. Rename this layer TUBE.
12. Open the "lucky cluster 3" element. Copy and paste as new layer. Resize with 40%. Move this layer below the INSIDE FRAME layer and arrange it behind the tube so just a little part shows. (see my tag). Change opacity to 74.
13. Open "green beer" element. Copy and paste as new layer. Resize with 20%. Image/Mirror. Arrange it behind the tube, but with a good part showing. (see my tag).
14. Open "beads" element. Copy and paste as new layer. Resize with 25%. Arrange to the top of the frame as its hanging from the frame. (see my tag). Move this layer above the TUBE layer.
15. Open "balloons" element. Copy and paste as new layer. Resize with 40%. Arrange it to the far right. It will be a little over your tube.
16. Now is time to start cleaning. Select the FRAME layer. With the magic wand select inside. Selections/Invert. Select the bottom layers (should be your papers) and hit delete on your keyboard. Select your TUBE layer and hit delete. Selections/Select None.
17. Now select INSIDE FRAME layer. With magic wand select inside. Selections/Modify/Expand 1. Selections/Invert. Now you'll select your other layers and hit delete on your keyboard. Just don't clean the layer with horseshoe element and with beads element. Keep selected.
18. Select your horseshoe element layer and with the eraser tool clean just the bottom part of it. Selections/Select None. Select the INSIDE FRAME layer and clean with the eraser tool just above the hat.
19. I changed the frames,lines and deco to white. Just select each layer and Adjust/Color Balance/Manual Color Correction. Change the source to black and the target to white. You can keep it black if you prefer.
You can add shadow now. I used 1-1-65-2 black.
Add the copyright and your name.
Save it.
For animation.
1. Select the BORDER layer. Duplicate two times (you should have a total of three). Select the second duplicate and Ajust/Add-remove noise/Add Noise uniform/40/monochrome checked. Hide the layer. Select the first duplicate and repeat noise. Hide layer. Select the original layer and repeat noise.
2. Edit/Copy Merged. Go to animation shop and paste it as new animation. Back to PSP hide the border layer and open the first duplicate. Edit/Copy Merged. Go to animation and paste after current. Back to PSP hide the duplicate and open the second duplicate. Edit/Copy Merged. Go to animation and paste after current.
Save as gif.

