Showing posts with label Ishika Chowdhury. Show all posts

September 16, 2016

Zoe ~ by Joanne Salgado


Tutorial written by Joanne Salgado on September 16th, 2016
for those who have a working knowledge of PSP.
I'm using PSP9 to create my tuts.
Any resemblance to any other tutorial is coincidental.
Do not copy and paste this tutorial anywhere on the net.
If you want to translate please ask first. 

****************************************
Material:

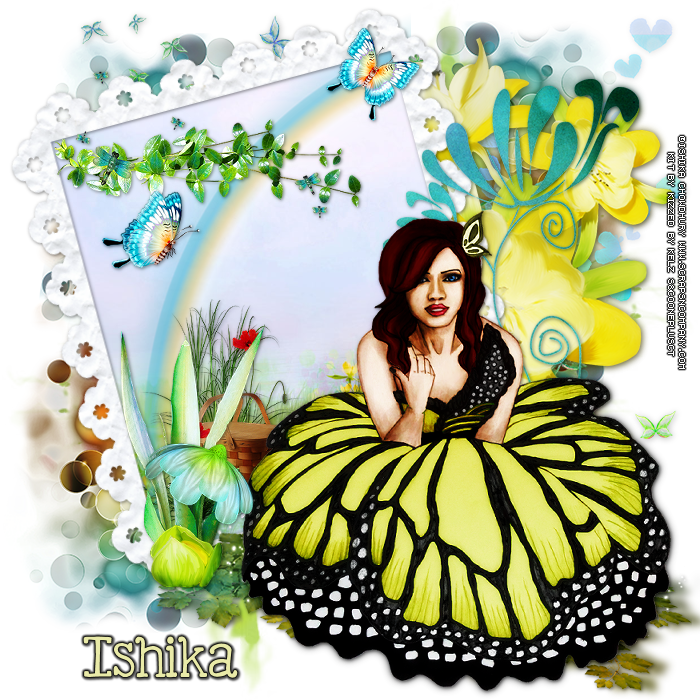
Tube: "Zoe" by Ishika Chowdhury - you can purchase it here
do not use without the proper #license.
PTU Kit "Zoe's Summer" by Blissful Designs - you can purchase it here
Font: Dorayaki

****************************************

Don't forget to save often.
At any point if you have doubts check my tag.

1. Open a new image 851x315

2. Open paper 'BD_ZoesSummerPaper (4)' copy and paste as new layer. Stretch it so it fits the canvas.

3. Open element 'BD_ZoesSummerElement (48)' copy and paste as new layer. Resize 20%. Arrange it to the bottom right.

4. Open element 'BD_ZoesSummerElement (2)' copy and paste as new layer. Resize 15%. Arrange it to the left.

5. Open element 'BD_ZoesSummerElement (78)' copy and paste as new layer. Resize 80%. Arrange it to the right.

6. Open element 'BD_ZoesSummerElement (38)' copy and paste as new layer. Resize 70%. Arrange it to the left.

7. Open element 'BD_ZoesSummerElement (77)' copy and paste as new layer. Resize 30%. Arrange it to the right.

8. Open element 'BD_ZoesSummerElement (73)' copy and paste as new layer. Resize 30%. Arrange it to the left.

9. Open element 'BD_ZoesSummerElement (55)' copy and paste as new layer. Resize 40%. Arrange it to the left.

10. Open element 'BD_ZoesSummerElement (79)' copy and paste as new layer. Resize 80%. Arrange it to the left.

11. Open element 'BD_ZoesSummerElement (83)' copy and paste as new layer. Resize 30%. Arrange it to the right.

12. Open element 'BD_ZoesSummerElement (53)' copy and paste as new layer. Resize 30%. Arrange it to the left.

13. Open element 'BD_ZoesSummerElement (59)' copy and paste as new layer. Resize 20%. Arrange it to the left.

14. Open element 'BD_ZoesSummerElement (34)' copy and paste as new layer. Resize 30%. Arrange it to the left.

15. Open element 'BD_ZoesSummerElement (60)' copy and paste as new layer. Resize 15%. Arrange it to the right

16. Open element 'BD_ZoesSummerElement (44)' copy and paste as new layer.

17. Open element 'BD_ZoesSummerElement (50)' copy and paste as new layer.

18. Open your tube. Copy and paste as new layer. Resize as needed.

19. Add new layer. Fill with white. Select all. Add noise. Contract 3. Fill with #32936a contract 2. Hit delete on your keyboard. Select none.

20. Add shadow as you prefer.

21. Add copyright. Add name. Save as PNG.

March 11, 2016

Coco Sugar Kiss

CUTE BUNNY TUTORIAL


Tutorial written by Marcia Salgado on March 11th, 2016
for those who have a working knowledge of PSP.
I'm using PSP9 to create my tuts.
Any resemblance to any other tutorial is coincidental.
Do not copy and paste this tutorial anywhere on the net.
If you want to translate please ask first. 

****************************************
Material:

Tube: "Coco Sugar Kiss" by Ishika Chowdhury, you can purchase it here 
do not use without the proper #license.
PTU Kit "Coco Sugar Kiss" by Blissful Designs, you can purchase it here 
Plugin: Eye Candy 6: Text & Selection
Font: Fabulous

****************************************

--> Remember to save often and use my tag as reference if necessary. Use a Drop Shadow of your preference on layers. 

1. Open BD_CocosugarkissElement (78). Resize 75%. Free Rotate: Left-20. Copy and paste as new layer. Move it to left.

2. Select inside the frame. Expand > 10. Add a new layer and move it below the frame layer. Open BD_CocosugarkissPaper (4). Copy and paste into selection. Deselect.

3. Click on Raster 1 layer (the bottom layer). Open BD_CocosugarkissElement (83). Resize 85%. Copy and paste as new layer. Move it down and to right.

4. Open BD_CocosugarkissElement (6). Copy and paste as new layer. Move it up and to right.

5. Open BD_CocosugarkissElement (54). Resize 55%. Mirror. Copy and paste as new layer. Move it to right.

6. Open BD_CocosugarkissElement (49). Resize 60%. Copy and paste as new layer.

7. Open BD_CocosugarkissElement (56). Resize 45%. Copy and paste as new layer. Move it a little up.

8. Open BD_CocosugarkissElement (1). Resize 50%. Mirror. Copy and paste as new layer. Move it down and to left.

9. Open BD_CocosugarkissElement (51). Resize 40%. Copy and paste as new layer. Move it down and to left, place it behind the left bottom corner border of the frame.

10. Click on frames layer. Apply Eye Candy 6: Text & Selection > Gradient Glow with the following settings:


11. Open BD_CocosugarkissElement (24). Resize 50. Copy and paste as new layer. Move it up and a little to left. Place it over the frame on top.

12. Open BD_CocosugarkissElement (33). Resize 70%. Copy and paste as new layer. Move it way down and way to left.

13. Open BD_CocosugarkissElement (12). Resize 50%. Copy and paste as new layer. Move it down.

14. Open BD_CocosugarkissElement (44). Resize 35%. Copy and paste as new layer. Place it over the top right corner of the frame.

15. Open your tube. Resize if needed. Copy and paste as new layer. Move it down and to left.

16. Open BD_CocosugarkissElement (68). Resize 30%. Place it in front of Coco's tube knees.


--> Add your copyright info and license#. Add your name and save as PNG.


February 21, 2016

Cupido Ruby with Cupido kit

LOVE QUEEN TUTORIAL


Tutorial written by Marcia Salgado on February 21th, 2016
for those who have a working knowledge of PSP.
I'm using PSP9 to create my tuts.
Any resemblance to any other tutorial is coincidental.
Do not copy and paste this tutorial anywhere on the net.
If you want to translate please ask first. 

****************************************
Material:

Tube: "Cupido Ruby" by Ishika Chowdhury
You can add this tube to your cart to get it as a free gift 
or you can purchase it here 
do not use without the proper #license.
PTU Kit "Cupido" by MarieL Design, this kit belongs to the gorgeous
and romantic Cupid Collab wich has awesome products inside, tubes,
alphas and more kits among them and as the tube you can add this
product to your cart to get it as a free gift or you can purchase it here 
Font: SaboresScript-Bold

****************************************

--> Remember to save often and use my tag as reference if necessary. Use a Drop Shadow of your preference on layers. 

1. Create a new image 700x550.

2. Open FRAME 3. Resize 75%. Copy and paste as new layer. Duplicate. Turn bigger frame invisible now, we'll work on copy now. Resize 85%. Select inside the frame. Expand > 3. Add a new layer and move it below the frame. Open PAPER 5. Select all. Contract > 30. Copy. Paste into selection. Deselect. Add a drop shadow on the frame layer. Merge visible. Move it to left and a little up. Duplcate. Mirror. Merge down. Move this layer to bottom. 

3. Open 'element' 48. Resize 60%. Copy and paste sa new layer. Move it down and way to left. Duplicate. Mirror. Merge down. Move this layer to bottom. 

4. Click on double frame layer. Open 'element' 55. Resize 65%. Copy and paste as new layer. Move it to left and up. Duplicate. Mirror. Merge down.

5. Open 'element' 37. Resize 70%. Copy and paste as new layer. Move to left.

6. Open 'element' 38. Resize 40%. Free Rotate: Right-15. Copy and paste as new layer. Move it to right and up.

7. Turn the bigger frame layer visible again and select inside the frame. Add a new layer. Expand > 3. Move this layer below the frame layer. Open PAPER 4. Copy and paste into selection. Invert selection. Open your tube. Resize if needed. Copy and paste as new layer. Place it inside the frame. Duplicate and turn the copy invisible. Click on tube original layer and delete. Deselect. Turn the copy visible and move it above the frame layer. Select the top of the head, see below, invert the selection and delete. Deselect.


8. Open 'element' 44. Resize 45%. Copy and paste as new layer. Place it on the tube's head.

9. Open 'element' 27. Resize 40%. Mirror. Copy and paste as new layer. Place it over the big frame right bottom corner. 

10. Open 'element' 26. Resize 40%. Mirror. Copy and paste as new layer. Place it over the big frame right bottom corner over the previous leaves. Merge down. Erase the bottom part of the stem.

11. Open 'element' 14. Resize 25%. Free Rotate: Right-15. Copy and paste as new layer. Place it over the big frame bottom right border, over the previous flower stem.


--> Add your copyright info and license#. Add your name and save as PNG.


January 16, 2016

Avril ~ by Joanne Salgado


Tutorial written by Joanne Salgado on January 16th, 2016
for those who have a working knowledge of PSP.
Any resemblance to any other tutorial is coincidental.
Do not copy and paste this tutorial anywhere on the net.
If you want to translate please ask first. 

Tube: Avril by Ishika Chowdhury - you can purchase here
Kit Waiting by Bibi's Collection - you can purchase here
Font: Segoe Script

Don't forget to save often.
At any point if you have doubts check my tag.

1. Open a new image 700x600

2. Open element 'BIBI-WAITING ELEM (51)' copy and paste as new layer. Resize 60%. Use raster deform tool, hold shift and the top of the element adjust it to the middle both sides. It will look like its a floor. Arrange it to the bottom.

3. Open element 'BIBI-WAITING ELEM (61)' copy and paste as new layer. Resize 60%. Arrange to bottom.

4. Open element 'BIBI-WAITING ELEM (47)' copy and paste as new layer. Arrange it to the left. Clean the lower and right parts.

5. Open element 'BIBI-WAITING ELEM (20)' copy and paste as new layer. Resize 80%. Mirror. Move the layer below the frame layer. Arrange it to the top left. Duplicate. Mirror. Arrange it a little to the left.

6. Open element 'BIBI-WAITING ELEM (34)' copy and paste as new layer. Arrange it to the top left.

7. Open element 'BIBI-WAITING ELEM (57)' copy and paste as new layer. Resize 60%. Arrange it to the right in front of the leafs.

8. Open paper 'BIBI-WAITING PAPERS (6)' copy and paste as new layer. Resize 60%. Arrange it inside the frame. Clean the parts that appears outside it.

9. Open element 'BIBI-WAITING ELEM (12)' copy and paste as new layer. Resize 50%. Move this layer above the frame layer. Arrange it to the right. Duplicate. Mirror. Arrange it a little to the bottom and to the right.

10. Open element 'BIBI-WAITING ELEM (42)' copy and paste as new layer. Resize 60%. Arrange it to the right.

11. Open element 'BIBI-WAITING ELEM (36)' copy and paste as new layer. Arrange it a little to the top.

12. Open element 'BIBI-WAITING ELEM (8)' copy and paste as new layer. Resize 60%. Arrange it to the bottom.

13. Open element 'BIBI-WAITING ELEM (43)' copy and paste as new layer. Resize 25%. Arrange it to the bottom right.

14. Open element 'BIBI-WAITING ELEM (82)' copy and paste as new layer. Resize 20%. Arrange it to the bottom left.

15. Open element 'BIBI-WAITING ELEM (72)' copy and paste as new layer. Arrange it to the top left of the frame.

16. Open element 'BIBI-WAITING ELEM (88)' copy and paste as new layer. Mirror. Arrange it to the left.

17. Open your tube. Copy and paste as new layer. Resize as you prefer and arrange it to the bottom.

18. Open element 'BIBI-WAITING ELEM (58)' copy and paste as new layer. Resize 55%.

19. Add shadow as you prefer.

20. Add copyright, name and save as PNG.

January 13, 2016

Quinn

FLIRTATION TUTORIAL


Tutorial written by Marcia Salgado on January 12th, 2016
for those who have a working knowledge of PSP.
I'm using PSP9 to create my tuts.
Any resemblance to any other tutorial is coincidental.
Do not copy and paste this tutorial anywhere on the net.
If you want to translate please ask first. 

****************************************
Material:

Tube: "Quinn" by Ishika Chowdhury, you can purchase it here
do not use without the proper #license.
PTU Kit "Quinn" by Kizzed By Kelz, you can purchase it here
Template: by me, here
Font: Anna Nicole NF

****************************************

--> Remember to save often and use my tag as reference if necessary. Use a Drop Shadow of your preference on layers. 

1. Open my template. Duplicate and close the original.

2. Delete the © layer.

3. Click on back layer. Open KBK_Quinn (104). Copy and paste as new layer. Move it way up and to left. Duplicate. Mirror. Flip. Merge down.

4. Open KBK_Quinn (70). Copy and paste as new layer. Move it a little up and to left. SShowing only a thin part of the element. Duplicate. Mirror. Flip. Merge down.

5. Click on circle layer. Select it. Open paper KBK_Quinn (11). Copy and paste as new layer. Deselect.

6. Click on rectangle layer. Select it. Modify > Smooth > Default. Open paper KBK_Quinn (13). Copy and paste into selection. Deselect.

7. Open KBK_Quinn (63). Resize 55%. Copy and paste as new layer. Move it up. Duplicate and move it down.

8. open KBK_Quinn (132). Resize 55%. Free Rotate: Left-90. Move it a little up and a little to left. Duplicate. Free Rotate: Left-90. Move it down.

9. Open KBK_Quinn (144). Copy and paste as new layer. Move it to left.

10. Open KBK_Quinn (39). Copy and paste as new layer. Move it a little to left.

11. Open KBK_Quinn (146). Copy and paste as new layer. Move it down and to left.

12. Click on octogone layer. Select it. Open paper KBK_Quinn (20). Copy and paste into selection. Keep selected.

13. Open your tube closeup. Resize if needed. Copy and paste as new layer. Position it as you wanted. Invert selection. Delete. Select all. Clip to canvas. Crop to selection.

14. Click on octogone frame layer. Open KBK_Quinn (144). Resize 55%. Copy and paste as new layer. Move it a little up. Place it over the red frame on left side. duplicate. Move it a little down and a little more to left. Merge down.

15. Ope your tube. Resize if needed. Used mirror on mine. Copy and paste as new layer. Move it to left. Now you may want to rearrange the elements to better fit your tube.

--> Add your copyright and license#. Add your name and save as PNG.


December 29, 2015

Gilded Holiday kit with Eve


== NEW PTU TAG TINY TURTLE DESIGNS CT ==
AND THE ART OF ISHIKA CHOWDHURY

Featuring "Eve", a Ishika Chowdhury tube and
 "Gilded Holiday", Tiny Turtle Design kit at TinyTurtleDesign Store.

Tiny Turtle Design kit has 28 papers and 144 elements so you can play with it. 

Ishika Chowdhury's tube can be found  at:
-> TinyTurtleDesign Store, here 

Tiny Turtle Design kit can be found  at:
-> TinyTurtleDesign Store, here 


August 8, 2015

Gothic Dina ~ by Joanne Salgado


Tutorial written by Joanne Salgado on August 08th, 2015
for those who have a working knowledge of PSP.
Any resemblance to any other tutorial is coincidental.
Do not copy and paste this tutorial anywhere on the net.
If you want to translate please ask first. 

Tube: Gothic Dina by Ishika Chowdhury - you can purchase here
Kit Gothic Dina by Whisper In The Wind - you can purchase here
Font: Mirielle

Don't forget to save often.
At any point if you have doubts check my tag.

1. Open a new image 650x550

2. Open element 'WITWGothicDina El 70png' copy and paste as new layer. Resize 70%. Arrange it to bottom.

3. Open element 'WITWGothicDina El 16' copy and paste as new layer. Resize 60%. Arrange it to the bottom left.

4. Open element 'WITWGothicDina El 6' copy and paste as new layer. Resize 50%. Arrange it behind the couch (move the layer below the couch layer).

5. Open element 'WITWGothicDina El 36' copy and paste as new layer. Resize 50%. Arrange it behind the couch to the left.

6. Open element 'WITWGothicDina El 48' copy and paste as new layer. Resize 50%. Arrange it behind the couch to the right.

7. Open element 'WITWGothicDina El 27' copy and paste as new layer. Resize 60%. Move this layer above the couch layer. Arrange it to the center.

8. Open element 'WITWGothicDina El 47' copy and paste as new layer. Resize 20%. Mirror. Arrange it above the couch to the left.

9. Open your tube. Copy and paste as new layer. Resize as you prefer and arrange it a little to the right.

10. Open element 'WITWGothicDina El 72png' copy and paste as new layer. Resize 25%. Arrange it to the left.

11. Open element 'WITWGothicDina El 30' copy and paste as new layer. Resize 20%. Arrange it above the little table we just added.

12. Open element 'WITWGothicDina El 7' copy and paste as new layer. Resize 60%. Mirror. Arrange it to the bottom.

13. Open element 'WITWGothicDina El 2' copy and paste as new layer. Resize 70%. Arrange it to the bottom, a little to the right.

14. Open element 'WITWGothicDina El 96' copy and paste as new layer. Resize 70%. Arrange it to the right.

15. Open element 'WITWGothicDina El 75png' copy and paste as new layer. Resize 30%. Arrange it to the bottom left (at the end of the blue lace we added).

16. Open element 'WITWGothicDina El 39' copy and paste as new layer. Resize 30%. Arrange it to the bottom right.

17. Open element 'WITWGothicDina El 17' copy and paste as new layer. Resize 20%. Mirror. Free Rotate right-15. Add sharpen. Arrange it to the bottom right.

18. Open element 'WITWGothicDina El 38' copy and paste as new layer. Resize 30%. Arrange it to the bottom right.

19. Open element 'WITWGothicDina El 91' copy and paste as new layer. Resize 20%. Free Rotate left-20. Add sharpen. Arrange it to the right.

20. Using the blue lace as the end of the images, clean the ground pattern, the couch legs, so it looks like my tag.

21. Add shadow. I used: 1-1-65-2 #404
040

22. Add copyright.

23. Add name.

Save as PNG

May 27, 2015

Fairy Jojo ~ by Joanne Salgado


Tutorial written by Joanne Salgado on May 27th, 2015
for those who have a working knowledge of PSP.
Any resemblance to any other tutorial is coincidental.
Do not copy and paste this tutorial anywhere on the net.
If you want to translate please ask first. 

Tube: Fairy Jojo by Ishika Chowdhury - you can purchase here
Kit Jojo Fairy by Ginnibug Designz - you can purchase here
Mask by Dee here
Font: Sprinklescolors

Don't forget to save often.
At any point if you have doubts check my tag.

1. Open a new image 600x500

2. Open element 'GBD_jjfe36' copy and paste as new layer. Resize 80%. Arrange it to bottom.

3. Open element 'GBD_jjfe54' copy and paste as new layer. Resize 40%. Arrange it to the bottom left. Move this below the grass layer.

4. Open element 'GBD_jjfe25' copy and paste as new layer. Resize 30%. Arrange it to the bottom left.

5. Open element 'GBD_jjfe40' copy and paste as new layer. Resize 15%. Arrange it above the three.

6. Open element 'GBD_jjfe103' copy and paste as new layer. Resize 70%. Arrange it to the right.

7. Open your tube. Copy and paste as new layer. Resize as you prefer and arrange it to the right. Move this above the grass layer.

8. Open element 'GBD_jjfe69' copy and paste as new layer. Resize 70%. Arrange it to bottom.

9. Open paper 'GBD_jjfp14' copy and paste as new layer. Move this below all layers. Apply your mask. Merge Group.

10. Add shadow. I used: 1-1-65-2 #3f3416.

11. Add copyright.

12. Add name. I used: Sprinklescolors / size: 36

Save as PNG

May 25, 2015

Blossom ~ by Joanne Salgado


Tutorial written by Joanne Salgado on May 25th, 2015
for those who have a working knowledge of PSP.
Any resemblance to any other tutorial is coincidental.
Do not copy and paste this tutorial anywhere on the net.
If you want to translate please ask first. 

Tube: Blossom by Ishika Chowdhury - you can purchase here
Kit Blossom by Kizzed By Kelz - you can purchase here
Font: Champagne & Limousines

Don't forget to save often.
At any point if you have doubts check my tag.

1. Open a new image 600x600

2. Open element 'KBK_Blossom (131)' copy and paste as new layer. Arrange it to bottom.

3. Open element 'KBK_Blossom (92)' copy and paste as new layer. Arrange it above the grass. Move this below the grass layer.

4. Open element 'KBK_Blossom (119)' copy and paste as new layer. Arrange it above the water. Move this below the water layer.

5. Open element 'KBK_Blossom (123)' copy and paste as new layer.

6. Open element 'KBK_Blossom (71)' copy and paste as new layer. Arrange it to the right. Move this above the grass layer.

7. Open element 'KBK_Blossom (59)' copy and paste as new layer. Resize 80%. Arrange it to the right.

8. Open your tube. Copy and paste as new layer. Resize as you prefer and arrange it to the right.

9. Open element 'KBK_Blossom (17)' copy and paste as new layer. Arrange it to the top.

10. Open element 'KBK_Blossom (108)' copy and paste as new layer. Resize 40%. Arrange it to the bottom left.

11. Open element 'KBK_Blossom (85)' copy and paste as new layer. Arrange it to bottom.

12. Open element 'KBK_Blossom (138)' copy and paste as new layer. Resize 20%. Arrange it to the bottom right.

13. Add shadow. I used: 1-1-65-2 #404040.

14. Add copyright.

15. Add name. I used: Champagne & Limousines / size: 48

Save as PNG

May 17, 2015

Blossom ~ by Joanne Salgado


Tutorial written by Joanne Salgado on May 17th, 2015
for those who have a working knowledge of PSP.
Any resemblance to any other tutorial is coincidental.
Do not copy and paste this tutorial anywhere on the net.
If you want to translate please ask first. 

Tube: Blossom by Ishika Chowdhury - you can purchase here
Kit Blossom by Disturbed Scraps - you can purchase here
Font: Mirielle

Don't forget to save often.
At any point if you have doubts check my tag.

1. Open a new image 600x500

2. Open element 'DS - Blossom Element (17)' copy and paste as new layer. Resize 70%. Arrange it to bottom.

3. Open your tube. Copy and paste as new layer. Resize as you prefer and arrange it to the right.

4. Open element 'DS - Blossom Element (38)' copy and paste as new layer. Resize 70%. Move this below the grass layer.

5. Open element 'DS - Blossom Element (1)' copy and paste as new layer. Resize 30%. Move this above the grass layer. Arrange it to the bottom left.

6. Open element 'DS - Blossom Element (15)' copy and paste as new layer. Resize 20%. Arrange it to the bottom left.

7. Open element 'DS - Blossom Element (23)' copy and paste as new layer. Resize 30%. Arrange it to bottom.

8. Open element 'DS - Blossom Element (24)' copy and paste as new layer. Resize 25%. Arrange it to the left.

9. Open element 'DS - Blossom Element (21)' copy and paste as new layer. Resize 20%. Free Rotate 20-left. Arrange it to the left.

10. Open element 'DS - Blossom Element (72)' copy and paste as new layer. Resize 70%. Arrange it to the top left. Move this below the fence layer.

11. Open element 'DS - Blossom Element (73)' copy and paste as new layer. Resize 50%. Move this above all layers. Arrange it to shine above the tube.

12. Open element 'DS - Blossom Element (6)' copy and paste as new layer. Resize 30%. Arrange it to the bottom right.

13. Add shadow. I used: 1-1-65-2 #404040

14. Add copyright.

15. Add name. I used: Mirielle / size: 36

Save as PNG

Peony ~ by Joanne Salgado


Tutorial written by Joanne Salgado on May 17th, 2015
for those who have a working knowledge of PSP.
Any resemblance to any other tutorial is coincidental.
Do not copy and paste this tutorial anywhere on the net.
If you want to translate please ask first. 

Tube: Peony by Ishika Chowdhury - you can purchase here
Kit Peony by Bibi's Collection - you can purchase here
Font: Alice and the Wicked Monster

Don't forget to save often.
At any point if you have doubts check my tag

1. Open a new image 600x500

2. Open element 'BIBI-PEONY ELEMS (86)' copy and paste as new layer. Resize 75%.

3. Open element 'BIBI-PEONY ELEMS (83)' copy and paste as new layer. Resize 20%. Arrange it to the right. Duplicate. Mirror. Arrange it to the left.

4. Open element 'BIBI-PEONY ELEMS (3)' copy and paste as new layer. Resize 40%. Arrange it to the bottom left.

5. Open element 'BIBI-PEONY ELEMS (71)' copy and paste as new layer. Resize 40%. Arrange it to the right. Move this to the bottom (last layer).

6. Open element 'BIBI-PEONY ELEMS (81)' copy and paste as new layer. Resize 40%. Arrange it to bottom.

7. Open element 'BIBI-PEONY ELEMS (67)' copy and paste as new layer. Resize 15%. Mirror. Arrange it to the bottom right. Move this above the flower layer.

8. Open element 'BIBI-PEONY ELEMS (23)' copy and paste as new layer. Resize 70%. Arrange it to the left. Move this to the bottom (last layer). Duplicate. Mirror, flip.

9. Open your tube. Copy and paste as new layer. Resize as you prefer and arrange it 'sitting' on the swing.

10. Add shadow. I used: 1-1-65-2 black.

11. Add copyright.

12. Add name. I used: Alice and the Wicked Monster / size: 48

Save as PNG

April 3, 2015

Green Fairy ~ by Joanne Salgado


Tutorial written by Joanne Salgado on February 18th, 2015
for those who have a working knowledge of PSP.
Any resemblance to any other tutorial is coincidental.
Do not copy and paste this tutorial anywhere on the net.
If you want to translate please ask first. 

Tube: Fairy Nora by Ishika Chowdhury - you can purchase here 
Kit Teddy Bear Band by La galerie de Jackie - you can purchase here 
Font: Almond Script

Don't forget to save often.
At any point if you have doubts check my tag.

1. Open a new image 600x600

2. Open frame 'GJ_KitTeddybearband (59)' copy and paste as new layer. Resize 15%. Arrange it a little to the top.

3. Open element 'GJ_KitTeddybearband (93)' copy and paste as new layer. Resize 30%. Arrange it to the bottom right. Move this layer bellow the frame layer.

4. Open paper 'GJ_KitTeddybearband (6)' copy and paste as new layer. Resize 15%. Select the frame layer and select inside it with the magic wand. Expand 2. Invert. Select the paper layer, hit delete on your keyboard. Selection None.

5. Open element 'GJ_KitTeddybearband (72)' copy and paste as new layer. Resize 10%. Arrange it to the bottom left of the frame. Move this layer above the frame layer.

6. Open element 'GJ_KitTeddybearband (67)' copy and paste as new layer. Resize 15% arrange it to the bottom of the frame.

7. Open element 'GJ_KitTeddybearband (69)' copy and paste as new layer. Resize 11%. Arrange it to the right above the log.

8. Open element 'GJ_KitTeddybearband (62)' copy and paste as new layer. Resize 15%. Arrange it to the inside top right of the frame.

9. Open element 'GJ_KitTeddybearband (93)' again, copy and paste as new layer. Resize 10%. Arrange it to the top left of the frame. 

10. Open your tube. Copy and paste as new layer. Resize as you prefer. Arrange it to the left as its sitting on the log.

11. Open element 'GJ_KitTeddybearband (40)' copy and paste as new layer. Resize 13%. Arrange it to the center of the frame.

12. Add shadow as you prefer. I used 1-1-65-2 black.

13. Add copyright.

14. Add name. I used: Almond Script / size: 60

Save as PNG

March 27, 2015

Suzie ~ by Joanne Salgado


Tutorial written by Joanne Salgado on February 18th, 2015
for those who have a working knowledge of PSP.
Any resemblance to any other tutorial is coincidental.
Do not copy and paste this tutorial anywhere on the net.
If you want to translate please ask first. 

Tube: Suzie by Ishika Chowdhury - you can purchase here 
Kit Suzie by Design by Joan - you can purchase here 
Font: Dancing Script

Don't forget to save often.
At any point if you have doubts check my tag.

1. Open a new image 500x500

2. Open element 'SUZIE_DBJ10' copy and paste as new layer. Resize 45%.

3. Open element 'SUZIE_DBJ87' copy and paste as new layer. Resize 65%. Move this layer bellow frame layer.

4. Open element 'SUZIE_DBJ31' copy and paste as new layer. Arrange it to the top left. Duplicate. Mirror/Flip.

5. Open element 'SUZIE_DBJ15' copy and paste as new layer. Resize 50%. Arrange it to the top right. 

6. Open element 'SUZIE_DBJ36' copy and paste as new layer. Resize 50%. Arrange it to the top right.

7. Open paper 'DBJ-SUZIE-Paper 8' copy and paste as new layer. Resize 50%. Select frame layer. With magic wand select inside it. Expand 3. Invert. Select paper layer. Hit delete on your keyboard. Selections None.

8. Open your tube. I'm using Suzie by Ishika Chowdhury. Copy and paste as new layer. Resize as you prefer and arrange it inside the frame. Move this layer above the frame and clean the lower part so it looks like the tube is coming from inside the frame.

9. Open element 'SUZIE_DBJ68' copy and paste as new layer. Resize 50%. Arrange it to the bottom left.

10. Open element 'SUZIE_DBJ56' copy and paste as new layer. Resize 80%. Mirror. Arrange it to the bottom left.

11. Open element 'SUZIE_DBJ27' copy and paste as new layer. Resize 50%. Arrange it to the left.

12. Open element 'SUZIE_DBJ88' copy and paste as new layer. Resize 70%. Arrange it to the bottom right.

13. Add shadow as you prefer. I used 1-1-65-2 black.

14. Add copyright.

15. Add name. I used: Dancing Script / size: 60

Save as PNG

February 25, 2015

Vanessa

DREAMING TUTORIAL


Tutorial written by Marcia Salgado on January 25th, 2015
for those who have a working knowledge of PSP.
Any resemblance to any other tutorial is coincidental.
Do not copy and paste this tutorial anywhere on the net.
If you want to translate please ask first. 

Copyrighted.com Registered & Protected 
QVTP-LEPI-CKRP-DI2Q

****************************************
Material:

Tube: Ishika Chowdhury, you can purchase it here at S&Co.
do not use without the proper #license.
PTU Kit 'Vanessa' by Kizzed By Kelz Kits, you can purchase it here at S&Co.
Font: KG Be Still & Know

****************************************

--> Remember to save often. Look at my tag for reference if needed.

1. Open a new image 700x700. Open KBK_Vanessa (75). Copy and paste as new layer. Free Rotate: Left-15. Move it to the middle left side of the tag. With magic Wand click inside the frame. Modify selection. Expand: 2px. Add new layer. Open paper KBK_Vanessa (30). Copy. Paste Into Selection. Move this layer below frame. On frame layer use drop shadow: 1-1-50-5.

2. Open KBK_Vanessa (9). Free Rotate: Left-90. Copy and paste as new layer. Move it to left side of the tag and place the layer below paper layer. Duplicate. Mirror. Flip. Move it a little up. Merge down. Open KBK_Vanessa (35). Copy and paste as new layer. Move it to upper right side of the tag. Drop Shadow: 1-1-35-9. Open KBK_Vanessa (69). Copy and paste as new layer. Move it to upper right side of the tag too. Same shadow. Open KBK_Vanessa (55). Copy and paste as new layer. Move it to right side. Show almost half flower only. Drop Shadow: 1-1-50-5.

3. Click on paper layer. Open KBK_Vanessa (8). Copy and paste as new layer. Place it over the paper and erase any part out of frame. Low layer opacity to 50. Open KBK_Vanessa (5). Resize 50%. Place it inside frame at bottom. Same drop shadow. Click on frame layer. Open KBK_Vanessa (42). Resize 50%. Copy and paste as new layer. Move it upper left of frame. Same shadow. Open KBK_Vanessa (41). Copy and paste as new layer. Move to right side of frame. Same shadow. 

4. Open KBK_Vanessa (57), Copy and paste as new layer. Move it to bottom right side of tag. Same shadow. Open he tube. Resize if needed. Copy and paste as new layer. Place it over the ground leaves. Add a suitable shadow. Open KBK_Vanessa (82). Resize 40%. Copy and paste as new layer. Move it to bottom left side of the frame. Drop Shadow: 1-1-50-5. Open KBK_Vanessa (65). Resize 20%. Copy and paste as new layer. Move it to front of the grass at bottom left side of frame. Same shadow. Open KBK_Vanessa (68). Resize 15%. Copy and paste as new layer. Move it over the flower base  at bottom left side of frame. Same shadow. 

5. Open KBK_Vanessa (47). Resize 20%. Copy and paste as new layer. Move it to left side of the frame and place ir over the paper. Same shadow. Open KBK_Vanessa (22). Resize 20%. Copy and paste as new layer. Move to upper right corner of the frame. Same shadow. 

6. Resize the tag if you want. Add the copyright info e proper #license. Add your name and save as PNG.