Showing posts with label Monti's Scraps. Show all posts

October 3, 2015

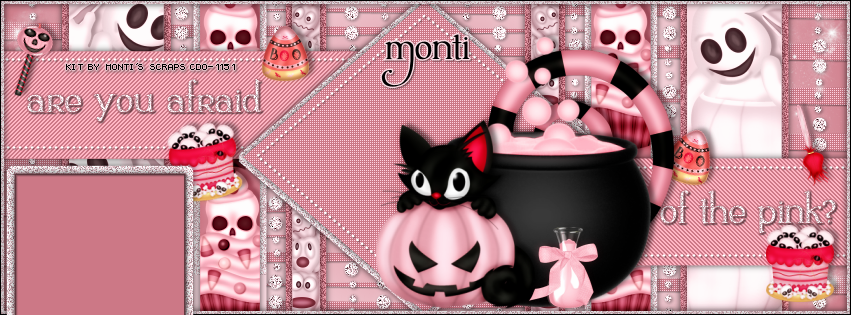
IB-KenMorton-31-2 - Show Off CT


**Click to see original size**


== NEW CT MONTI'S SCRAPS PTU TIMELINE ==

Featuring "IB-KenMorton-31-2" Kit by MONTI'S SCRAPS at Creative Design Outlet - CDO

Monti's kit has 5 papers, 20 elements, 2 frames and 1 wordart so you can play with it.

Kit can be found at:

-> Creative Design Outlet - CDO, here


IB-CuddlyRigorMortis-October2015 - CT Timeline


**Click to see original size**


== NEW CT MONTI'S SCRAPS PTU TIMELINE ==

Featuring "IB-CuddlyRigorMortis-October2015" Kit by MONTI'S SCRAPS at Creative Design Outlet - CDO

Monti's kit has 5 papers, 20 elements, 2 frames and 1 wordart so you can play with it.

Kit can be found at:

-> Creative Design Outlet - CDO, here


September 17, 2015

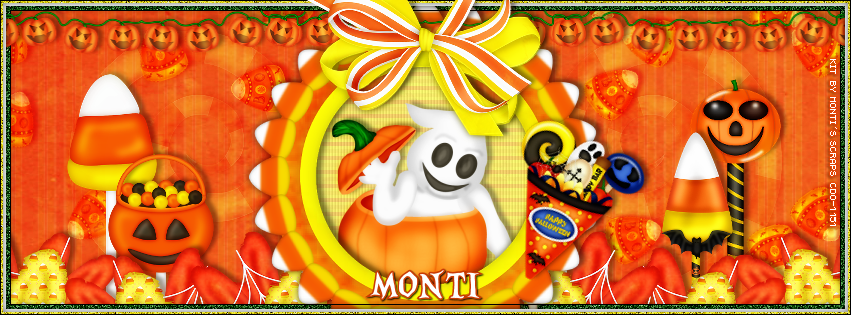
CDO Halloween Collab Kit - Monti's Scraps CT


**Click to see original size**


== NEW CT MONTI'S SCRAPS PTU TIMELINE ==

Featuring the portion of "CDO Halloween Collab Kit" made by MONTI'S SCRAPS at Creative Design Outlet - CDO

Monti's collab portion has 5 papers, 15 elements, 1 frames and 2 wordart so you can play with it.

CDO Collab Kit Promo can be found here
The CDO scrap designers have made a spooktastic Halloween collab kit to giveaway to you this month!! 

In total there are 199 elements, 18 frames, 13 word arts and 58 papers!

More info on how to acquire the CDO Halloween Collab can be found at:

-> Creative Design Outlet - CDO, here


September 15, 2015

ScrapMonti_IB-MarylineCazenave-8-2 - CT Tag


== NEW CT MONTI'S SCRAPS PTU TIMELINE ==

Featuring "ScrapMonti_IB-MarylineCazenave-8-2" Kit by MONTI'S SCRAPS
 at Creative Design Outlet - CDO

Monti's kit has 6 papers, 23 elements, 2 frames and  wordart so you can play with it. The tube that inspired this scrap kit can be purchased HERE

Kit can be found at:


-> Creative Design Outlet - CDO, here


ScrapMonti_IB-MarylineCazenave-8-2 - Timeline


** Click to see original size**


== NEW CT MONTI'S SCRAPS PTU TIMELINE ==

Featuring "ScrapMonti_IB-MarylineCazenave-8-2" Kit by MONTI'S SCRAPS
 at Creative Design Outlet - CDO

Monti's kit has 6 papers, 23 elements, 2 frames and  wordart so you can play with it. The tube that inspired this scrap kit can be purchased HERE

Kit can be found at:

-> Creative Design Outlet - CDO, here


July 5, 2015

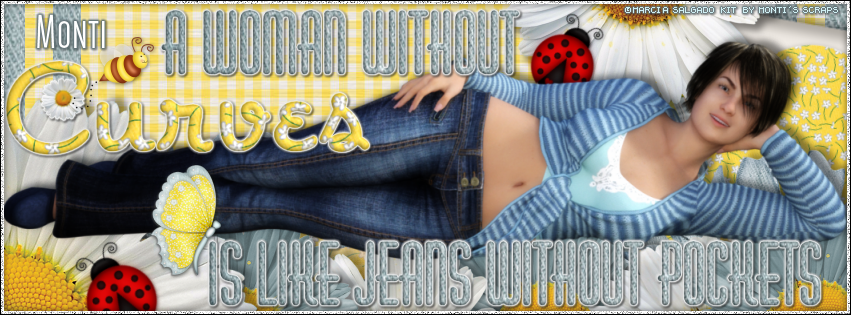
Curves ~ by Joanne Salgado


Tutorial written by Joanne Salgado on July 05th, 2015
for those who have a working knowledge of PSP.
Any resemblance to any other tutorial is coincidental.
Do not copy and paste this tutorial anywhere on the net.
If you want to translate please ask first. 

Tube: by Marcia Salgado - you can get her freebie bellow.
Kit PinupToons-June2015 by Monti's Scraps - you can purchase here
Font: Canter Bold

Tube by © Marcia Salgado, http://pspbrasil.proboards.com


Don't forget to save often.
At any point if you have doubts check my tag

1. Open a new image 851x315.

2. Open paper 'ScrapMonti_IB-PinupToonsJune2015-bt-Paper2' copy and paste as new layer. Use Deform Raster Tool and strech it so it fits the canvas.

3. Open paper 'ScrapMonti_IB-PinupToonsJune2015-bt-Paper4' copy and paste as new layer.

4. Open paper 'ScrapMonti_IB-PinupToonsJune2015-bt-Paper2' again. Copy and paste as new layer. Resize 93%.

5. Open paper 'ScrapMonti_IB-PinupToonsJune2015-bt-Paper4' again. Copy and paste as new layer. Resize 87%.

6. Open element 'ScrapMonti_IB-PinupToonsJune2015-bt-Element15' copy and paste as new layer. Free Rotate right-10. Arrange it to the right.

7. Open element 'ScrapMonti_IB-PinupToonsJune2015-bt-Element6' copy and paste as new layer. Resize 70%. Arrange it to the bottom left. Duplicate and move it to bottom right.

8. Open element 'ScrapMonti_IB-PinupToonsJune2015-bt-Element13' copy and paste as new layer. Resize 50%. Arrange it to the middle bottom. Duplicate it twice, move one to bottom left and one to bottom right.

9. Open element 'ScrapMonti_IB-PinupToonsJune2015-bt-Element2' copy and paste as new layer. Arrange it to the bottom left. Duplicate it. Resize 50%. Arrange it to top right.

10. Open element 'ScrapMonti_IB-PinupToonsJune2015-bt-Element10' copy and paste as new layer. Resize 18%. Free Rotate: left-30. Arrange it to the bottom left over the daisy. Duplicate. Mirror and resize 90%. Move itto top right and place over the top daisy.

11. Open your tube. Copy and paste as new layer. Resize as you prefer and arrange it in the middle of your image (you can fix its position later).

12. Open wordart 'ScrapMonti_IB-PinupToonsJune2015-bt-WordArt' copy and paste as new layer. Resize 80%. Use the Freehand selection tool to separate it in three parts, 'a woman without', 'curves' and 'is like jeans without pocket'. Arrange the first part to the top middle. Arrange the 'curves' to the left and the last part to the right (you may want to resize the word 'curves' a little bit with your pick tool).

13. Open element 'ScrapMonti_IB-PinupToonsJune2015-bt-Element9' copy and paste as new layer. Resize 15%. Arrange to top left. Place it near the 'curve' word daisy.

14. Add a new layer. Fill with white. Add noise uniform-100-monochrome checked. Contract 3. Fill with white. Contract 1. Hit delete on your keyboard.

15. Add shadow. I used: 1-1-65-2 #404040.

16. Add copyright.

17. Add name. I used: Canter Bold / size: 36

Save as PNG

June 15, 2015

Monti's Inspired by Renee Biertempfel 37-1


== NEW CT MONTI'S SCRAPS PTU TAG ==

Featuring "ScrapMonti_IB-ReneeBiertempfel-37-1" Kit
by MONTI'S SCRAPS at Creative Design Outlet - CDO

Monti's kit has 6 papers, 20 elements, 2 frames and 1 wordart so you can play with it. The tube that inspired this scrap kit can be purchased HERE 

*This scrap kit may be used with any artists work. Please follow CDO's TOU's for your tubes.*

Kit can be found at:

-> Creative Design Outlet - CDO, here


June 10, 2015

Cluster Pack 3 by Monti's Scraps

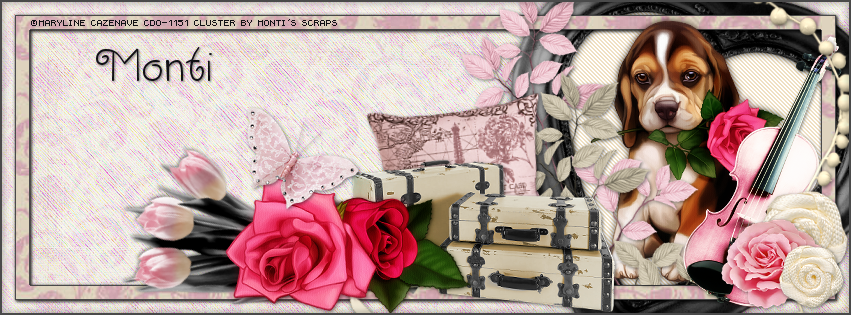
PINK PUPPY TUTORIAL

**Click to see original size**

Tutorial written by Marcia Salgado on June 10th, 2015
for those who have a working knowledge of PSP.
Any resemblance to any other tutorial is coincidental.
Do not copy and paste this tutorial anywhere on the net.
If you want to translate please ask first. 

****************************************
Material:

Tube: "Rose Puppy" by Maryline Cazenave, you can purchase it here
do not use without the proper #license.
PTU Cluster "Cluster Pack 3" by Monti's Scraps,
you can purchase it here
Plugin: Penta.com > Jeans
Font: CK Curly

****************************************

--> Remember to save often and use my tag as reference if necessary. Used the Drop Shadow: 1-1-50-5 in most layers. 

1. Open ScrapMonti_ClusterPack-3-Frame2 and ScrapMonti_ClusterPack-3-Paper. You will get the elements directly from the cluster PSD.

2. Create a new image 851x315. Fill it with the paper. Rename the layer to PAPER.

3. Add a new layer. Rename the layer to MOTION. Select all. Fill it with white. Contract > 15. Delete. Click on PAPER layer. Promote it to a layer. Rename the layer to BORDER. Duplicate. Blend Mode: Multiply. Contract > 15. Delete. Click on MOTION layer. Fill with white. Deselect. Add Noise: Uniform-50. Motion Blur: 318-100. Edge Effects > Enhance More. Repeat Enhance. Blend Mode: Soft Light. Duplicate. Mirror. Flip. Blend Mode: Soft Light. Move BORDER layer over MOTION layer. Add a Drop Shadow.

3. Click on MOTION layer. Copy Frame and paste as new layer. Resize 60%. Free Rotate: Right-20. Move it way right. Click inside the frame. Expand > 4. Add a new layer. Fill it with #f0e0c2. Apply Penta.com > Jeans > Default.

4. Click on BORDER layer. Add a new layer. Select all. Contract > 15. Fill with #111115. Contract > 1. Delete. Contract > 13. Fill with #111115. Contract > 1. Delete. Deselect.

5. Open your tube. Resize if needed. Copy and paste as new layer. Move it to right and place it over the frame. Erase all parts at frame bottom. Add a suitable shadow.

6. Copy Leaves-Pink. Paste as new layer. Resize 70%. Place it over the left side of the frame. Erase the bottom part that is over the large border.

7. Copy Leaves-Cream. Paste as new layer. Resize 70%. Mirror. Place over the left side of the frame a little more down and to right than the pink.

8. Copy Cushion. Paste as new layer. Move it to right. Leave it near the frame left side.

9. Copy Violin. Paste as new layer. Resize 60%. Move it way right and place it over the right side of the frame.

10. Copy Buds-Cream. Paste as new layer. Move it way right.

11. Copy Flower-Cream. Paste as new layer. Resize 70%. Move it way down right. Place it just a little up of right bottom corner. Duplicate. Resize 70%. Mirror, And place it over the corner.

12. Click on the layer of the bigger cream flower. Copy Flower-Pink. Paste as new layer. Resize 70%. Move it over the left side of the bigger cream flower.

13. Click on first layer. Copy Tulips. Paste as new layer. Resize 70%. Free Rotate: Left-55. Move it down left.

14. Copy SuitCases. Paste as new layer. Resize 70%. Move it down a little to right. Place it over the cushion. With my tube I have an extra layer with roses, just resized it and place it between the tulips and the suitcases.

15. Copy Butterfly. Paste as new layer. Resize 70%. Mirror. Place it over the tulips, or if you are using the same tube I am, place it over the roses. Add a border #111115 of 2px


--> Add your copyright info (no URL by Facebook TOU) and license#. Add your name. Save as PNG.

--> Sometimes I had to change my Timeline size to 846x313 because when I add it to Facebook the image has extra pixels and do not fit perfectly. So try this size if the same is happening to you.




May 24, 2015

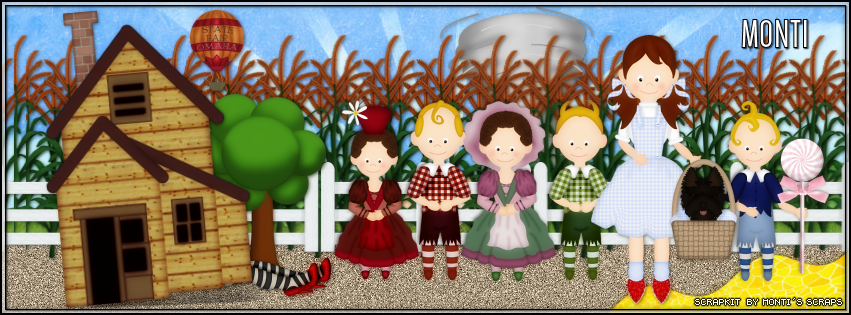
Wizard of Oz

THE BEGINNING TUTORIAL

**Click to see original size**

Tutorial written by Marcia Salgado on April 10th, 2015
for those who have a working knowledge of PSP.
Any resemblance to any other tutorial is coincidental.
Do not copy and paste this tutorial anywhere on the net.
If you want to translate please ask first. 

****************************************
Material:

PTU Kit "Wizard of Oz" by Monti's Scraps,
you can purchase it here 
Plugin: MuRa's Meister > Copies
Font: Canter Bold

****************************************

--> Remember to save often and use my tag as reference if necessary. Used the Drop Shadow: 1-1-50-5 in most layers. 

1. Create a new image 851x315. Add a new layer. Custom Selection: Left-0, Top-200, Right-851, Bottom-315. 

2. Open MontiScraps-TS-WOZ-Paper-13. Custom Selection: Left-0, Top-0, Right-800, Bottom-250. Copy and paste as new layer. Move it to the top.

3. Open MontiScraps-TS-WOZ-Tornado, Resize 35%. Copy and paste as new layer. Move it a litle up and right.

4. Open MontiScraps-TS-WOZ-CornStalk. Resize 40%. Copy and paste as new layer. Apply MuRa's Meister > Copies. Settings below. Duplicate it twice. Move one of the copies a little up and left and the other upper and right. Merge down until you have only one layer with this element.


5. Open MontiScraps-TS-WOZ-Fence. Resize 35%. Copy and paste as new layer. Apply MuRa's Meister > Copies. Settings below. Move a little down.


6. Open MontiScraps-TS-WOZ-HotAirBalloon. Resize 15%. Copy and paste as new layer. Move it up and left.

7. Open MontiScraps-TS-WOZ-Tree. Resize 30%. Copy and paste as new layer. Move it to left.

8. Open MontiScraps-TS-WOZ-WitchLegs. Resize 20%. Copy and paste as new layer. Move it down left. 

9. Open MontiScraps-TS-WOZ-House. Resize 45% Free Rotate: Left-5. Copy and paste as new layer. Move it to left. Place it over the witch legs.

10. Open MontisScraps-TS-WOZ-YellowBrickRoad. Resize 50%. Free Rotate: Left-90. Flip. Free Rotate: Left-5. Copy and paste as new layer. Move it way down right. 

11. Open the follow elements: MontiScraps-TS-WOZ-Munchkin-Girl1, MontiScraps-TS-WOZ-Munchkin-Girl2, MontiScraps-TS-WOZ-Munchkin-Green, MontiScraps-TS-WOZ-Munchkin-Red and MontiScraps-TS-WOZ-Munchkin-withLollipop, Resize them all 40%. Copy and paste as new layer each one and line them in front of the corner field. Merge all Munchkin layers in one using Merge Down.

12. Open MontiScraps-TS-WOZ-Dorothy. Resize 45%. Mirror, Copy and paste as new layer. Move it right. Place Dorothy over a part of the yellow road.

13. Open MontiScraps-TS-WOZ-TotoInBasket. Resize 20%. Coy and paste as new layer. Place it on right Dorothy's hand. 

14. Add a new layer. Fill with black. Select all. Contract > 2. Delete. Keep selected. Add new layer. Fill with white. Contract > 5. Delete. Low the opacity to 68. Keep selected. Add a new layer. Fill with black. Contract > 1. Delete. Deselect.

--> Add your copyright info (no URL by Facebook TOU) and license#. Add your name. Save as PNG.

--> Sometimes I had to change my Timeline size to 846x313 because when I add it to Facebook the image has extra pixels and do not fit perfectly. So try this size if the same is happening to you.


May 17, 2015

Mad Scientist ~ by Joanne Salgado


Tutorial written by Joanne Salgado on May 17th, 2015
for those who have a working knowledge of PSP.
Any resemblance to any other tutorial is coincidental.
Do not copy and paste this tutorial anywhere on the net.
If you want to translate please ask first. 

Tube: Cuddly Rigor Mortis Tube 16-3 by Cuddly Rigor Mortis - you can purchase here
Kit ScrapMonti_IB-CuddlyRigorMortis-18-1 by Monti's Scraps - you can purchase here
Font: AR CHRISTY

Don't forget to save often.
At any point if you have doubts check my tag

1. Open a new image 851x315.

2. Open paper 'ScrapMonti_IB-CuddlyRigorMortis-18-1-Paper7' copy and paste as new layer. Use Raster Deform Tool and stretch the paper to fill the canvas.

3. Open paper 'ScrapMonti_IB-CuddlyRigorMortis-18-1-Paper5' copy and paste as new layer.

4. Open paper 'ScrapMonti_IB-CuddlyRigorMortis-18-1-Paper6' copy and paste as new layer. Resize 90%.

5. Open element 'ScrapMonti_IB-CuddlyRigorMortis-18-1-Element12' copy and paste as new layer. Resize 30%. Arrange it to the bottom left.

6. Open element 'ScrapMonti_IB-CuddlyRigorMortis-18-1-Element9' copy and paste as new layer. Resize 30%. Arrange it to the top left.

7. Open element 'ScrapMonti_IB-CuddlyRigorMortis-18-1-Element7' copy and paste as new layer. Resize 20%. Arrange it to the top left.

8. Open element 'ScrapMonti_IB-CuddlyRigorMortis-18-1-Element3' copy and paste as new layer. Resize 30%. Arrange it to the bottom right.

9. Open element 'ScrapMonti_IB-CuddlyRigorMortis-18-1-Element2' copy and paste as new layer. Resize 25%. Arrange it to bottom.

10. Open element 'ScrapMonti_IB-CuddlyRigorMortis-18-1-Element21' copy and paste as new layer. Resize 20%. Arrange it to bottom.

11. Open element 'ScrapMonti_IB-CuddlyRigorMortis-18-1-Element24' copy and paste as new layer. Resize 30%. Arrange it to bottom left.

12. Open element 'ScrapMonti_IB-CuddlyRigorMortis-18-1-Element20' copy and paste as new layer. Resize 20%. Arrange it to bottom left.

13. Open element 'ScrapMonti_IB-CuddlyRigorMortis-18-1-Element10' copy and paste as new layer. Resize 30%. Arrange it to the top.

14. Open element 'ScrapMonti_IB-CuddlyRigorMortis-18-1-WordArt' copy and paste as new layer. Resize 50%. Arrange it to center left.

15. Open your tube. Copy and paste as new layer. Resize as you prefer and arrange it to the right.

16. Add a new layer. Fill with black. Contract 3. Fill with white, add noise uniform-100. Contract 1. Fill with black. Contract 1. Hit delete on your keyboard.

17. Add shadow. I used: 1-1-65-2 black.

18. Add copyright.

19. Add name. I used: AR CHRISTY / size: 36

Save as PNG

May 13, 2015

Hot Cocoa Kisses

CHOCOLATE TUTORIAL


Tutorial written by Marcia Salgado on April 10th, 2015
for those who have a working knowledge of PSP.
Any resemblance to any other tutorial is coincidental.
Do not copy and paste this tutorial anywhere on the net.
If you want to translate please ask first. 

****************************************
Material:

PTU Kit "Hot Cocoa Kisses" by Monti's Scraps,
you can purchase it here: CDO
Template: by me, mar2015_template08, here
Font: Lineal Simples St

****************************************

--> Remember to save often and use my tag as reference if necessary. Used the Drop Shadow: 1-1-50-5 in most layers. 

1. Open my template. Duplicate. Close the original. Delete © layer. 

2. Click on stripe5 layer. Select it and add a new layer. Open ScrapMonti_HotCocoaKisses-mega-Paper9. Copy and paste into selection. Deselect and delete stripe5 layer. Add a white border of 4px. Repeat the same with stripe1 layer. 

3. Click on stripe4 layer and select it. Add a new layer. Open ScrapMonti_HotCocoaKisses-mega-Paper8. Copy and paste into selection. Deselect and add a white border of 4px. Repeat the same with stripe2 layer.

4. Click on stripe3 layer. Select it and add a new layer. Open ScrapMonti_HotCocoaKisses-mega-Paper7. Copy and paste into selection. Deselect and delete stripe3 layer. Add a white border of 4px.

5. Click on rectangle white layer. Select it. Add a new layer. Open ScrapMonti_HotCocoaKisses-mega-Paper4. Copy and paste into selection. Deselect and delete rectangle white layer. Add a white border of 4px.

5. Click on 2 stripes layer. Select it. Add a new layer. Open ScrapMonti_HotCocoaKisses-mega-Paper12. Copy and paste into selection. Deselect and delete 2 stripes layer. Add a white border of 4px.

6. Open ScrapMonti_HotCocoaKisses-mega-Element84. Resize 35%. Copy and paste as new layer. Move it up. Duplicate. Flip. Merge down. 

7. Open ScrapMonti_HotCocoaKisses-mega-Element23. Resize
 35%. Copy and paste as new layer. Move it up right. Duplicate. Mirror. Merge down.

8. Open ScrapMonti_HotCocoaKisses-mega-Element88. Resize 35%. Copy and paste as new layer. Move it up. Duplicate. Flip. Merge down. 

9. Open ScrapMonti_HotCocoaKisses-mega-Element62. Resize 20%. Copy and paste as new layer. Move it way right and up. Duplicate. Mirror. Merge down.

10. Open ScrapMonti_HotCocoaKisses-mega-Element64. Resize 20%. Copy and paste as new layer. Move it up right, same line as previous flower. Duplicate. Mirror. Merge down.

11. Open ScrapMonti_HotCocoaKisses-mega-Element63. Resize 20%. Copy and paste as new layer.  Move it up right, same line as previous flowers. Duplicate. Mirror. Merge down.

12. Click on restangle black layer. Select it. Add a new layer. Open ScrapMonti_HotCocoaKisses-mega-Paper11. Copy and paste into selection. Deselect and delete rectangle black layer.

13. Click on rectangle dashed layer. Open ScrapMonti_HotCocoaKisses-mega-Element72. Copy and paste as new layer. Move it down right.

14. Open ScrapMonti_HotCocoaKisses-mega-Element68. Resize 45%. Free Rotate: Right-30. Copy and paste as new layer. Move it way right.

15. Open ScrapMonti_HotCocoaKisses-mega-Element40. Resize 70%. Copy and paste as new layer. Move it to left.

--> Add your copyright info and license# if needed. Add your name and save as PNG.


April 9, 2015

IB-Marika-33-1

WONDERLAND TUTORIAL


Tutorial written by Marcia Salgado on April 9th, 2015
for those who have a working knowledge of PSP.
Any resemblance to any other tutorial is coincidental.
Do not copy and paste this tutorial anywhere on the net.
If you want to translate please ask first. 

****************************************
Material:

PTU Kit "IB-Marika-33-1" by Monti's Scraps,
you can purchase it here
Font: Please write me a song

****************************************

--> Remember to save often and use my tag as reference if necessary. Used the Drop Shadow: 1-1-50-5 in most layers. 

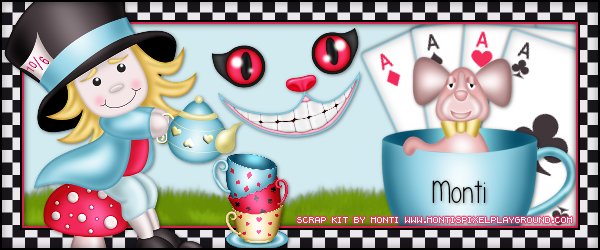
1. Create a new image 600x250. Add a new layer. Fill with color #d2ebf0. Open ScrapMonti_IB-Marika-33-1-Element18. Copy and paste as new layer. Move it to bottom right, duplicate and move it to left. Merge down. 

2. Open ScrapMonti_IB-Marika-33-1-Element37. Resize 50%. Free Rotate: Left-20. Copy and paste as new layer and move it to right. Open ScrapMonti_IB-Marika-33-1-Element34. Resize 50%. Free Rotate: Left-10. Copy and paste as new layer and place it over the first card. OPen ScrapMonti_IB-Marika-33-1-Element35. Resize 50%. Free Rotate: Right-5. Copy and paste as new layer and place it over the second card. Open ScrapMonti_IB-Marika-33-1-Element36. Resize 50%. Free Rotate: Left-18. Copy and paste as new layer and place it over the third card.

3. Open ScrapMonti_IB-Marika-33-1-Element10. Resizr 50%. Mirror. Copy and paste as new layer and place it over the cards. Open ScrapMonti_IB-Marika-33-1-Element6. Resize 30%. Copy and paste as new layer. Move it a little up and to left.

4. Add a new layer, fill with color #f2285a. Select all. Contract > 24. Delete. Add a new layer. Open ScrapMonti_IB-Marika-33-1-Paper2. Use it as your foregtound pattern. Settings: Angle-0 Scale-50. Fill the layer. Select all. Contract > 20. Delete. Add a new layer. Select all. Contract > 20. Fill with Black. Contract > 2. Delete. 

5. Open ScrapMonti_IB-Marika-33-1-Element9. Resize 20%. Copy and paste as new layer. Move it to bootom left. Open ScrapMonti_IB-Marika-33-1-Element16. Resize 50%. Copy and paste as new layer. Move it to bottom far left. Add a new layer. Fill with Black. Select all. Contract > 2. Delete.

--> Add your copyright and #license. Add your name. Save as PNG.


Wonderland - IB-Marika-33-1 - Show Off


== NEW CT MONTI'S SCRAPS PTU SHOW OFF ==

Featuring "IB-Marika-33-1" Kit by MONTI'S SCRAPS
at Creative Design Outlet - CDO

To see the tutorial, go HERE

Amazing kit with a Wonderland theme inspired by Marika's tube, you can purchase the tube HERE. The elements will took you through fantastic travel. It has 5 papers, 20 elements, 2 frames and 1 wordart so you can play with it.

*This scrap kit may be used with any artists work. 
Please follow CDO's TOU's for your tubes.*

Kit can be found at:

-> Creative Design Outlet - CDO, here


March 22, 2015

Bloom ~ by Joanne Salgado


Tutorial written by Joanne Salgado on February 18th, 2015
for those who have a working knowledge of PSP.
Any resemblance to any other tutorial is coincidental.
Do not copy and paste this tutorial anywhere on the net.
If you want to translate please ask first. 

Tube: 25-1 by Enamorte - you can purchase here 
Kit Spring Collab Kit-2015 by Monti's Scraps - you can purchase here 
Mask here 
Font: Impact

Don't forget to save often.
At any point if you have doubts check my tag.

1. Open a new image 600x600

2. Open element 'MS-CDO_SpringCollabKit-2015-Frame' copy and paste as new layer. Resize 70%. With magic wand select inside it, expand 3, add new layer and move this layer bellow the frame layer. Flood fill with #f9d9d1, add noise with uniform/30/monochrome checked.

3. Open element 'MS-CDO_SpringCollabKit-2015-Element8' copy and paste as new layer Resize 30%. Arrange it to the top right of the frame.

4. Open your tube. copy and paste as new layer. Resize as you prefer and arrange it inside the frame as the tube is coming out of the frame. Clean with eraser tool or with freehand tool.

5. Open element 'MS-CDO_SpringCollabKit-2015-WordArt' copy and paste as new layer. Resize 50%. Arrange it to the bottom right of the frame.

6. Open element 'MS-CDO_SpringCollabKit-2015-Element15' copy and paste as new layer. Resize 30%. Arrange it to the bottom right bellow the wordart.

7. Open paper 'MS-CDO_SpringCollabKit-2015-Paper3' copy and paste as new layer. Resize 73%. Apply the mask, I used 'DD_VMask_7_zpshp5bfwbc' and merge group.

8. Add shadow as you prefer. I used: 1-1-65-2 black.

9. Add copyright.

10. Add name. I used: Impact / size: 36

Save as PNG

March 16, 2015

Out Of This World ~ by Joanne Salgado


Tutorial written by Joanne Salgado on February 18th, 2015
for those who have a working knowledge of PSP.
Any resemblance to any other tutorial is coincidental.
Do not copy and paste this tutorial anywhere on the net.
If you want to translate please ask first. 

Kit Out Of This World by Monti's Scraps - you can purchase here 
Font: Checkbook

Don't forget to save often.
At any point if you have doubts check my tag.

1. Open a new image 600x300.

2. Open paper 'ScrapMonti_OutOfThisWorld-Paper2' copy and paste as new layer. Resize 80%. Arrange it so the lighter parts of the paper appears.

3. Open element 'ScrapMonti_OutOfThisWorld-Element27' copy and paste as new layer. Arrange it to the top. Duplicate. Arrange it to bottom (don't use mirror).

4. Open element 'ScrapMonti_OutOfThisWorld-Element13' copy and paste as new layer. Resize 25%. Arrange it to the top left.

5. Open element 'ScrapMonti_OutOfThisWorld-Element6' copy and paste as new layer. Resize 25%. Arrage it to the right. It will appear behind the moon, if needed re-arrange it again later.

6. Open element 'ScrapMonti_OutOfThisWorld-Element9' copy and paste as new layer. Arrange it down, just a part of the moon will appear.

7. Open element 'ScrapMonti_OutOfThisWorld-Element17' copy and paste as new layer. Resize 25%. Arrange it above the moon to the left.

8. Open element 'ScrapMonti_OutOfThisWorld-Element31' copy and paste as new layer. Resize 25%. Free Rotate right-55. Rename CAR. Move this layer bellow the astronaut we just added.

9. Add a new layer, move this layer above all others. Select all. Flood fill with #000000, Contract 1. Flood fill with #808080. Contract 2. Flood fill with #ffffff, add noise with uniform/100/monochrome. Contract 2. Hit delete on you keyboard. Selection None.

10. Add shadow as you like. I used 1-1-65-2 black.

11. Add copyright.

12. Add name. I used: Checkbook / size: 48

Now we will start the animation process.

1. With the ellipse tool, make a half circle around the moon so you can follow the line and your car don't look like you have a drunk driver. Rename it LINE.

2. Select the CAR layer. Arrange it to the far bottom right. Just a small part of it will appear. Duplicate. Free Rotate left-15. Arrange it a little more to the front. Duplicate. Free Rotate left-25. Arrange it again to the front. Follow the line we made. I used: Free Rotate - left always - with 35, 50, 60, 75, 85, 95, 105, 115, 130, 145. But for you may be different, so just see whats best for you. (I've ended up with 13 car layers).
3. Hide all the car layers. Copy merged, Go to animation shop, paste as new animation. Back to PSP, open the first car layer. Copy merged. Back do animation, paste after current. Back to PSP, hide the layer, open the second and back to animation. keep doing this until all the car layer were sent to animation.

4. Select the first layer (at animation shop). Animation/Frame Properties - change to 100. The others change to 20.

Save as gif.