Tutorial written by Joanne Salgado on February 26th, 2016
for those who have a working knowledge of PSP.
Any resemblance to any other tutorial is coincidental.
Do not copy and paste this tutorial anywhere on the net.
If you want to translate please ask first.
Tube: Kattie by Alfadesire - you can purchase
here
Kit Evening Glamour by Design by Joan - you can purchase
here
Font: Just Realize
Don't forget to save often.
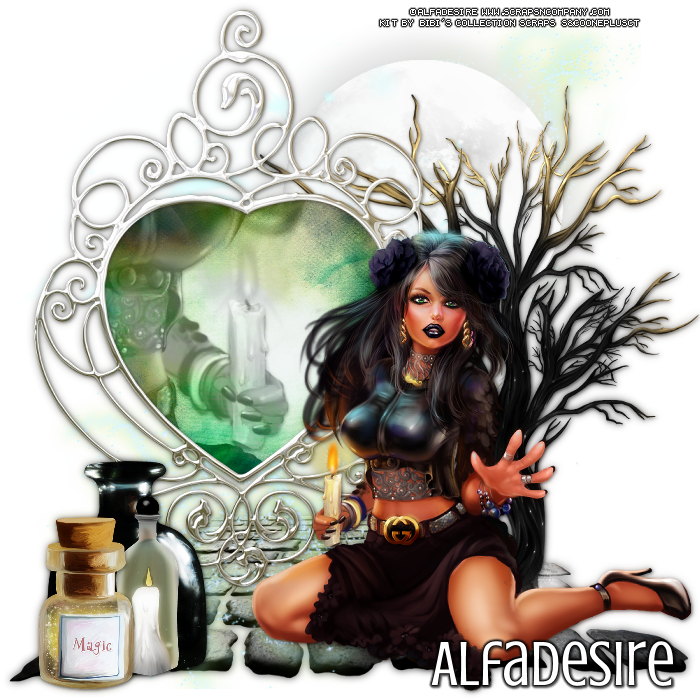
At any point if you have doubts check my tag.
1. Open a new image 650x550
2. Open element 'EVENING GLAMOUR_DBJ70' copy and paste as new layer. Resize 70%. Rotate left 20. Arrange it to the left.
3. Open element 'EVENING GLAMOUR_DBJ38' copy and paste as new layer. Resize 60%. Move this layer below the frame layer. Arrange it to the top right. Duplicate. Mirror. Arrange it to the top left.
4. Open element 'EVENING GLAMOUR_DBJ87' copy and paste as new layer. Resize 70%. Arrange it to the riht o f the frame, above the leafs.
5. Open element 'EVENING GLAMOUR_DBJ27' copy and paste as new layer. Resize 60%. Arrange it to the top of the frame.
6. Open element 'EVENING GLAMOUR_DBJ74' copy and paste as new layer. Resize 60%. Arrange it to the top right of the frame.
7. Open element 'EVENING GLAMOUR_DBJ71' copy and paste as new layer. Resize 60%. Arrange it to the top right of the frame above the white flowers.
8. Open element 'EVENING GLAMOUR_DBJ42' copy and paste as new layer. Resize 60%. Arrange it to the bottom left of the frame.
9. Open element 'EVENING GLAMOUR_DBJ58' copy and paste as new layer. Resize 60%. Arrange it to the left of the frame.
10. Open element 'EVENING GLAMOUR_DBJ21' copy and paste as new layer. Clean almost all the beads and bow, you'll need only the heart part and a few beads near the heart. Arrange it to the bottom left.
11. Open element 'EVENING GLAMOUR_DBJ16' copy and paste as new layer. Resize 60%. Arrange it to the top left of the frame.
12. Open paper 'PPEVENING GLAMOUR_DBJ-6' copy and paste as new layer. Resize 30%. Arrange it inside the frame and clean the outside parts.
13. Open element 'EVENING GLAMOUR_DBJ95' copy and paste as new layer. Resize 90%. Arrange it to top.
14. Open element 'EVENING GLAMOUR_DBJ93' copy and paste as new layer. Arrange it to top.
15. Open element 'EVENING GLAMOUR_DBJ34' copy and paste as new layer. Resize 50%. Move this layer above the frame layer. Arrange it to the bottom right (just a small part of the left side will be above the frame).
16. Open element 'EVENING GLAMOUR_DBJ61' copy and paste as new layer. Resize 60%. Arrange it to bottom right.
17. Open element 'EVENING GLAMOUR_DBJ73' copy and paste as new layer. Resize 60%. Arrange it to the top left of the frame.
18. Open element 'EVENING GLAMOUR_DBJ75' copy and paste as new layer. Resize 40%. Arrange it to the left above the bottom part of the flower we just added.
19. Open element 'EVENING GLAMOUR_DBJ94' copy and paste as new layer. Resize 70%. Arrange it to the left.
20. Open your tube. Copy and paste as new layer. Resize as needed and arrange it in the middle.
21. Open element 'EVENING GLAMOUR_DBJ12' copy and paste as new layer. Resize 30%. Mirror. Arrange it to the bottom right.
22. Open element 'EVENING GLAMOUR_DBJ29' copy and paste as new layer. Resize 25%. Arrange it to the bottom left.
23. Open element 'EVENING GLAMOUR_DBJ39' copy and paste as new layer. Resize 20%. Arrange it above the fireplace to the left.
24. Open element 'EVENING GLAMOUR_DBJ101' copy and paste as new layer. Resize 13%. Arrange it to the bottom left, to the right of the rose we added there.
25. Open element 'EVENING GLAMOUR_DBJ77' copy and paste as new layer. Resize 15%. Arrange it above the fireplace to the right. Duplicate. Mirror. Arrange it near the one we just added.
26. Open element 'EVENING GLAMOUR_DBJ89' copy and paste as new layer. Resize 10%. Arrange it above the fireplace to the left of the champagne.
27. Add shadow as you prefer.
28. Add copyright. Add name. Save as PNG.